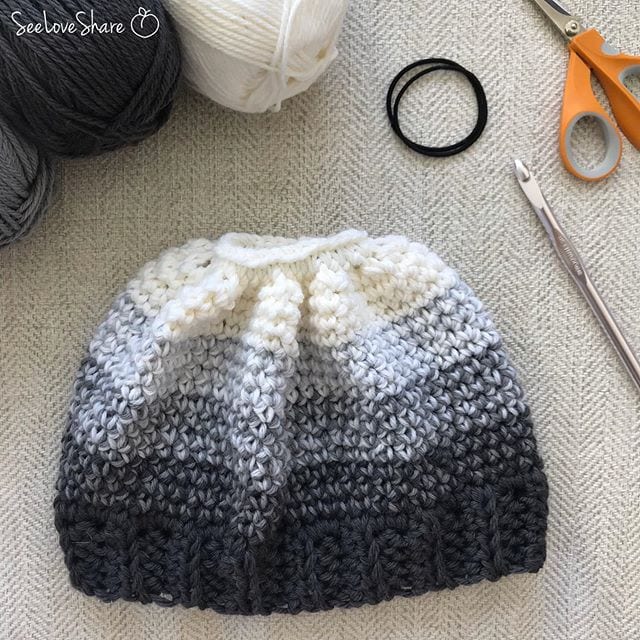
This pattern is worked from the band ribbing up to top, using two strands of yarn at the same time. The final row works a hair tie into the top which will naturally cinch and close the top, leaving room to stretch for a ponytail to pull through.
Materials:
- 4 colours of your choice, Medium weight [4]
I used Paintbox Wool Mix Aran in:
- 8.0mm Crochet Hook
- Tapestry needle
- 1 thick hair tie or two skinny hair ties
Gauge:
9 stitches, 12 rows to 10cm/4″
Abbreviations:
Ch: Chain
HDC: Half Double Crochet
Sts: Stitches
BLO: Back Loops Only
SC: Single Crochet
SLST: Slip Stitch
SC2Tog: Single Crochet Two Together
Pattern:
Begin Band:
With two strands of Color A: Ch 6.
Row 1: Hdc in 2nd ch from hook. Hdc in each remaining ch. Turn. (5 sts)Row 2: Ch 1. Hdc in same st. Working in Back Loops Only, hdc in next 3 sts. Hdc in last st going through both loops. Turn. (5 sts)
Repeat row two until your band reaches the length to desired sizing. To measure, flatten the band and stretch out to flat.
Fold long piece in half and sl st up the side, making a band. Turn so the seam is on the inside and your loop is at the top.
Begin Body:
Row 1: Swap one strand of Color A with Color B: Ch 1. Sc in across the top of the band, should be approx. 58 sts for an adult large. Join with a sl st. [Should have one strand of A & B]Row 2-4. SC in each st around, join with a slst
Row 5: Swap remaining Color A with Color C: SC in each st around, join with a slst [Should have one strand of B & C]
Row 6-8: SC in each st around, join with a slst
Row 9: Swap Color B for Colour D: SC in each st around, join with a slst [Should have one strand of C & D]
Row 10-12: SC in each st around, join with a slst
Row 13: Swap Color C for Colour D: SC in each st around, join with a slst [Should have two strands D]
Row 14-15: SC in each st around, join with a slst
Begin closing the hat:
Row 16: In the next row: sc2tog around, join with a slst
Row 17: Bring hair tie to the center opening at the top. Work SC into the center of the hair tie, creating sc around the hair tie around. This part is simple but a little difficult to explain – see photo below. You will need to start stretching the hair tie as you near the end of the row. The top will naturally begin to cinch up on itself, closing the top completely or leaving a little space for your ponytail to pull through. The hair tie should be completely covered and buried in the work. Bind off and weave in ends.
You can download the pattern for free from my Ravelry Store here!
