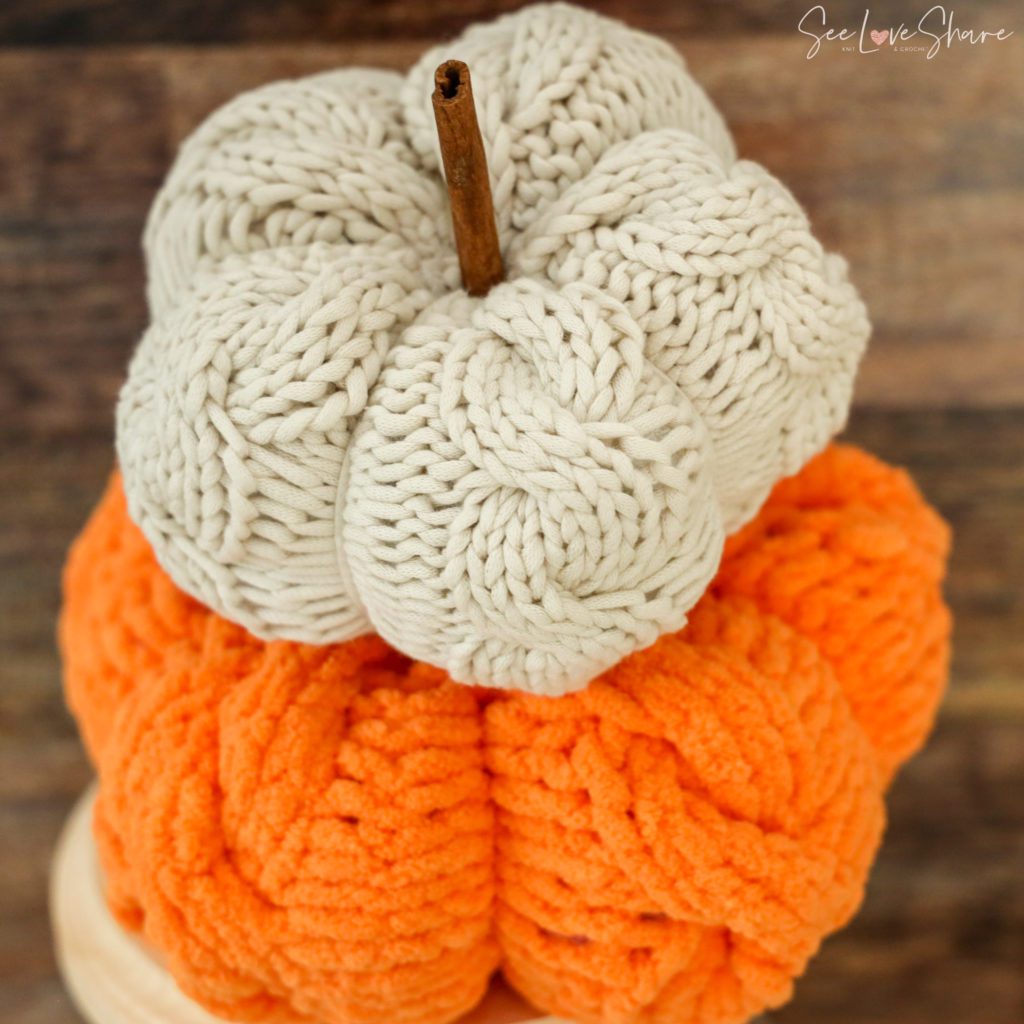
Pumpkins are just about the most fun item to make – especially as summer begins to wind down and cooler evenings start to creep in. There are a million pumpkin patterns out there and they’re all going to get you to lively fall decor. This one just adds cables to it. There is nothing complicated about it and we’re going to walk you through everything you need to know to work it up on your own. From a step-by-step stitch guide to an assembly walkthrough. You’ve got this! Check it out and send me pictures as yours comes together!

UPDATE November 2024:
I hope that you’re enjoying your current knitting projects. It has been such a pleasure sharing my patterns with you and seeing your creativity bring them to life.
After much thought, I have made the difficult decision to no longer offer my patterns for free. This was not an easy choice—designing and sharing these patterns has always been a passion of mine and a way to connect with this amazing community.
However, the time, effort, and resources required to create, test, and perfect each pattern are significant. To continue bringing you high-quality, unique designs and to support the sustainability of my work, I will now be offering my patterns for purchase on Etsy.
I am incredibly grateful for your support over the years. Your kind words, encouragement, and enthusiasm mean so much to me. I hope you’ll continue to enjoy my patterns and support this new chapter.
Thank you for your understanding and for being an integral part of this journey.
Use coupon code SLSFRIEND10 for 10% off the downloadable & printable version.
Pattern Notes:
This pattern is worked on a circular needle in rounds.
Measurements:
Approx. 8in wide, 5in tall. This pattern can be adjusted +/- in multiples of 9 stitches.
Materials:
- 8.00mm (U.S. 11) circular knitting needle with 16in cord
- Stitch holder
- Bulky #5 Yarn in various Autumn colors.
- Pictured used Bernat Maker Home Dec in Cream & Bernat Blanket Yarn Brights in Orange
- Tapestry needle
- Polyfill stuffing
- Cinnamon stick as stump
Assembly:
Step 1: With a piece of scrap yarn, weave tapestry needle along bottom edge of work and bind tightly. Tuck loose end into the pumpkin (you won’t see it!).
Step 2: Stuff with polyfill
Step 3: With the long tail remaining from the knit work, weave tapestry needle along top edge of work and bind tightly – do not bind off.
Step 4: With long tail and tapestry needle, begin to shape the pumpkin. Pull the needle through the center of the pumpkin, wrap yarn around the side of the pumpkin between 2 cables and add tension to create a pucker/crease in the pumpkin. Repeat 4 more times between the remaining cables. Bind off and tuck in the loose end.
Step 5: Attach the cinnamon stick and enjoy!