

All Holiday Patterns Free Patterns Crochet
March 31st, 2026
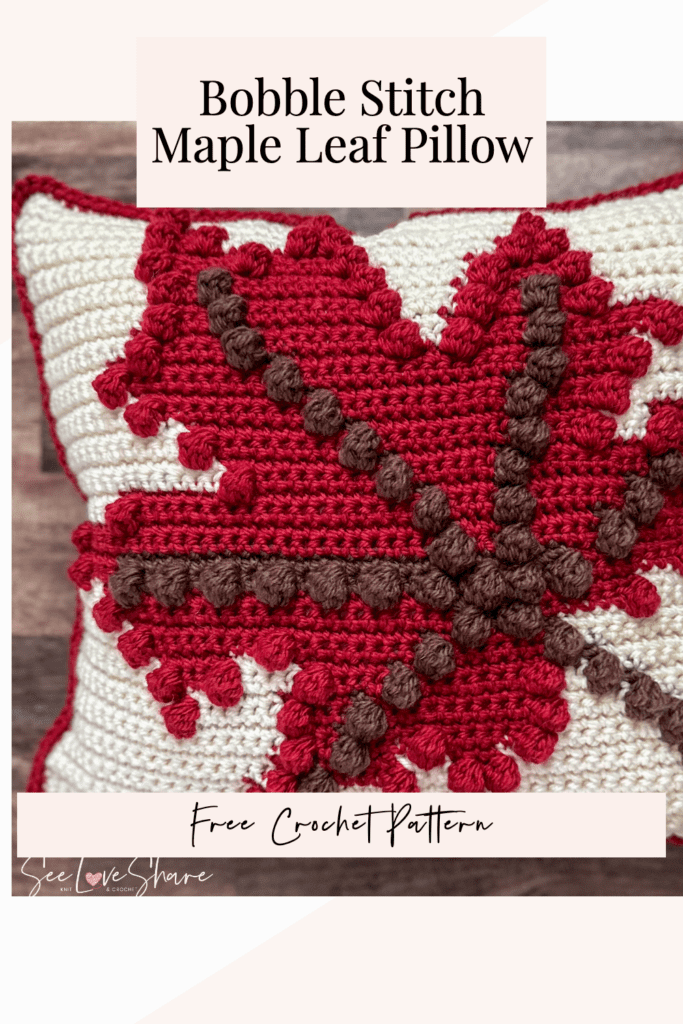
Crochet Bobble Stitch Maple Leaf Pillow Pattern (Free)
A free crochet bobble stitch maple leaf pillow pattern using tapestry colorwork — beginner-friendly 16×16 pillow cover with full written instructions. A bold red maple leaf with a brown bobble branch, worked in tapestry crochet on a cream background, makes this pillow an absolute showstopper for autumn décor. Whether you’re celebrating the season or showing off a little Canadian pride, this one’s for you. The full written pattern is below — completely free!
Pattern Details
- Skill Level: Intermediate
- Finished Size: 16″ x 16″ pillow cover
- Hook: 6.0mm (US J/10)
- Yarn Weight: #5 Bulky
- Technique: Tapestry crochet / bobble stitch
- Format: Free written pattern below — clean PDF available on Etsy
Colors Used:
- White / Soft Cream — approx. 150 yds (background)
- Red / Scarlet — approx. 300 yds (leaf + back panel)
- Brown / Cocoa — approx. 100 yds (branch/stem)
I used Patons Inspired yarn in Soft Cream, Scarlet, and Cocoa.
Materials You’ll Need
- #5 Bulky yarn in Soft Cream, Red/Scarlet, and Brown/Cocoa — I used Patons Inspired yarn
- 6.0mm (US J/10) crochet hook
- Tapestry needle
- Bobbins (for color management)
- 16″ x 16″ pillow insert
Abbreviations (US Terms)
- SC — Single crochet
- YO — Yarn over
- WSC — White single crochet
- RB — Red bobble
- RSC — Red single crochet
- BSC — Brown single crochet
- BB — Brown bobble
Special Stitch — Bobble Stitch (used for RB and BB): [YO, insert hook in stitch, YO, pull up a loop, YO, draw through 2 loops] 5 times in same stitch, YO, draw through all 6 loops on hook.
Pattern Notes
- Pattern is worked in rows from bottom to top.
- Odd rows are worked right to left; even rows left to right.
- Carry unused yarn color behind stitches (tapestry crochet method) or use bobbins for color management.
- Each row ends with a ch-1 and turn.
Color Change Tips:
- Change color on the last yarn-over of the stitch before the color change.
- Keep color changes tidy by consistently carrying yarn to the wrong side of the work.
- Use bobbins or short lengths of yarn for smaller color sections to prevent tangling.
- Always twist colors around each other when changing to prevent holes.
Free Pattern — Front Panel
With white yarn, ch 50.
← Row 1: WSC in 2nd ch from hook to end (49 sts)
→ Row 2: WSC49
← Row 3: WSC49
→ Row 4: WSC49
← Row 5: WSC30, RB, RSC, RB, WSC16
→ Row 6: WSC16, RSC3, WSC30
← Row 7: WSC5, BB, WSC14, RB, WSC7, RB, RSC4, RB, WSC15
→ Row 8: WSC15, RSC6, WSC7, RSC, WSC13, BSC2, WSC5
← Row 9: WSC7, BB, WSC10, RB, RSC, RB, WSC3, RB, RSC4, BB, RSC, RB, WSC17
→ Row 10: WSC17, RSC2, BSC, RSC5, WSC3, RSC3, WSC9, BSC2, WSC7
← Row 11: WSC9, BB, WSC7, RB, RSC4, RB, RSC4, BB, RSC2, RB, WSC18
→ Row 12: WSC18, RSC3, BSC, RSC10, WSC6, BSC2, WSC9
← Row 13: WSC11, BB, WSC4, RB, RSC9, BB, RSC3, RB, WSC6, RB, WSC11
→ Row 14: WSC11, RSC, WSC6, RSC4, BSC, RSC10, WSC3, BSC2, WSC11
← Row 15: WSC13, BB, WSC2, RB, RSC7, BB, RSC4, RB, WSC4, RB, RSC3, RB, WSC10
→ Row 16: WSC10, RSC5, WSC4, RSC5, BSC, RSC8, WSC, BSC2, WSC13
← Row 17: WSC15, BB, RSC6, BB, RSC8, RB, RSC8, RB, WSC8
→ Row 18: WSC8, RSC18, BSC, RSC5, BSC2, WSC15
← Row 19: WSC10, RB, RSC6, BB, BSC2, BB, RSC21, RB, WSC6
→ Row 20: WSC6, RSC22, BSC4, RSC7, WSC10
← Row 21: WSC6, RB, RSC7, BB, BSC2, BB, BSC, BB, BSC2, BB, BSC2, BB, BSC2, BB, BSC2, BB, BSC2, BB, BSC2, BB, BSC2, BB, RSC4, RB, WSC3
→ Row 22: WSC3, RSC5, BSC27, RSC8, WSC6
← Row 23: WSC3, RB, RSC7, BB, RSC5, BB, RSC3, BB, RSC24, RB, WSC2
→ Row 24: WSC2, RSC25, BSC, RSC3, BSC, RSC5, BSC, RSC8, WSC3
← Row 25: WSC4, RB, RSC4, BB, RSC7, BB, RSC4, BB, RSC17, RB, WSC8
→ Row 26: WSC8, RSC18, BSC, RSC4, BSC, RSC7, BSC, RSC5, WSC4
← Row 27: WSC5, RB, RSC, BB, RSC9, BB, RSC6, BB, RSC9, RB, WSC14
→ Row 28: WSC14, RSC10, BSC, RSC6, BSC, RSC9, BSC, RSC2, WSC5
← Row 29: WSC3, RB, RSC4, RB, WSC3, RB, RSC3, BB, RSC9, BB, RSC9, RB, WSC12
→ Row 30: WSC12, RSC10, BSC, RSC9, BSC, RSC4, WSC3, RSC6, WSC3
← Row 31: WSC2, RB, RSC2, RB, WSC5, RB, RSC4, BB, RSC11, BB, RSC9, RB, WSC10
→ Row 32: WSC10, RSC10, BSC, RSC11, BSC, RSC5, WSC5, RSC4, WSC2
← Row 33: WSC2, RB, WSC7, RB, RSC4, BB, RSC14, BB, RSC9, RB, WSC8
→ Row 34: WSC8, RSC10, BSC, RSC14, BSC, RSC5, WSC7, RSC, WSC2
← Row 35: WSC8, RB, RSC6, BB, RSC4, RB, WSC2, RB, RSC8, BB, RSC5, RB, WSC10
→ Row 36: WSC10, RSC6, BSC, RSC9, WSC2, RSC5, BSC, RSC7, WSC8
← Row 37: WSC12, RB, RSC2, BB, RSC3, RB, WSC4, RB, RSC8, BB, RSC3, RB, WSC11
→ Row 38: WSC11, RSC4, BSC, RSC9, WSC4, RSC4, BSC, RSC3, WSC12
← Row 39: WSC13, RB, RSC4, RB, WSC6, RB, RSC8, BB, RSC2, RB, WSC11
→ Row 40: WSC11, RSC3, BSC, RSC9, WSC6, RSC6, WSC13
← Row 41: WSC14, RB, RSC, RB, WSC9, RB, RSC5, RB, RSC5, RB, WSC10
→ Row 42: WSC10, RSC13, WSC9, RSC3, WSC14
← Row 43: WSC15, RB, WSC11, RB, RSC, RB, WSC5, RB, RSC2, RB, WSC10
→ Row 44: WSC10, RSC4, WSC5, RSC3, WSC11, RSC, WSC15
← Row 45: WSC28, RB, WSC9, RB, WSC10
→ Rows 46–49: WSC49 each row
Back Panel
With red yarn, ch 50. Row 1: sc in 2nd ch from hook and in each ch across (49 sts). Rows 2–49: ch 1, turn, sc in each st across (49 sts per row). Fasten off and weave in ends.
Edging, Assembly & Finishing
With front side facing, starting at bottom right corner, evenly space sc along the side edge of the pillow, 2 sc in the corner, along every stitch on the top, 2 sc in corner, down the side edge, 2 sc in corner, and along the bottom. Each row should be approx. one sc, so approx. 50 sts along the sides and top/bottom. Join with a slst to first sc.
Each round of edging will add approx. ½ inch. If you’re working with a 16×16 pillow, only work one round. If your pillow is slightly larger, continue working rounds to ensure the best fit. The cover should not have any slack and should stretch comfortably to fit over the pillow insert.
Place pieces together with both right sides facing out. Work 1 sc into each stitch across the top, side, and bottom, working 2 sc into each corner. Insert the pillow form and close the last side by working sc up the final side. Sl st into the first sc worked, tie off yarn, and weave in ends.
Want a clean, printable version of this pattern? Grab the PDF instantly on Etsy — no ads, easy to follow at your hook.
Frequently Asked Questions
Can I make this larger than 16×16?
Yes! Each round of edging adds approximately ½ inch, so you can keep adding rounds to fit a larger pillow insert.
What yarn did you use?
I used Patons Inspired in Soft Cream, Scarlet, and Cocoa. The stitch definition on this yarn is perfect for tapestry colorwork.
Is this pattern really free?
Yes! The full written pattern is right here on the blog. If you’d like a clean, ad-free printable version, you can grab the PDF on Etsy for $5.49 — but everything you need to make this pillow is above.
What’s the difference between the free pattern and the Etsy PDF?
Same pattern, same instructions — the Etsy version is a beautifully formatted, printable PDF that’s easy to follow at your hook without scrolling through a webpage.
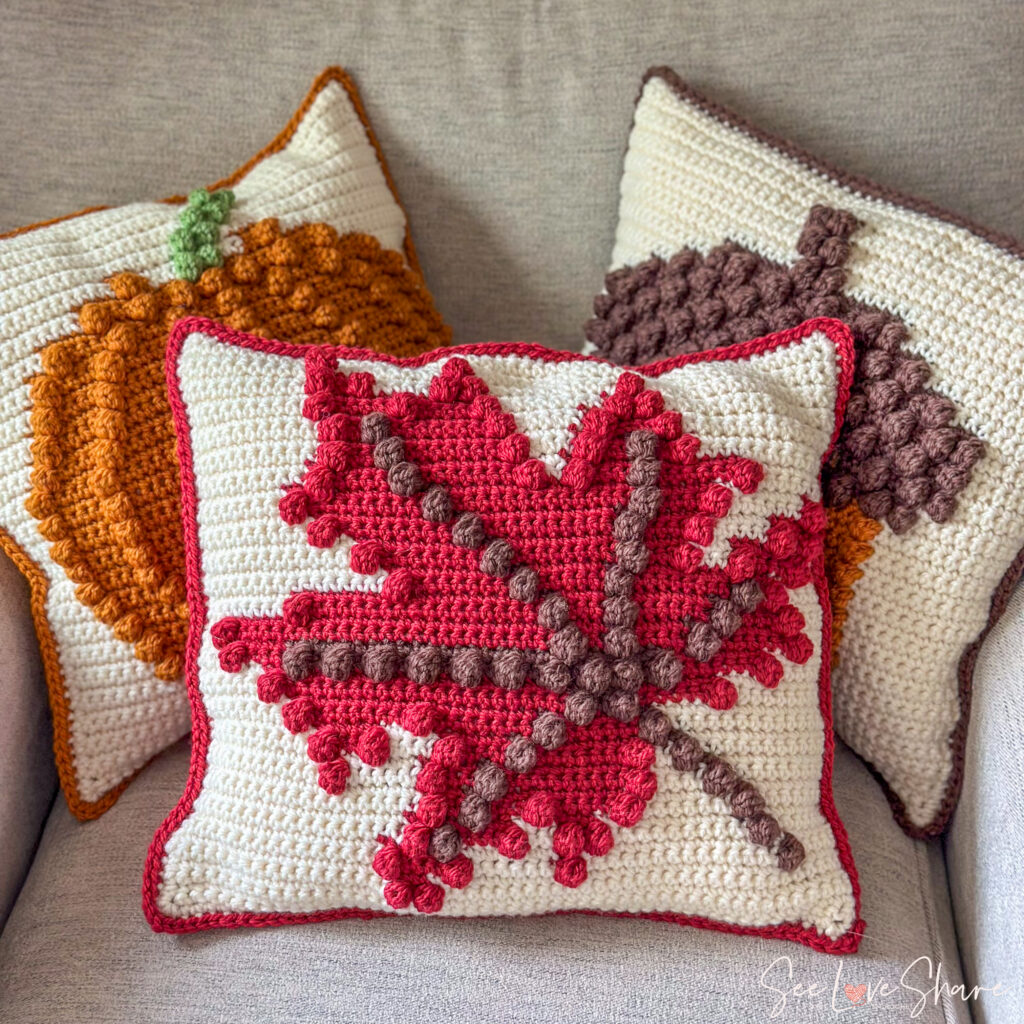
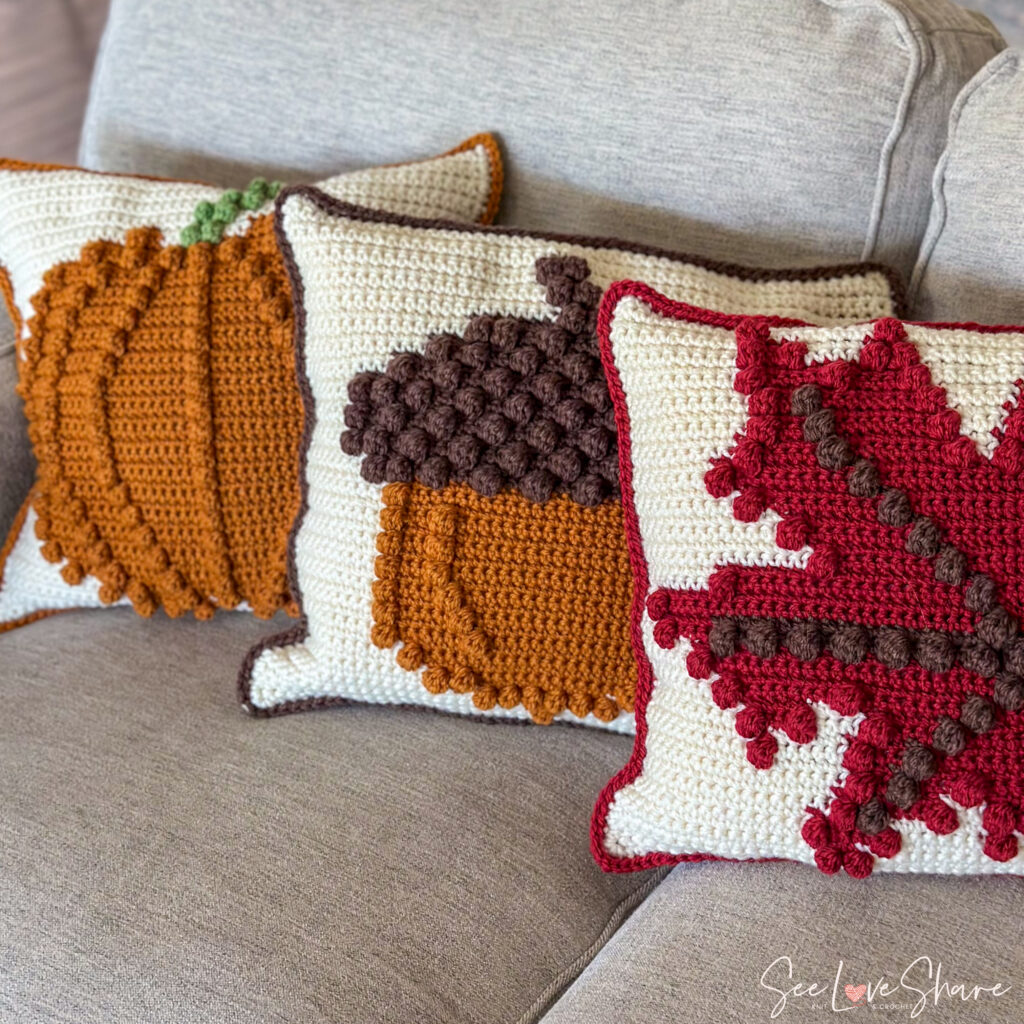
More Fall Bobble Pillow Patterns
This maple leaf is part of a three-pattern series. Make them all and style them together for the ultimate fall vibe!
- Bobble Stitch Pumpkin Pillow Pattern
- Bobble Stitch Acorn Pillow Pattern
- Fall Bobble Pillow Bundle — save with all 3
Love the whole set? Save on all three with the bundle!

More Patterns You’ll Love
Autumn Maple Leaf Garland
Crochet Tote Bag — Farmers Market Bag