
September 25th, 2024
Autumn Maple Leaf Garland Crochet Pattern — Embellishment, Place Setting & Garland
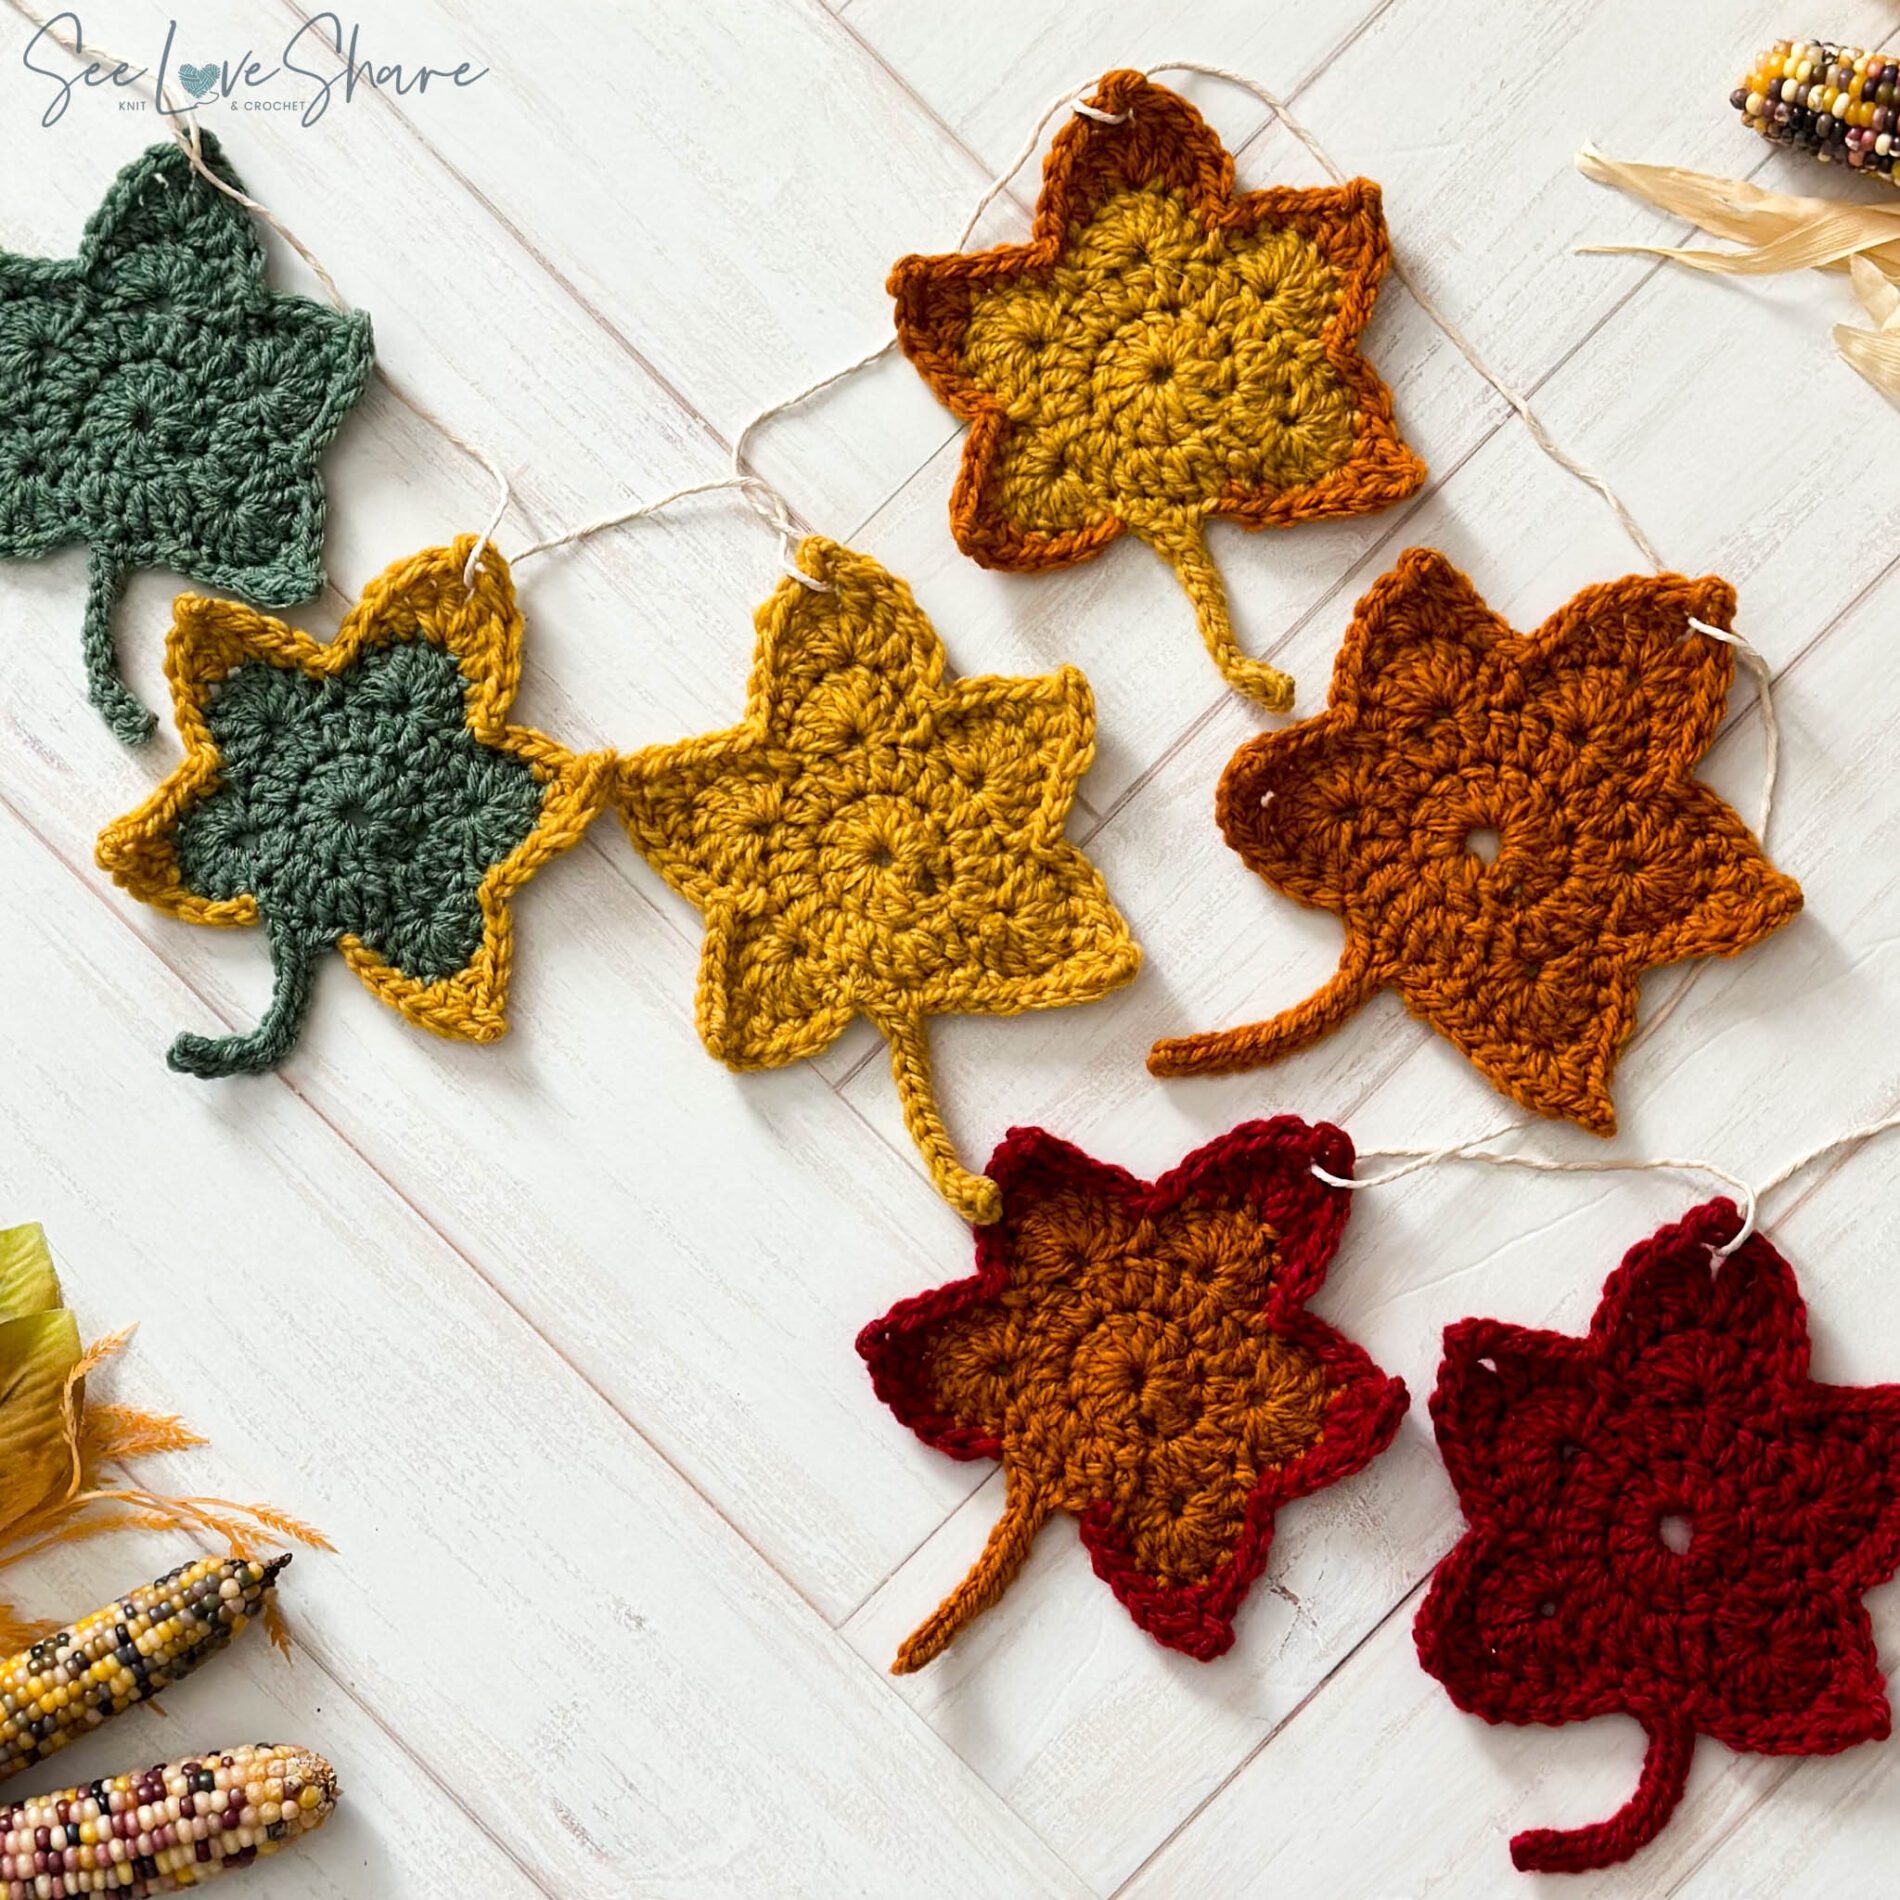
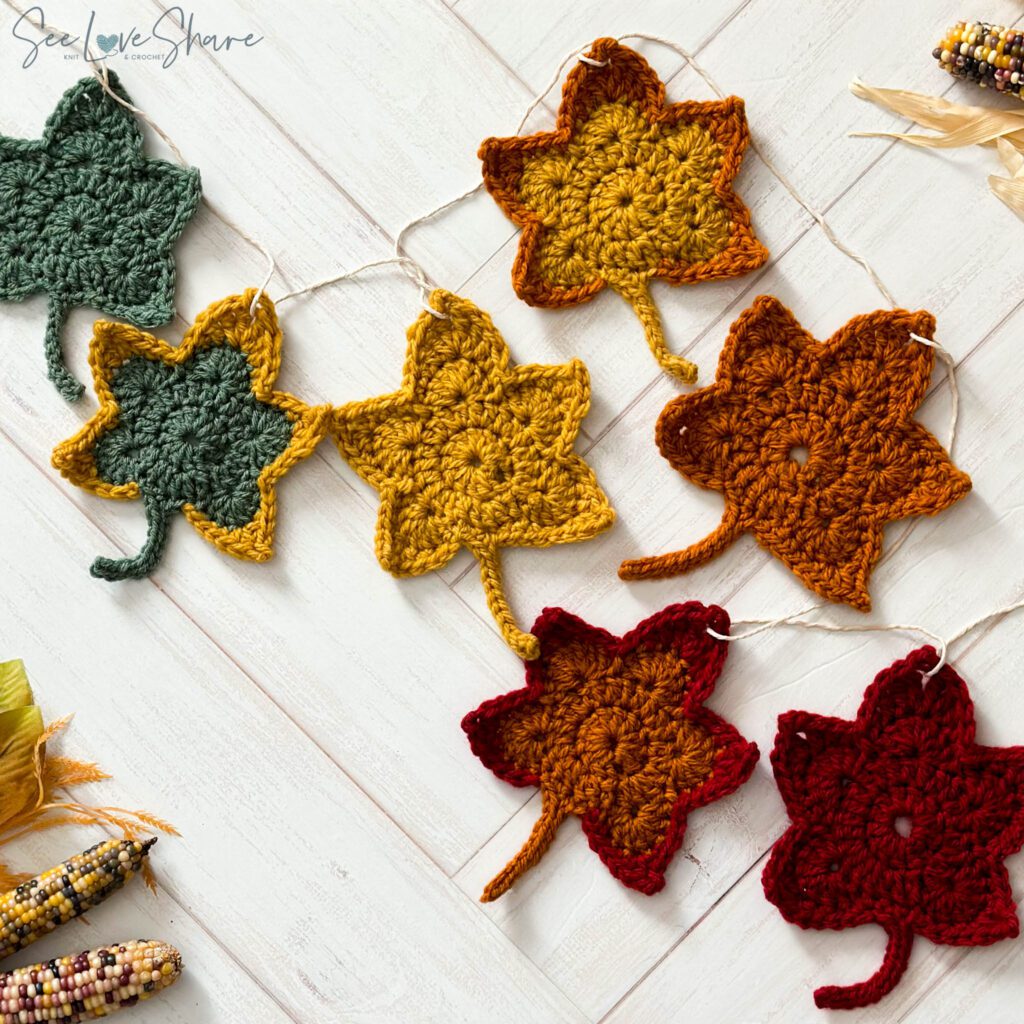
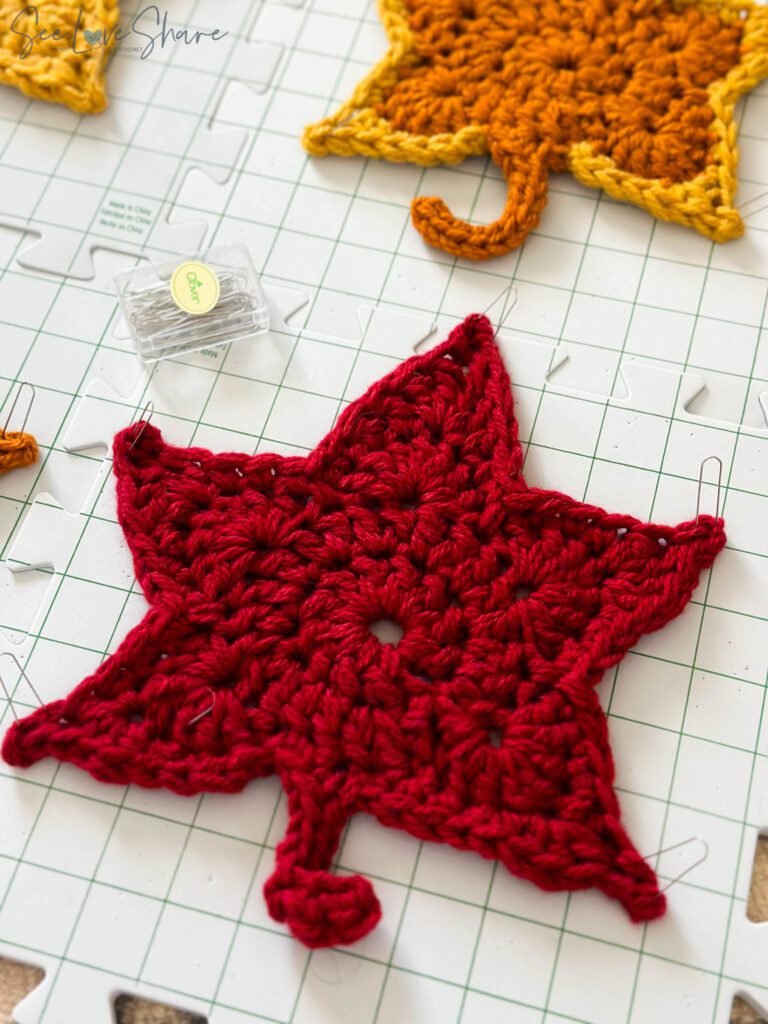
Bring the beauty of fall indoors with this stunning autumn maple leaf garland crochet pattern — versatile crocheted maple leaves that work beautifully as a strung garland, individual embellishments, or charming place settings for Thanksgiving and harvest dinners. Each leaf is worked in 4 continuous rounds with optional two-tone colour changes, capturing the warm reds, ambers, and golds of fall foliage in soft, dimensional yarn.
This autumn maple leaf garland pattern is available as a clean, printable PDF on Etsy. It includes the full row-by-row pattern, colour change technique notes, blocking instructions for crisp leaf shapes, garland assembly walkthrough, and place setting styling tips. Perfect for Thanksgiving tables, fall mantels, harvest centerpieces, or as a thoughtful handmade hostess gift.
Get the printable PDF
Autumn Maple Leaf Garland Pattern PDF
Instant download with the full row-by-row pattern in a clean, ad-free, print-friendly layout — including the colour change technique, blocking guide, and assembly notes for garland AND place settings. Use code SEELOVE15 for 15% off.
Why You’ll Love This Autumn Maple Leaf Garland
This pattern has become a fan favourite for fall and Thanksgiving decor:
✔ Three ways to use: strung as garland, individual embellishments, or place setting cards
✔ Two-tone colour options bring leaves to life with realistic shading
✔ Each leaf is approx. 5″ (7″ with stem) — perfect display size
✔ Beginner-friendly stitches with intermediate finishing (blocking)
✔ Customizable garland length — make 5-7 leaves spaced across twine
✔ Perfect Thanksgiving table accent or fall mantel centerpiece
✔ Doubles as a take-home guest favour for dinner parties
✔ Reusable year after year — store flat between seasons
The autumn maple leaf garland is the kind of project that delivers a lot of visual impact with surprisingly simple techniques. Mix scarlet, ginger, honey spice, and olive for a stunning multi-tonal display that captures the essence of fall.
Autumn Maple Leaf Garland Pattern Details
Skill Level
Easy / Intermediate — suitable for crocheters familiar with basic stitches such as chain, single crochet, and slip stitch. The blocking step is what takes these from “homemade” to “handcrafted heirloom.”
Finished Size
Each leaf is approximately 5 inches wide, 7 inches including the stem. A 6-foot garland looks beautiful with 7 leaves spaced evenly.
Gauge
4″ x 4″ (10cm x 10cm) = 11 sc x 12 rows with 6 mm (US J/10) crochet hook
Materials You’ll Need
Yarn (#5 Bulky)
The pattern is shown in Patons Inspired Yarn in these fall colours:
- Scarlet — deep, classic fall red
- Ginger — warm copper-orange
- Honey Spice — golden amber
- Olive — earthy green-brown
Shop the materials


Mix multiple colours across your garland for a stunning multi-tonal effect, or use one solid colour for a more minimalist look. Any #5 bulky weight yarn will work; just check your gauge before starting.
Tools and Supplies
- 6 mm (US J/10) crochet hook from this complete hook set
- Tapestry needle for weaving in ends
- Twine (if stringing as a garland)
- Scissors
Blocking Materials
Blocking is essential for crisp, flat maple leaves — they tend to curl off the hook, but blocking sets them in their gorgeous final shape. Here’s what you’ll need:
- Blocking mat — a foam mat, yoga mat, or thick towel will do
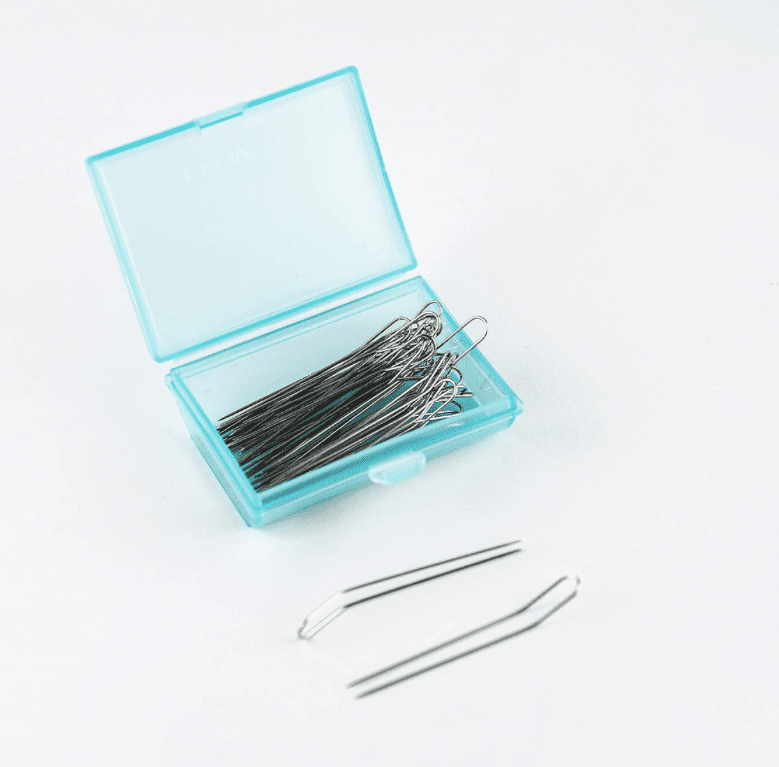
- Rust-proof T-pins or sewing pins
- Clean towel
- Small bowl of lukewarm water
If blocking is new to you, here are the exact materials I use:
About the Construction
Each maple leaf is worked in 4 continuous rounds, building the iconic 5-point leaf shape from the center outward. The pattern includes notes for both single-colour leaves and two-toned versions where colour changes are marked clearly in the pattern.
Because these are worked in the round with shaping increases at each point, the leaves naturally curl off the hook. Don’t worry — that’s exactly why blocking is the magic finishing step. After a quick water bath and a few hours pinned flat, your leaves transform from curled spirals into crisp, flat, perfect maple leaf silhouettes.
Tips for Clean Two-Tone Colour Changes
- Finish the last stitch with the old colour: Work until there are two loops on your hook with the old colour.
- Yarn over with the new colour: Before completing the last stitch with the old colour, yarn over with the new colour.
- Pull through loops: Finish the last stitch by pulling through the last two loops with the new colour.
- Secure the old colour: Crochet over the tail as you go OR weave it in later with a tapestry needle.
Clean colour changes are what take a homemade-looking leaf into heirloom-quality decor. Try ombre shading by graduating from olive to ginger to scarlet as the leaf radiates outward — stunning.
Abbreviations
Blocking & Finishing Your Maple Leaves
Step 1: Wet Block
- Fill a bowl with lukewarm water and submerge your crochet leaves
- Let them soak for about 10-15 minutes to ensure the fibers absorb water evenly
- Gently remove each leaf and squeeze out excess water without wringing
- Place each leaf on a towel, roll it up, and press to remove more water
- Lay each leaf flat on a blocking mat or thick towel, stretch it to the desired shape, and pin in place
- Allow to dry completely (24-48 hours depending on the yarn thickness)
Step 2: Shape & Dry
- While the leaves are pinned on your blocking mat, smooth and shape each point evenly so all five points are sharp and defined
- Once the leaves are completely dry, remove the pins and they’ll retain the blocked shape permanently
Blocking dramatically improves the look and feel of your finished leaves — especially for shaped pieces like these where defined points matter.
Garland Assembly
Make a combination of 5-7 leaves depending on the length of garland you want. Play with colour combinations — try alternating scarlet and ginger, or graduating from olive to scarlet for an ombre effect. I made a 6-foot garland with 7 leaves and spaced them evenly across the twine.
With twine, weave at the top point of the leaf, leaving around 6 inches of slack between each leaf for natural drape.
As Place Setting or Name Tag
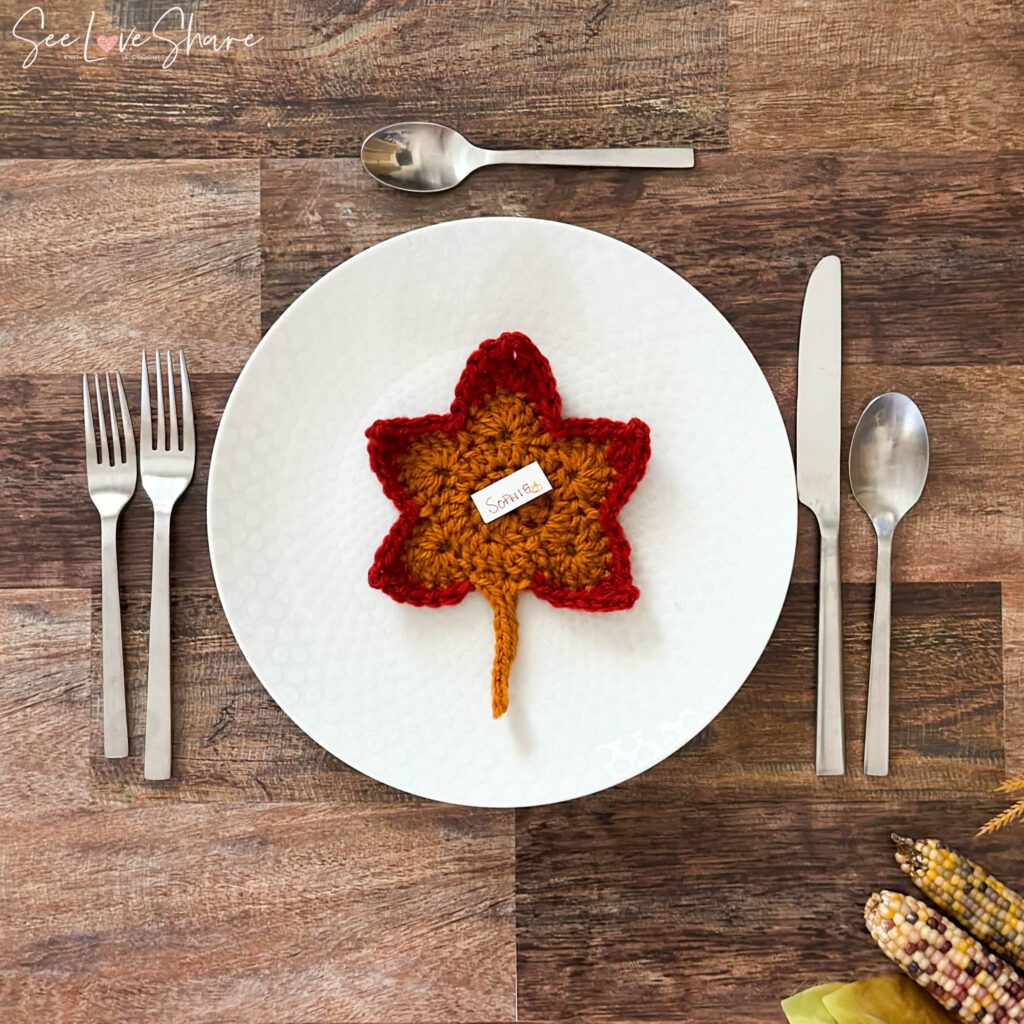
There are no hard rules here — get creative with your styling! I didn’t want to permanently attach names to the leaves because I wanted guests to take them home, so I just laid a written name card on top of each leaf at their place setting. They double as a beautiful favour, a place marker, and a take-home memento all at once.
More Styling Ideas for Your Maple Leaves
- Thanksgiving centerpiece — scatter individual leaves down the center of the dinner table
- Fall mantel garland — drape across the mantel with mini pumpkins and candles
- Front entry display — hang on a console or entryway wreath
- Window valance — hang across a window for cozy autumn light filtering
- Napkin rings — slip a single leaf into a napkin ring for an instant table upgrade
- Tiered tray accent — scatter on each tier of a fall-themed display
- Gift topper — attach to gift boxes or wine bottle gifts
- Handmade gift bundle — wrap a small set with twine and a handwritten tag for a perfect hostess gift
Want the polished PDF version?
Grab the Ad-Free Printable Pattern
Same pattern, beautifully formatted for printing and bringing to your crochet chair — with colour change notes, blocking instructions, and garland + place setting styling tips. Use code SEELOVE15 for 15% off.
Frequently Asked Questions
How long does each maple leaf take to crochet? Each leaf takes about 30-45 minutes once you’ve got the rhythm. A full 6-foot garland of 7 leaves comes together in a single afternoon.
Do I really have to block the leaves? Yes — really. Unblocked leaves curl significantly off the hook and don’t look like maple leaves. Blocking takes 24-48 hours but transforms them into crisp, beautiful, flat leaf shapes with defined points.
Can I make these in different colours? Absolutely. Try classic fall (scarlet, ginger, gold), monochrome neutral (cream + oat), or even non-traditional (blush + dusty rose for a spring-summer version).
How many leaves do I need for a garland? A 6-foot garland looks beautiful with 7 leaves spaced 6 inches apart. Adjust the count up or down for shorter or longer garlands.
Can I use a different yarn weight? Yes — any #5 bulky weight yarn will work. Just check your gauge before making a full batch. Thicker yarn will give you bigger leaves; finer yarn will be more delicate.
How do I store the garland between seasons? Store flat (not folded) in a labeled bin or large flat envelope to maintain the blocked shape. They’ll come out perfect every autumn for years.
Is the pattern available for free? The free version has been retired, but you can purchase the printable PDF on Etsy for a small fee. Your purchase supports the work that goes into designing, testing, and sharing patterns. Thank you!
More Fall & Thanksgiving Patterns You’ll Love
 Adjustable Autumn Falling Leaves Table Runner — Free Pattern
- Thanksgiving Crochet Table Runner — Thankful Tapestry Pattern
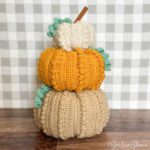
- Farmhouse-Chic Stackable Crochet Pumpkins
- Rustic Ribbed Crochet Pumpkins
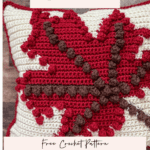
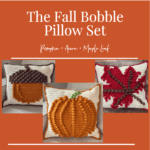
- Crochet Bobble Stitch Maple Leaf Pillow Pattern
- Crochet Bobble Stitch Fall Pillow Pattern Bundle


Save This Autumn Maple Leaf Garland Pattern
Want to come back to this autumn maple leaf garland pattern later? Save it to Pinterest so you can find it when fall arrives — and share it with your crocheting friends!