November 5th, 2023
Christmas Sugar Cookie ANGEL Ornament – Free Crochet Pattern
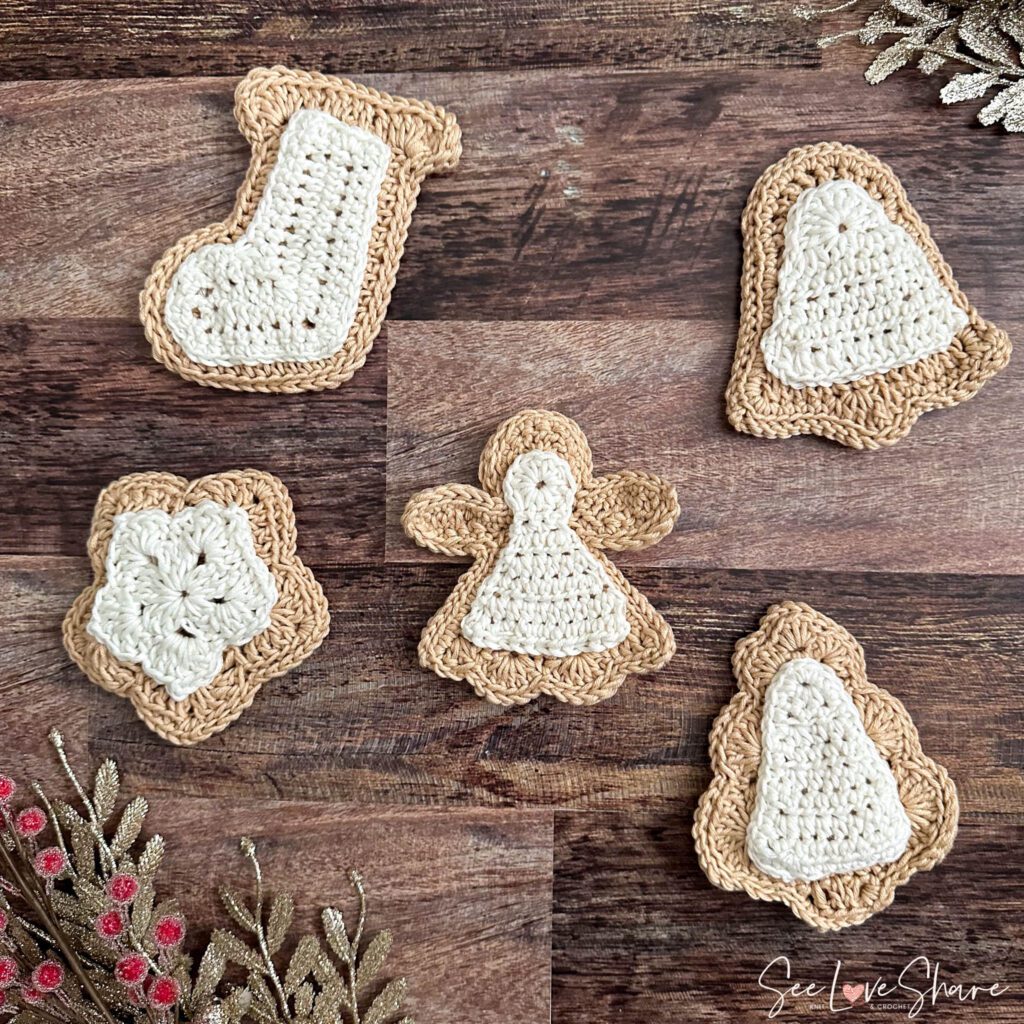
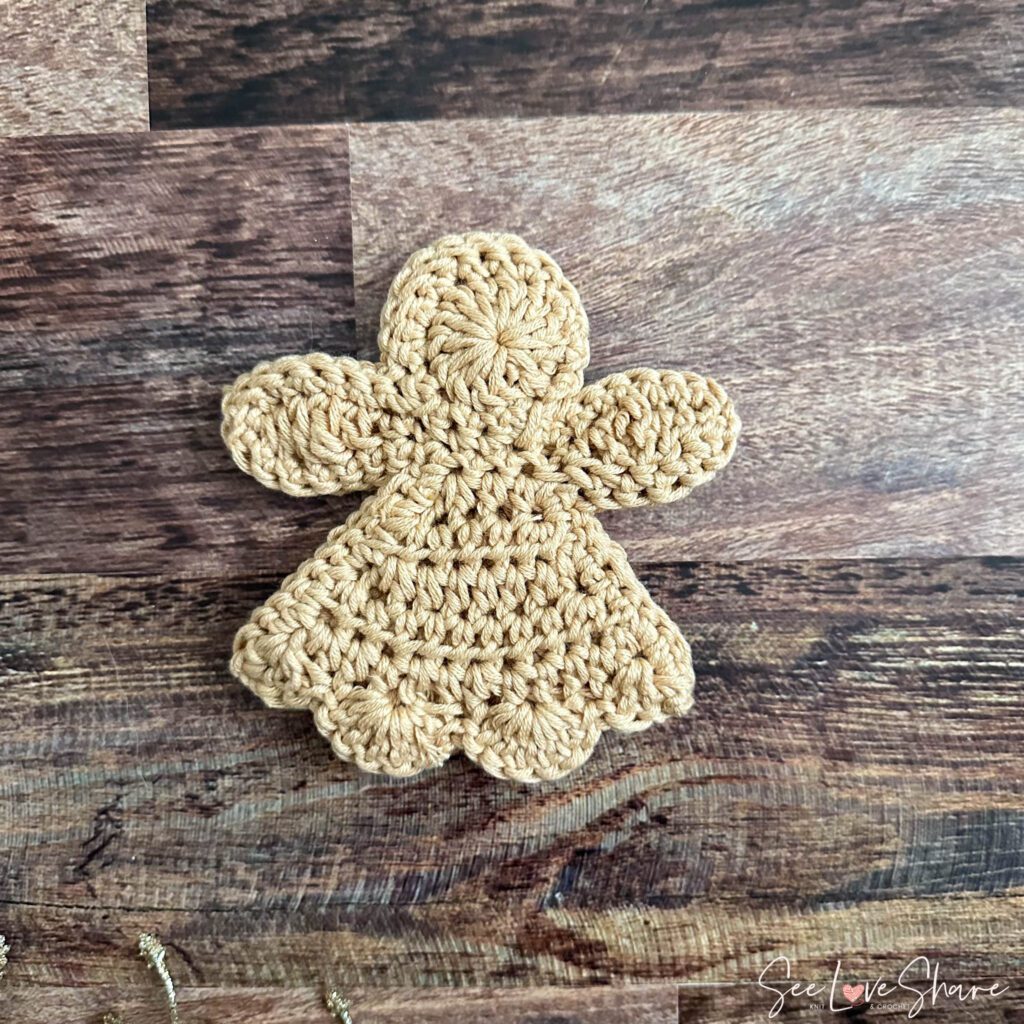
Are you ready to add a delicious touch of warmth and charm to your holiday decor? Look no further! Our Crochet Sugar Cookie Ornament Patterns are here to sweeten up your holiday season. These delightful and unique ornaments are perfect for adorning your tree, gifting to loved ones, or even as festive additions to your home. These ornaments work up in a flash. Each one consists of a front and mirroring back panel that are slip stitched together. Two panels create bulk and allow these ornaments to hang in their shape without curling. Frosting is then added on one side as a pop of personality to each ornament to allow these to pop!
Skill Level:
Intermediate: For crocheters with some experience. More intricate stitches, shaping & finishing.
Measurements:
Each piece is approx. 3in tall.
Materials:
- 1 Ball 120 g / 4.2 oz, 254 meters / 232 yards of #3 Medium yarn of each – this will make approx. 4 cookies, double if making the entire set.
- Cookie: Light brown
- Icing: white/off-white
- As photographed – Bernat Softee Baby Cotton in Sand (cookie) and Cotton (frosting)
- Size 4.0 mm (U.S. G/6)
- Tapestry needle
Gauge:
- Crochet Gauge: 16 sc and 20 rows with a 4.0 mm (U.S. G/6) crochet hook
Abbreviations:
Pattern:
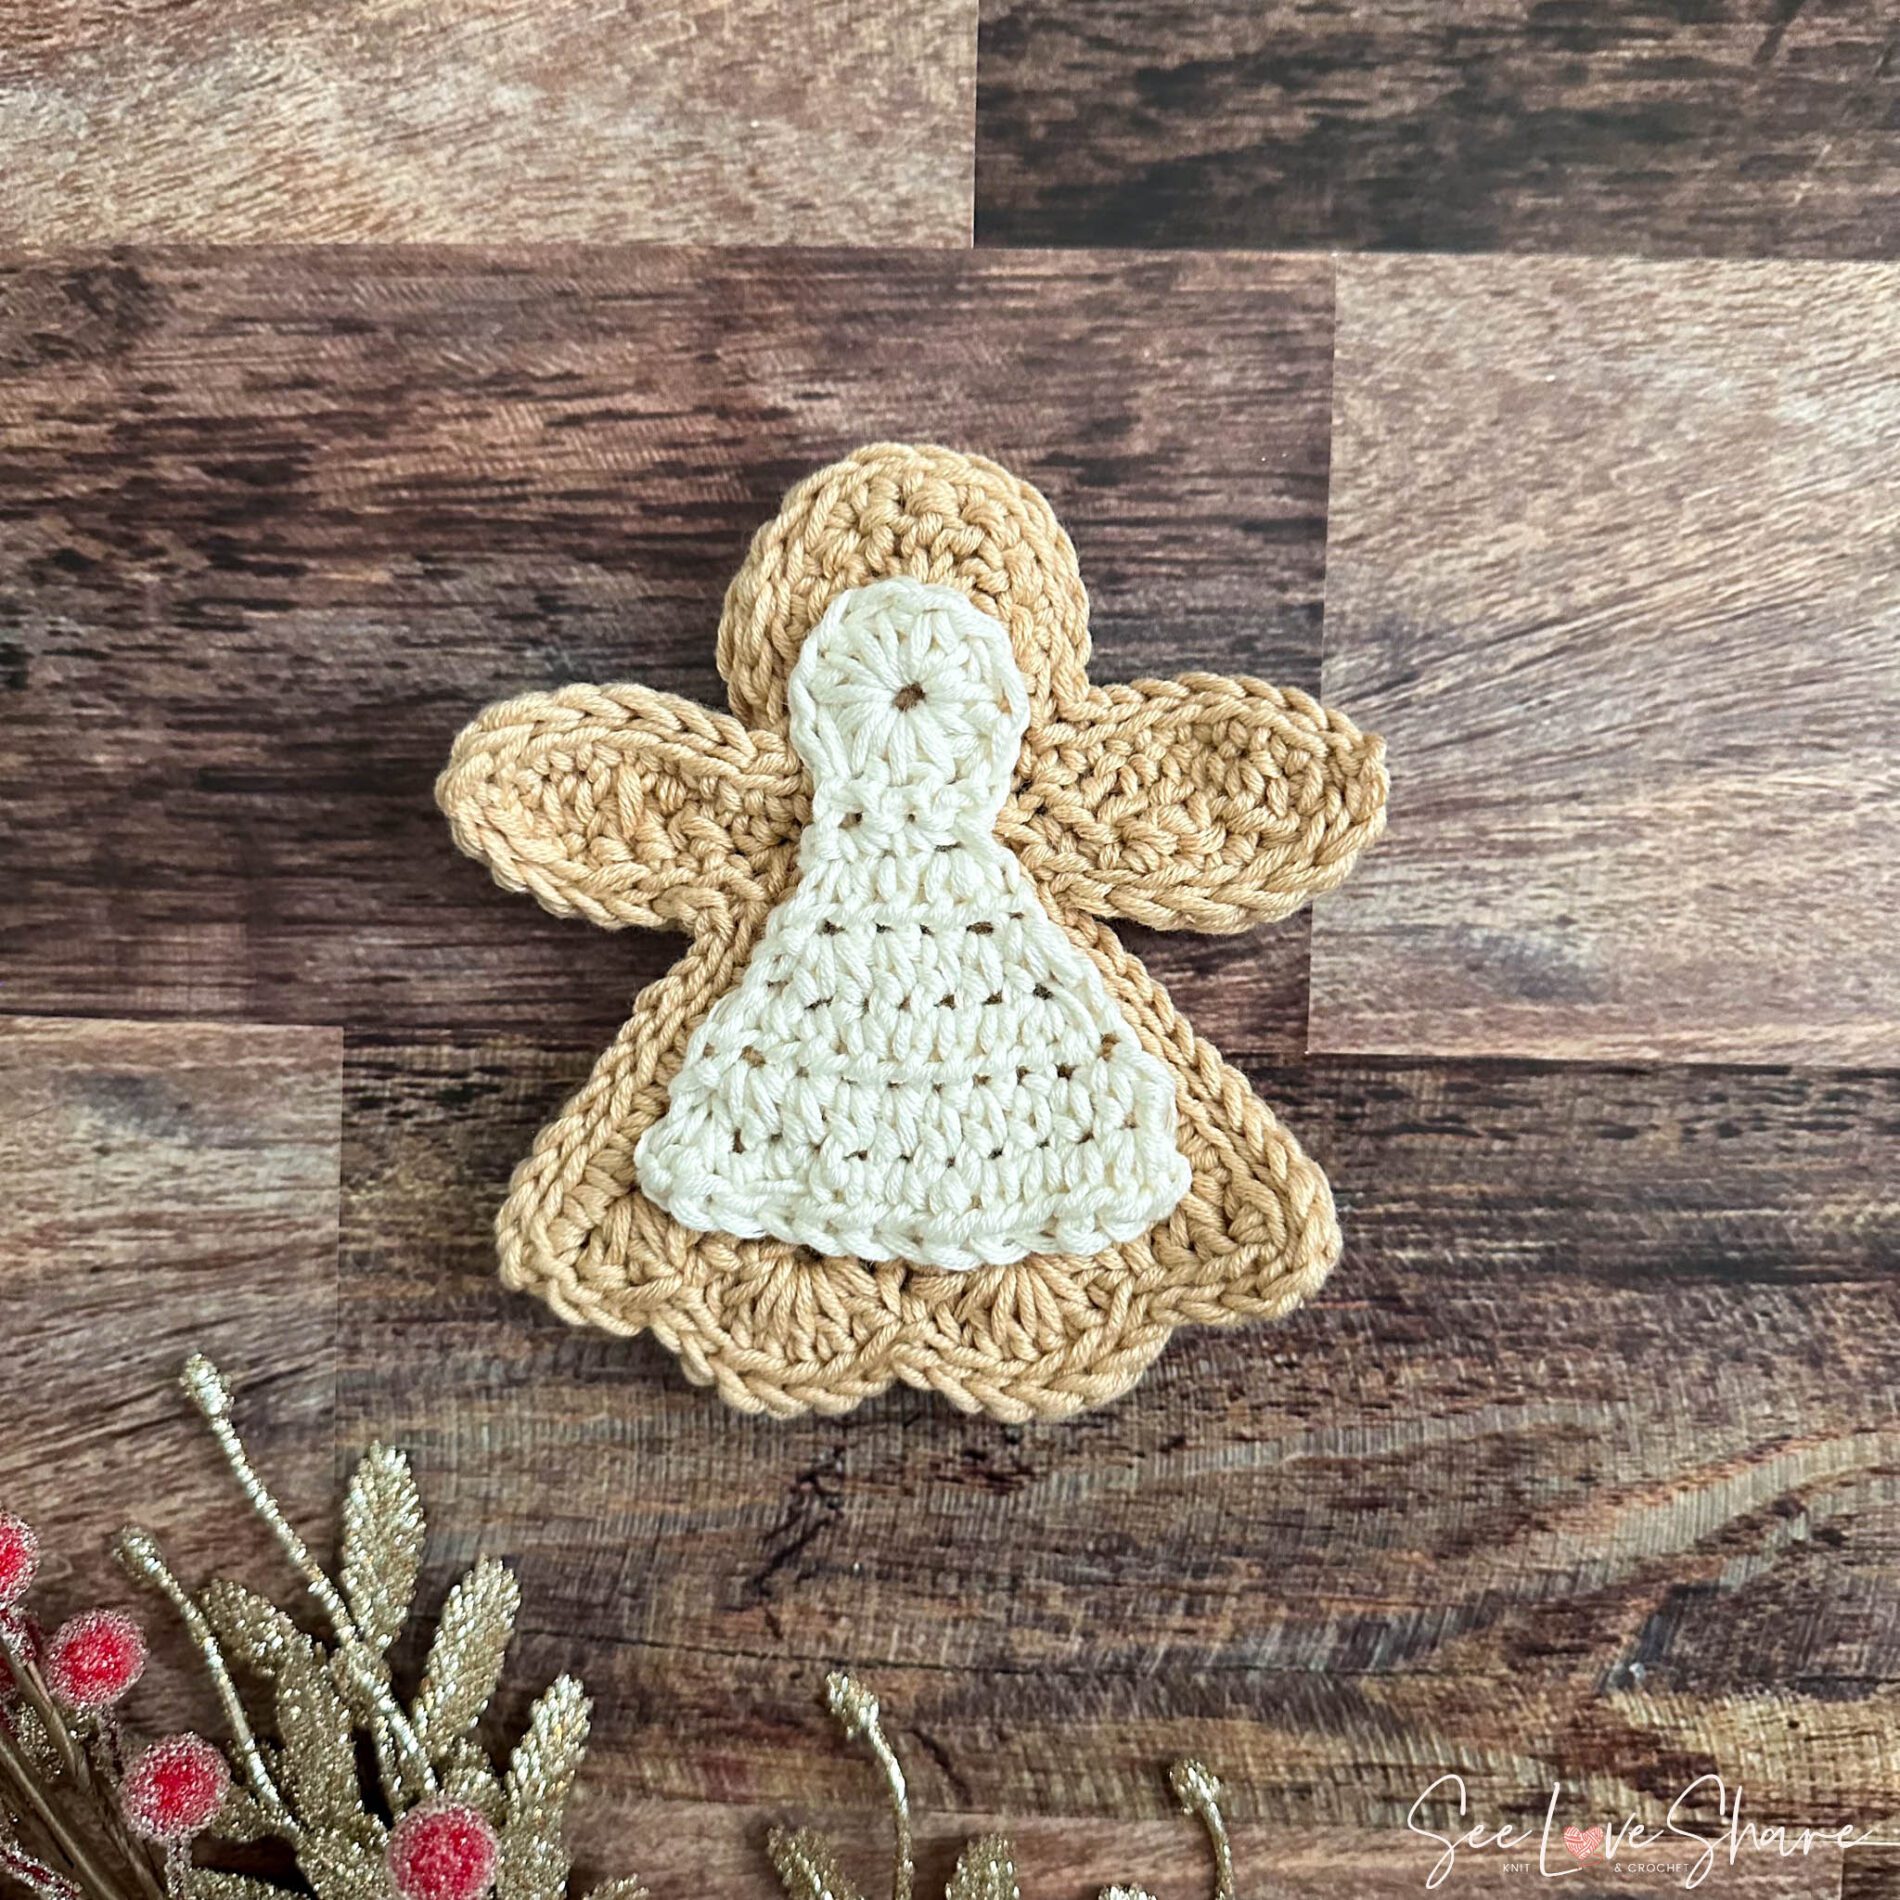
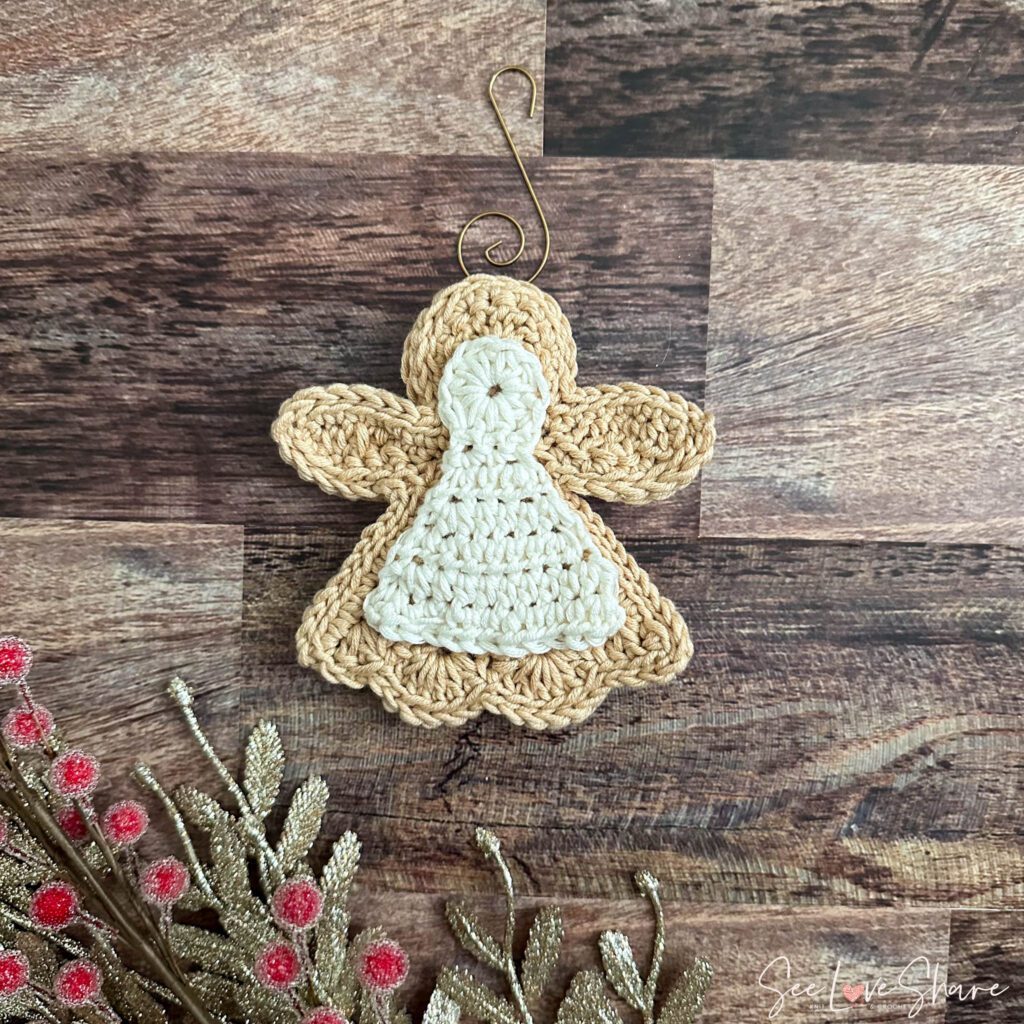
ANGEL:
Cookie: make 2
With light brown:
Starting at head, ch 3, join with slst to first ch to create a loop,
Row 1: ch 2, 12 dc within loop, join with a slst to top of starting ch 2, ch 1, turn
Row 2: Work neck: sc in first 3 sts of head, ch 8, turn
Row 3: Work wing: sc in 2nd ch from hook, hdc, dc, tr, dc, hdc, sc all along chain, sc across 3 sts of neck, chain 8
Row 4: Work 2nd wing: sc in 2nd ch from hook, hdc, dc, tr, dc, hdc, sc all along chain, slst across 3 sts of neck, ch 1, turn
If you’d like an Ad-Free Version or if you’d just like to support my effort – please consider purchasing a downloadable & printable version from my Etsy Shop! A little goes a long way. Thank you!
Row 5: work body: 2 hdc in first st, hdc in next st, 2 hdc in next st, ch 1, turn (5 hdcs)
Row 6: 2 hdc in first st, hdc in next 3 sts, 2 hdc in next st, ch 1, turn (7 hdcs)
Row 7: 2 hdc in first st, hdc in next 5 sts, 2 hdc in next st, ch 1, turn (9 hdcs)
Row 8: 2 hdc in first st, hdc in next 7 sts, 2 hdc in next st, ch 1, turn (11 hdcs)
Row 9: 2 hdc in first st, hdc in next 9 sts, 2 hdc in next st, ch 1, turn (13 hdcs)
Row 10: ch 2, 2 dc in next st. sk 1 st, slst, sk 1 st, 6 dc in next st, sk 1 st, slst, sk 1 st, 6 dc in next st, sk 2 st, slst, 3 dc in final st, do not turn, continue to edging.
Edging: evenly space sc along side edge of skirt, sc2tog where the body meets the wing, sc along bottom edge of wing to tip, ch 2, evenly space sc along top of wing, sc2tog where the top of the wing and head meet. Work edging on head, *sc, 2 sc in next st*, repeat within ** around head. sc2tog where the top of the wing and head meet, evenly space sc along top of wing to tip, ch 2, sc along bottom edge of wing, sc2tog where the body meets the wing, evenly space sc along side edge of skirt. Bind off (do not edge bottom of skirt).
(back)
Frosting: make 1
With White:
To start, ch 3, join with slst to first ch to create a loop,
Row 1: ch 2, 12 hdc within loop, join with a slst to top of starting ch 2, ch 1, turn
Row 2 Work neck: sc in first 3 sts of head, ch 1, turn
Row 3: sc in first 3 sts, ch 1, turn
Row 4: work body: 2 hdc in first st, hdc in next st, 2 hdc in next st, ch 1, turn (5 hdcs)
Row 5: 2 hdc in first st, hdc in next 3 sts, 2 hdc in next st, ch 1, turn (7 hdcs)
Row 6: 2 hdc in first st, hdc in next 5 sts, 2 hdc in next st, ch 1, turn (9 hdcs)
Row 7: 2 hdc in first st, hdc in next 7 sts, 2 hdc in next st, ch 1, turn (11 hdcs)
Row 8: 2 hdc in first st, hdc in next 9 sts, 2 hdc in next st.
Bind off, leaving a long tail to attach to cookie.
Assembly:
Stack both cookies, align corners and sides. Starting at any corner, slst in BLO through BOTH cookies, continue with slst in blo in all sts in edging around. Bind off, weave in ends. Center frosting on the cookie, you should be able to see an even border of the cookie all the way around the frosting. Sew frosting to cookie with tapestry needle.
Bind off, weave in all ends and ENJOY!
This Pattern belongs to a set! Check them all out here!