
All Home Decor Crochet Crochet Extras & Fun!
October 8th, 2020
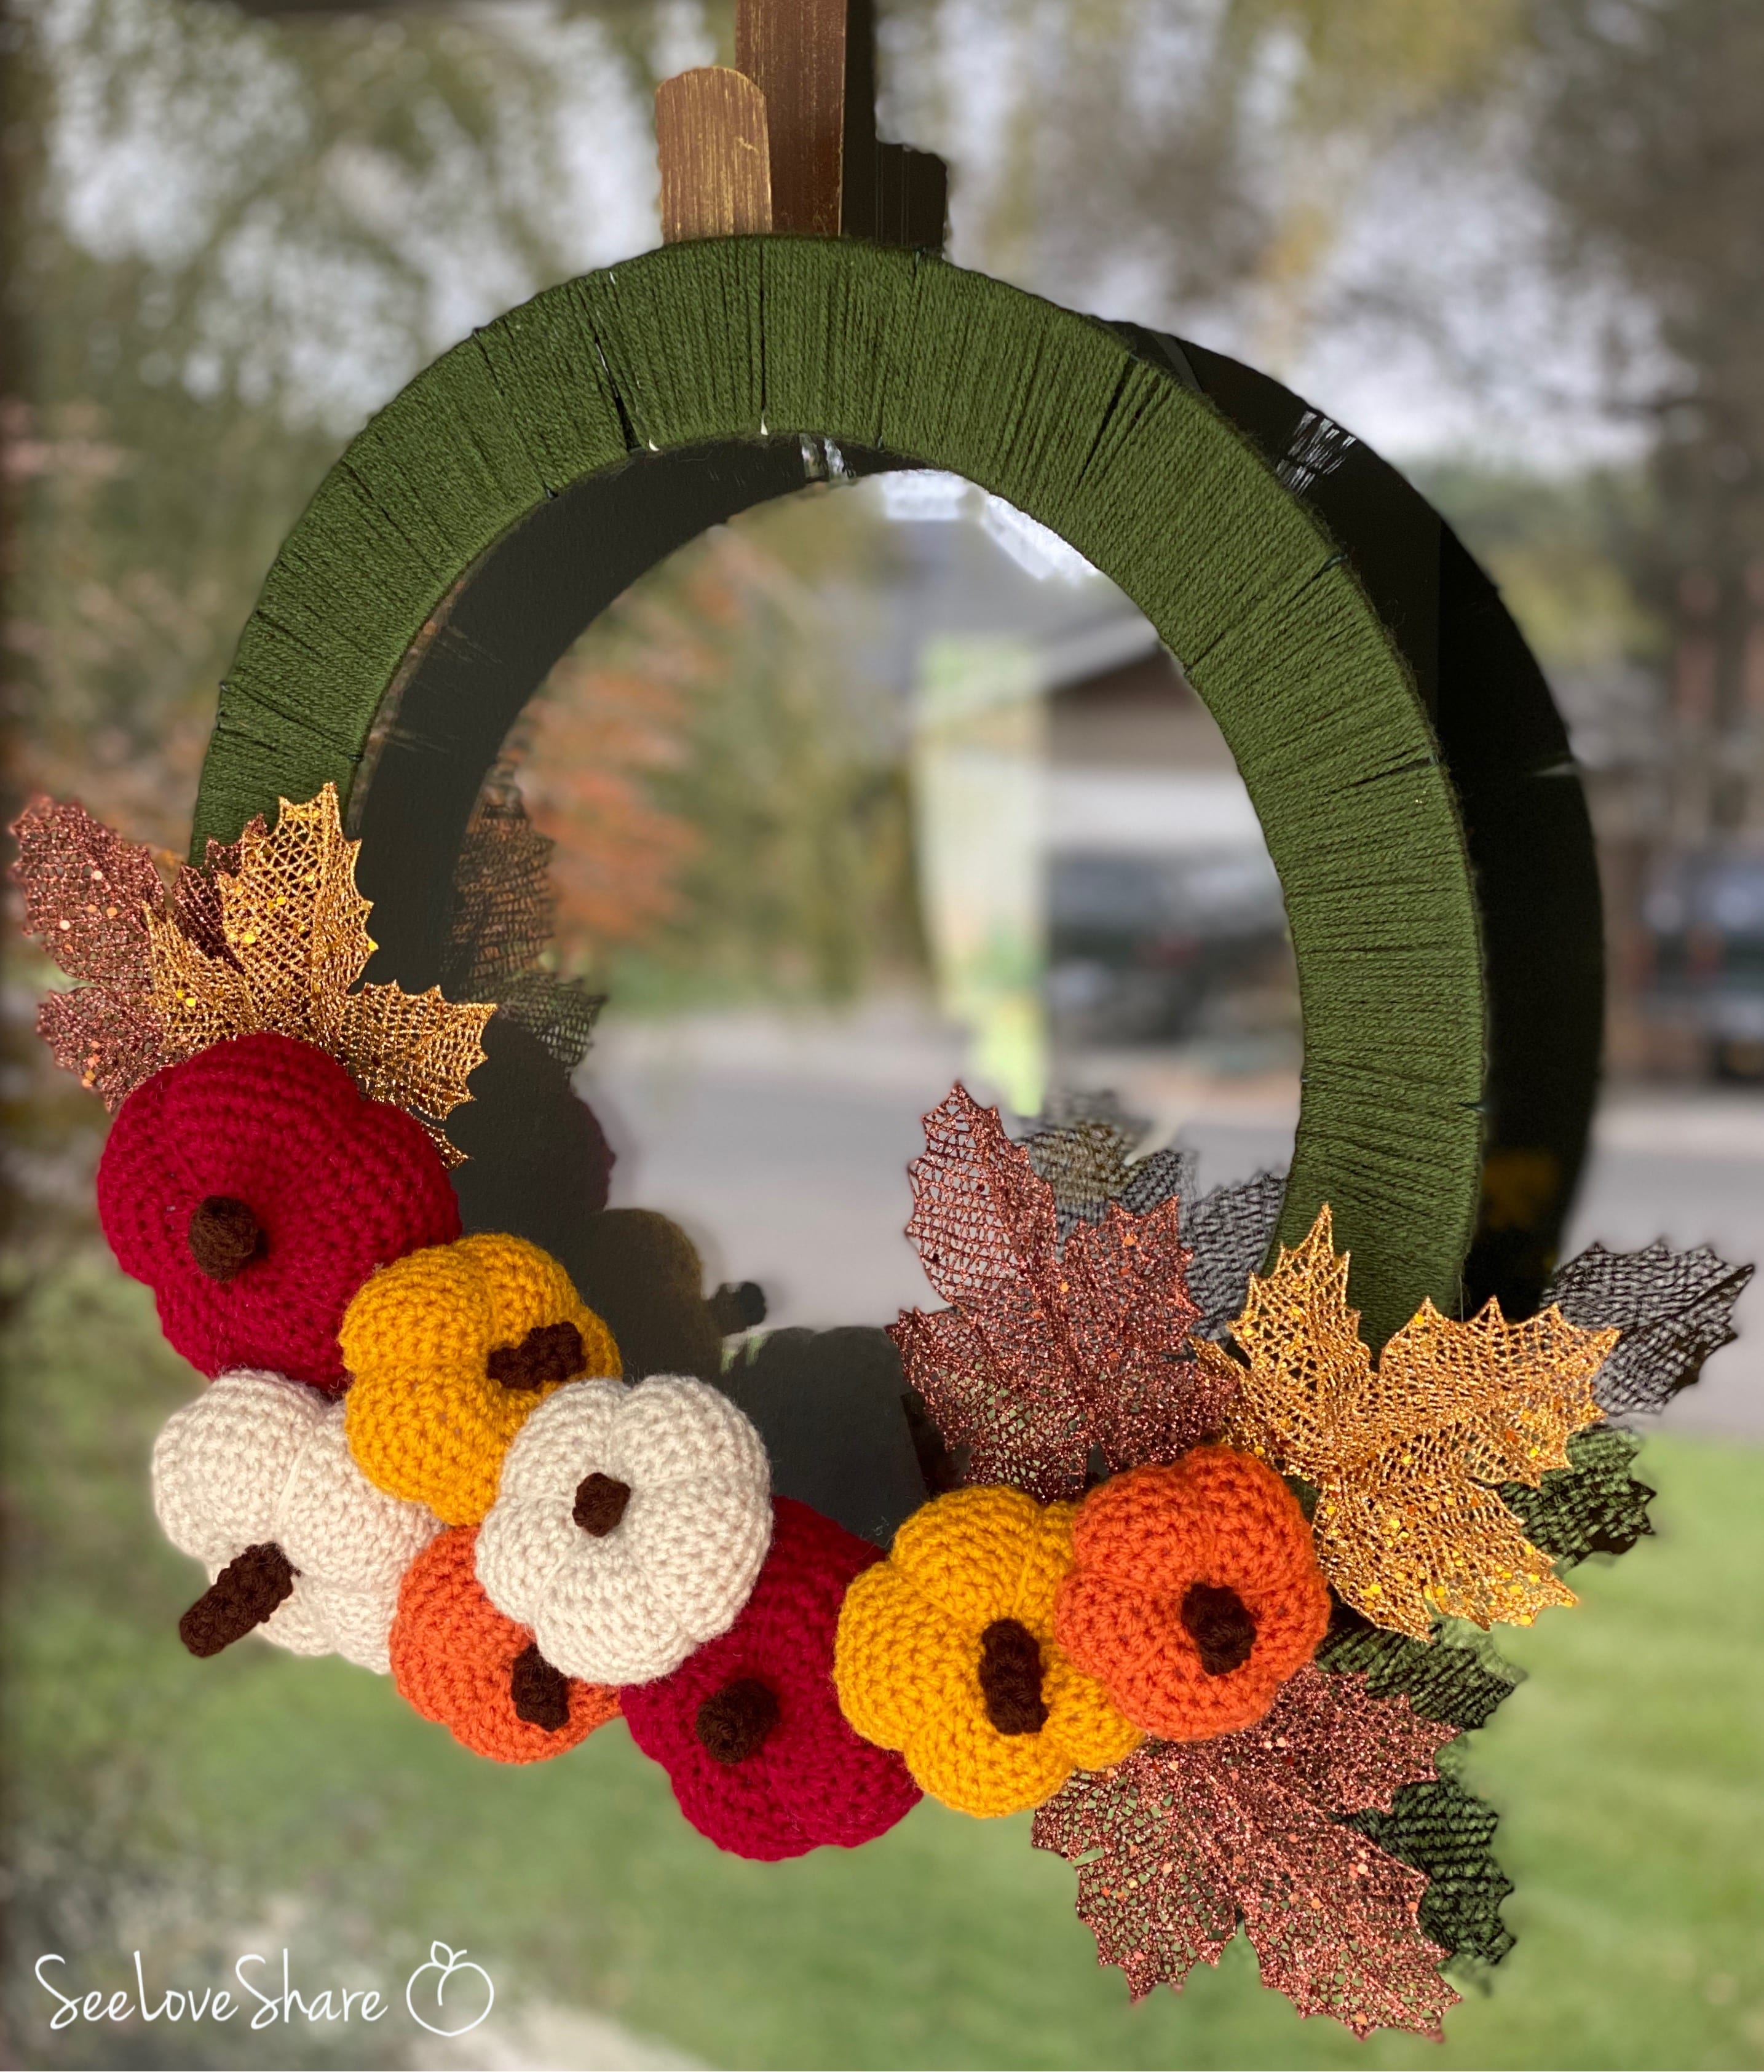
Crochet Pumpkin Wreath
New house means new wreaths! As soon as September rolls around I’m all about pumpkin season. Check out how I put these multi-sized mini pumpkins to use!

Let’s get started! Here is a list of the materials you’re going to need:
Materials:
- Wreath hanger:
- 1 wire wreath frame. I used this one from JoAnn –
- Assorted Pumpkin coloured RedHeart SuperSaver yarn. These are the colours I chose:
- Pumpkin
- Aran
- Gold
- Burgundy
- Carrot
- Coffee (for the stems)
- Medium Thyme (to wrap the wreath wire)
- PolyFill
- Tapestry Needle
- Glue gun (if you dont want to tie it all together)
- Decorative leaves (optional)
- 3 large minis
- 3 medium minis
- 2 small minis


Directions:
1. Make multiple mini pumpkins in the colour of your choosing.
See check out this FREE set of Patterns to make 3 different sizes.

I made 8 pumpkins for this wreath
2. Wrap the wreath with the Medium Thyme yarn. I started by tying it to one side and started wrapping tight enough so the yarn wouldn’t slip out of place.


3. Begin placing your embellishments. If you’re using decorative leaves, start with those. I played around with the placement before i committed to the shape and style. I suggest you do the same!

4. Once you are satisfied with the layout TAKE A PICTURE so you can remember what it all looked like! Then, pull out your glue gun (this is the faster option). If you aren’t using a glue gun, you can attach the pumpkins by sewing them on with your tapestry needle. You may need to attach the pumpkins to each other and to the wire frame (same goes for the glue gun option). All in all, this is the most rewarding step.

5. Attach a wire hook to the back/top of the wreath. This will allow you to hang it off-centered if that’s the look you’re going for.

6. Place on wreath hanger and enjoy!