
November 8th, 2020
The Easiest Crochet Sock Pattern — Softee Striped Socks (Toe-Up Seed Stitch)
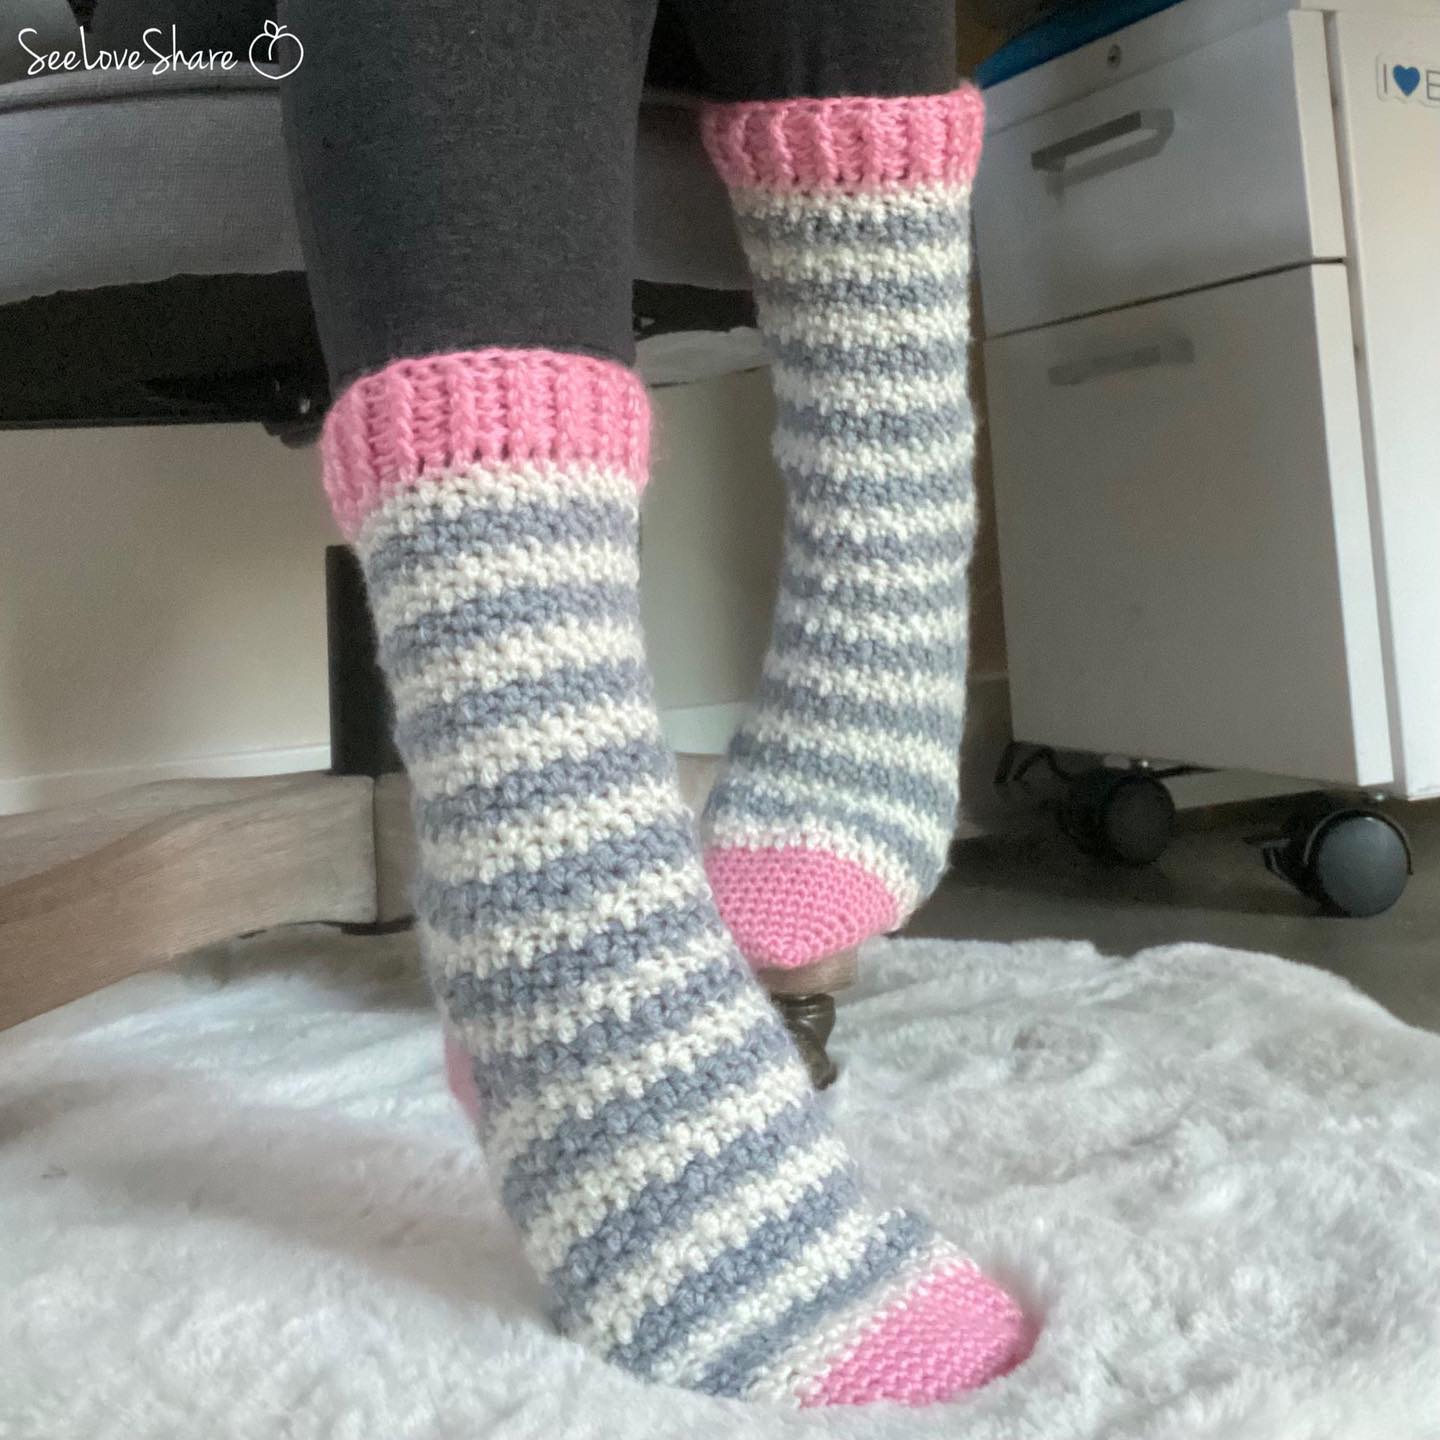
This is the easiest crochet sock pattern you’ll ever fall in love with. Worked toe-up in a seed stitch stripe, these socks create the softest, cushiest, stretchiest fabric your feet will ever know. The seed stitch crochet sock pattern was over a year in the making — I frogged no less than four pairs before I was finally happy with it — and so many of you commented and left helpful suggestions along the way. This is the best version I could develop, and I’m so proud of it. 🧡
The full crochet sock pattern is available as a clean, printable PDF on Etsy. Grab it below and get started!
🧶 Get the Softee Striped Socks PDF Pattern
Skip the screen — get a clean, printable PDF with every round explained, adjustable sizing, and full heel + cuff instructions. Use code SEELOVE15 for 15% off!

Why You’ll Love This Crochet Sock Pattern
These socks are the easiest, coziest crochet project for your sock drawer:
✔ Toe-up construction — try them on as you go
✔ Seed stitch stripe creates the softest, cushiest fabric
✔ Beginner-intermediate friendly with detailed PDF instructions
✔ The crochet sock pattern is fully adjustable to any foot size
✔ FPDC/BPDC ribbed cuff stays snug all day
✔ Customize colors — try any 3-color palette
✔ Made in soft, washable Bernat Softee Baby yarn
✔ Perfect handmade gift or self-care project
About This Crochet Sock Pattern
These socks are worked toe-up with a seed stitch stripe — the alternating sc/dc pattern creates a beautifully textured, stretchy fabric that hugs your foot perfectly. The construction is straightforward once you get the hang of it, and the adjustable sizing in the PDF means you can customize the width and length to fit any foot in your life.
| Detail | |
|---|---|
| Skill Level | Intermediate |
| Construction | Toe-up |
| Finished Size | Foot length fit to size. Leg approx. 9″ including cuff. |
| Hook | 4.5mm (UK 8 / US G6) |
| Yarn | Bernat Softee Baby — Pink, Flannel, White |
| Format | PDF instant download |
Materials You’ll Need
- 1 ball Bernat Softee Baby in Prettiest Pink
- 1 ball Bernat Softee Baby in Flannel (grey)
- 1 ball Bernat Softee Baby in White
- 4.5mm (US G6) crochet hook
- Tapestry needle
- Scissors
The crochet sock pattern is designed for Bernat Softee Baby — a soft, machine-washable yarn that’s gentle on feet and holds up to repeated washes. Any DK-weight (#3) yarn works as a substitute as long as you match gauge.
What’s in the PDF?
- Full written crochet sock pattern — every round individually explained
- Adjustable sizing instructions — customize width in increments of 2 sts
- Heel construction with helpful step-by-step notes
- Cuff instructions with FPDC/BPDC ribbing detail
- Clean, printable format — instant download after purchase
- Lifetime access — re-download anytime from your Etsy account
🧶 Ready to Make These Socks?
The Softee Striped Socks PDF includes everything you need — every round, every detail, every helpful note. Use code SEELOVE15 for 15% off!
Looking for a Free Crochet Sock Pattern?
My Cabin Socks are a free companion crochet sock pattern — a simpler, faster version using double crochet that works up quickly and is perfect for men or anyone who wants a no-fuss cozy sock. Same toe-up construction, no color changes, totally free.
Frequently Asked Questions
Is this crochet sock pattern beginner-friendly?
The pattern is rated Intermediate — you’ll need to be comfortable working in the round and managing color changes. If you’ve made a hat or simple amigurumi you’ll be absolutely fine.
Can I adjust the size?
Yes — the PDF includes full instructions for adjusting width in increments of 2 sts. Foot length is always fit to your own size since it’s worked toe-up.
How do I get the pattern after purchasing?
It’s an instant PDF download — available immediately after your Etsy purchase under “Purchases and Reviews” in your Etsy account. No waiting, no shipping.
Can I use different colors?
Absolutely — any 3 colors of Bernat Softee Baby (or any DK-weight yarn) work beautifully. The stripe sequence is fully customizable.
How long does the crochet sock pattern take to complete?
Plan for 12-20 hours per pair depending on your speed and foot size. The toe-up construction means you can take breaks naturally between sections.
Can I sell finished socks?
Yes — small batch sales are allowed for personal income. Please credit SeeLoveShare as the designer.
What yarn weight does this use?
DK weight (#3). Bernat Softee Baby is the recommended yarn for that perfect soft, washable hand. Any DK-weight yarn substitutes as long as you match gauge.
More Beginner-Friendly Crochet Patterns You’ll Love
If you enjoyed this crochet sock pattern, you’ll love these related cozy crochet projects:
- Cabin Socks — Free Crochet Sock Pattern
- The Easiest Crochet Hat Pattern
- Crochet Floppy Sun Hat
- Crochet Shells & Squares Coverup
- Two Toned Beanie — Crochet Pattern
Save This Crochet Sock Pattern
Want to come back to this crochet sock pattern later? Save it to Pinterest so you can find it when sock-knitting season hits — and share it with your crochet friends!