June 3rd, 2026
Knitting Lifeline Tutorial: How to Frog Your Work Safely
If you’ve ever found a mistake several rows down in your knitting and felt your stomach drop at the thought of ripping back, this knitting lifeline tutorial is for you. There’s a technique that lets you frog (unravel) your work with total confidence, stopping the unraveling exactly where you want it, without dropping a single stitch. It’s called a lifeline, and once you learn it you’ll never dread ripping back again.
In this knitting lifeline tutorial, I walk through exactly how I do it on my current project, step by step. I run a spare knitting needle through one leg of every stitch in a single row, then frog everything above it. When the unraveling reaches that needle, it simply stops, and all my live stitches are sitting safely on the spare needle, ready to keep knitting.
Watch the Knitting Lifeline Tutorial Video
Prefer to read along? The full written instructions are below, along with my best tips for picking up stitches the right way round and a few troubleshooting notes.
What Is a Lifeline in Knitting?
A lifeline is a length of waste yarn or a spare needle threaded through an entire row of live stitches. It acts as a safety net: if you need to rip back, the lifeline holds those stitches in place so the unraveling can’t travel any further than that row. You can place one ahead of time (the smart, preventative way) or insert one on the fly the moment you spot a mistake (the rescue method shown in this knitting lifeline tutorial).
The version I demonstrate uses a spare knitting needle as the lifeline. Instead of threading waste yarn, you run a second needle through one leg of each stitch in the row just below your mistake, then frog down to it. It’s fast, it keeps every stitch live and mounted correctly, and you can knit straight off the spare needle when you’re done.
Frogging vs. Tinking: Which One Do You Need?
If your mistake is only a stitch or two back in the current row, it’s usually faster to “tink” (knit spelled backwards), which means un-knitting one stitch at a time. But if the mistake is several rows down, tinking becomes tedious fast. That’s when frogging to a lifeline wins: you rip out multiple rows in one motion and land safely on a row of secured stitches.
What You’ll Need
| Item | Notes |
| Spare knitting needle | A circular or straight needle one size smaller than your working needle slides through stitch legs more easily |
| Your live project | Still on its working needles |
| Stitch marker (optional) | Helps mark the exact row you need to rip back to |
| Good lighting + flat surface | Treat it like surgery; work on a table where you can see stitch legs clearly |
| Ball or yarn winder (optional) | For winding the frogged yarn back up neatly as you go |
How to Frog Safely Using the Lifeline Technique
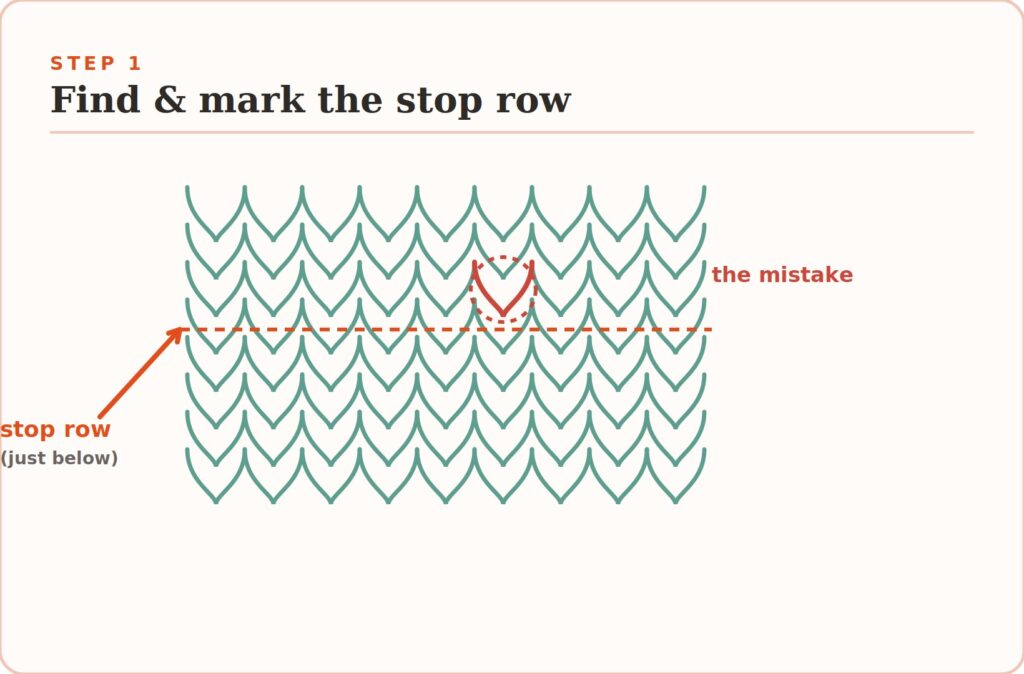
Step 1: Find and Mark Your Stop Row
Examine your knitting and identify exactly where the mistake happened. Choose the row one row below the mistake as your stopping point; that’s the row you’ll secure with your spare needle. Pop in a stitch marker if it helps you keep track of how far down you’re ripping.
Step 2: Thread the Spare Needle Through the Stop Row
Working from right to left across your stop row, insert your spare needle through one leg of every stitch. Pick up the right leg of each stitch and catch every single one so none can escape downward when you start ripping. A needle a size smaller than your working needle makes this much easier; you can transfer back to your regular needle as you knit.

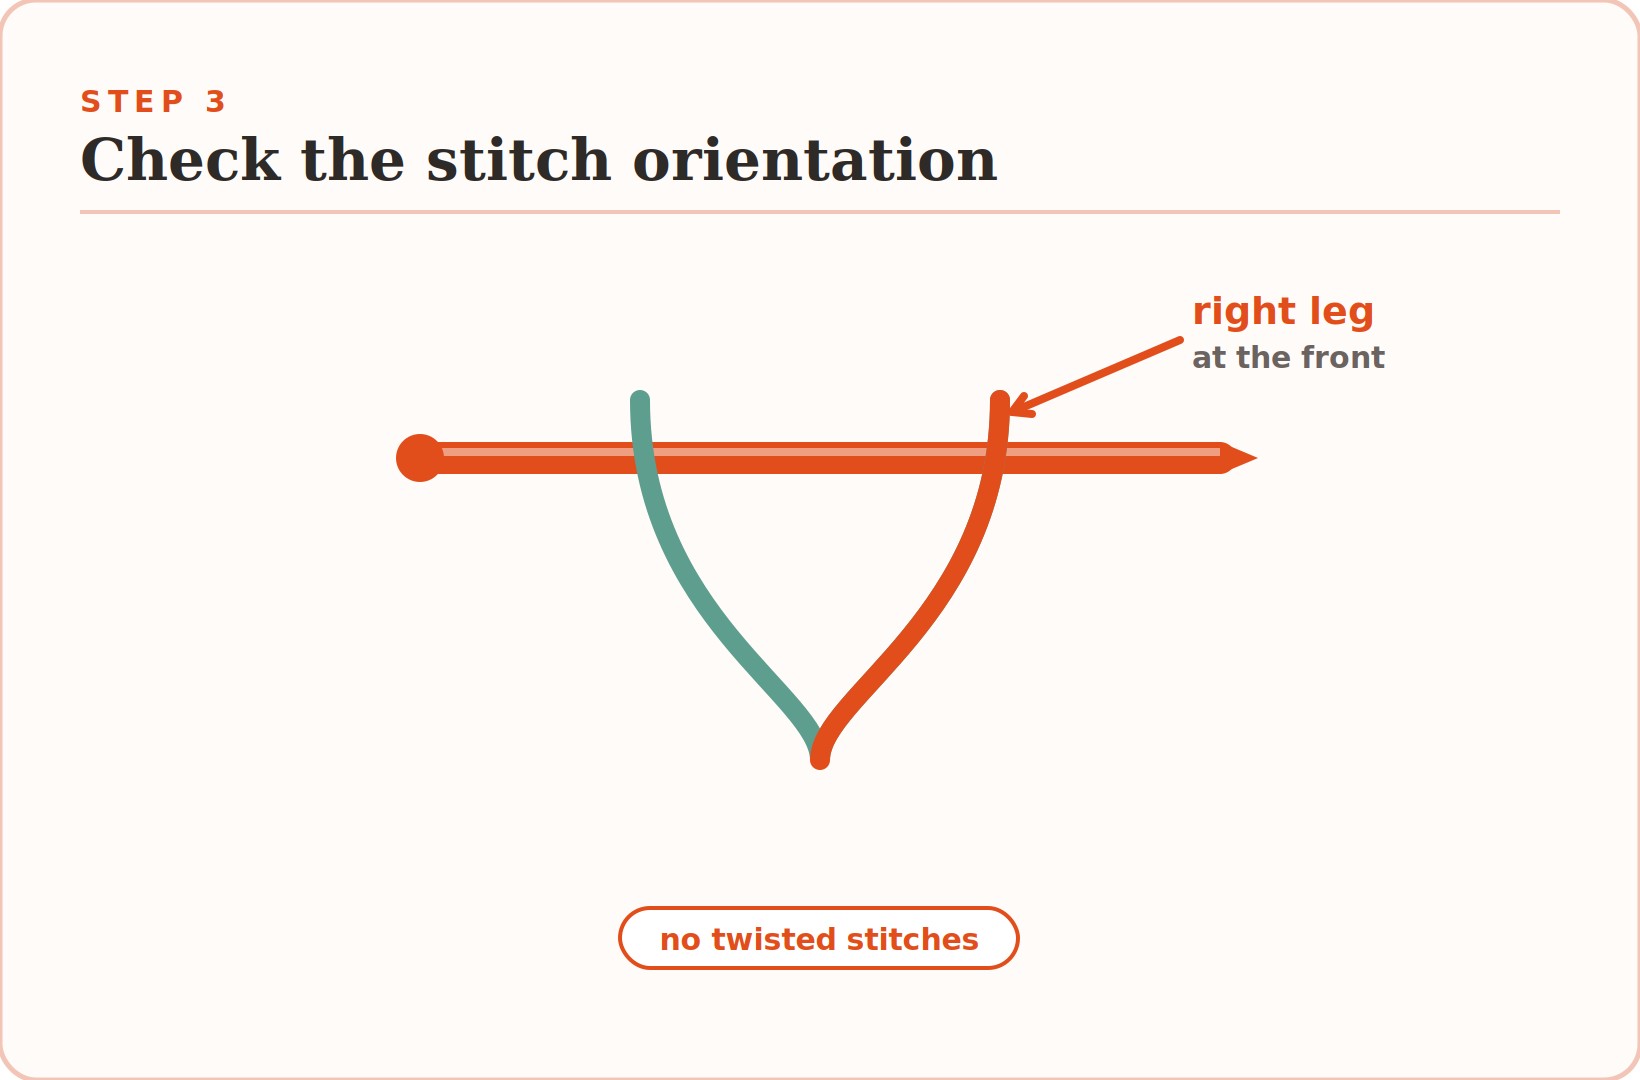
Step 3: Check Your Stitch Orientation
As you pick up each stitch, make sure it’s mounted correctly. Insert the needle so the right leg of the stitch sits at the front of the needle. This keeps your stitches from ending up twisted when you start knitting again. Take your time here; correct orientation now saves a headache later.

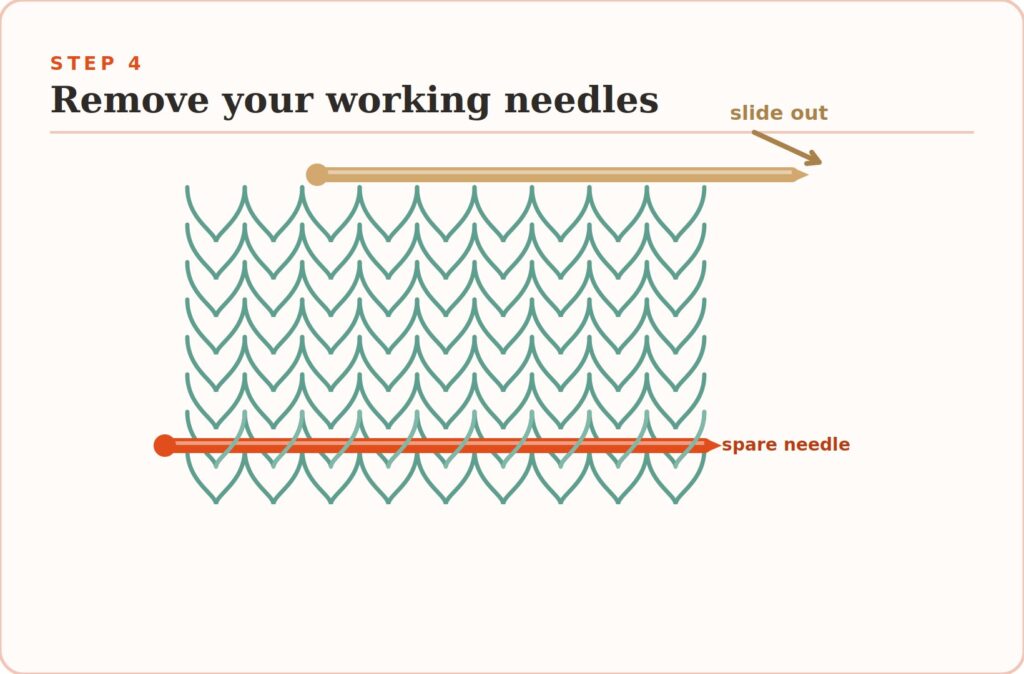
Step 4: Remove Your Working Needles and Rip
Once your stop row is fully secured on the spare needle, slide your live stitches off the working needles. Gently pull the working yarn to unravel your knitting row by row. Go slowly, especially with sticky or textured yarns, and wind the yarn back onto the ball as you unravel to avoid tangles and knots.
Step 5: Stop at the Lifeline
Keep unraveling until the ripping reaches your spare needle. It will stop there naturally; the secured stitches can’t come undone. Take a moment to count your stitches and confirm you have the right number on the needle.

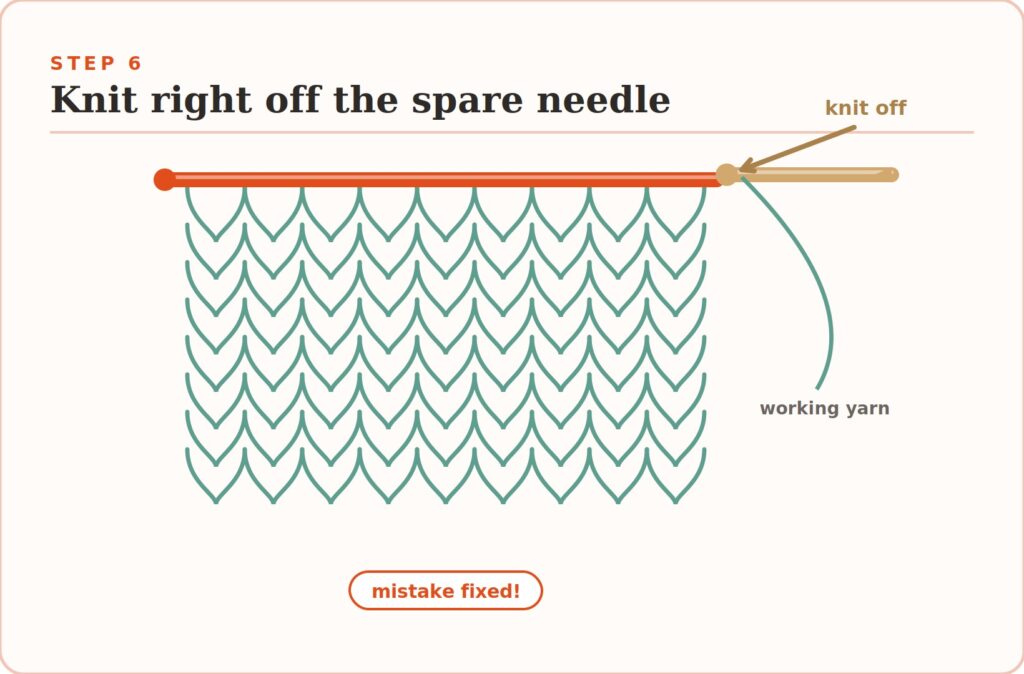
Step 6: Resume Knitting
Pick up your working needle and knit straight off the spare needle on your next row. If you used a smaller spare needle, simply work each stitch back onto your regular working needle as you go. Double-check the first row for any twisted stitches, then carry on as normal, mistake fixed and confidence intact — and that’s the whole knitting lifeline tutorial in six simple steps.
My Best Tips for Safe Frogging
- This method works best in simple stitch patterns with a purl row, like stockinette, stockinette-based cables, or plain eyelet, where the stitch legs are easy to read. Lace and heavy texture are trickier. (New to reading your stitches? The Craft Yarn Council’s standard knitting terms are a handy reference.)
- Treat frogging like surgery: sit in a well-lit spot, lay your work flat on a table, and give it your full attention.
- Smooth or superwash yarns unravel beautifully but can be slippery to pick back up. Go slowly so live stitches don’t slide away.
- Going forward, place a proper lifeline (smooth waste yarn threaded through a whole row) before you hit trouble, especially on complex projects, so you never have to pick up live stitches mid-rip again.
Frequently Asked Questions
What does “frogging” mean in knitting?
Frogging is the term for ripping out rows of stitches to undo your work. The name comes from the “rip it, rip it” sound, which echoes a frog’s “ribbit, ribbit.”
Can I use waste yarn instead of a spare needle?
Absolutely. A traditional lifeline uses smooth waste yarn threaded through a row of stitches. The spare-needle method shown here is a great on-the-spot rescue when you didn’t place a yarn lifeline ahead of time, and it lets you knit right off the needle afterward.
Will this work for lace or cable patterns?
It works best on simpler stitch patterns where the stitch legs are easy to identify. For intricate lace or dense cables, a pre-placed waste-yarn lifeline is safer because the stitches can be harder to read when you’re picking them back up.
How do I avoid twisted stitches when I pick them up?
Make sure the right leg of each stitch sits at the front of the needle as you thread it through. If a stitch looks twisted on your first row back, just knit into the back loop or re-seat it before working it.
More Knitting Tips & Tutorials
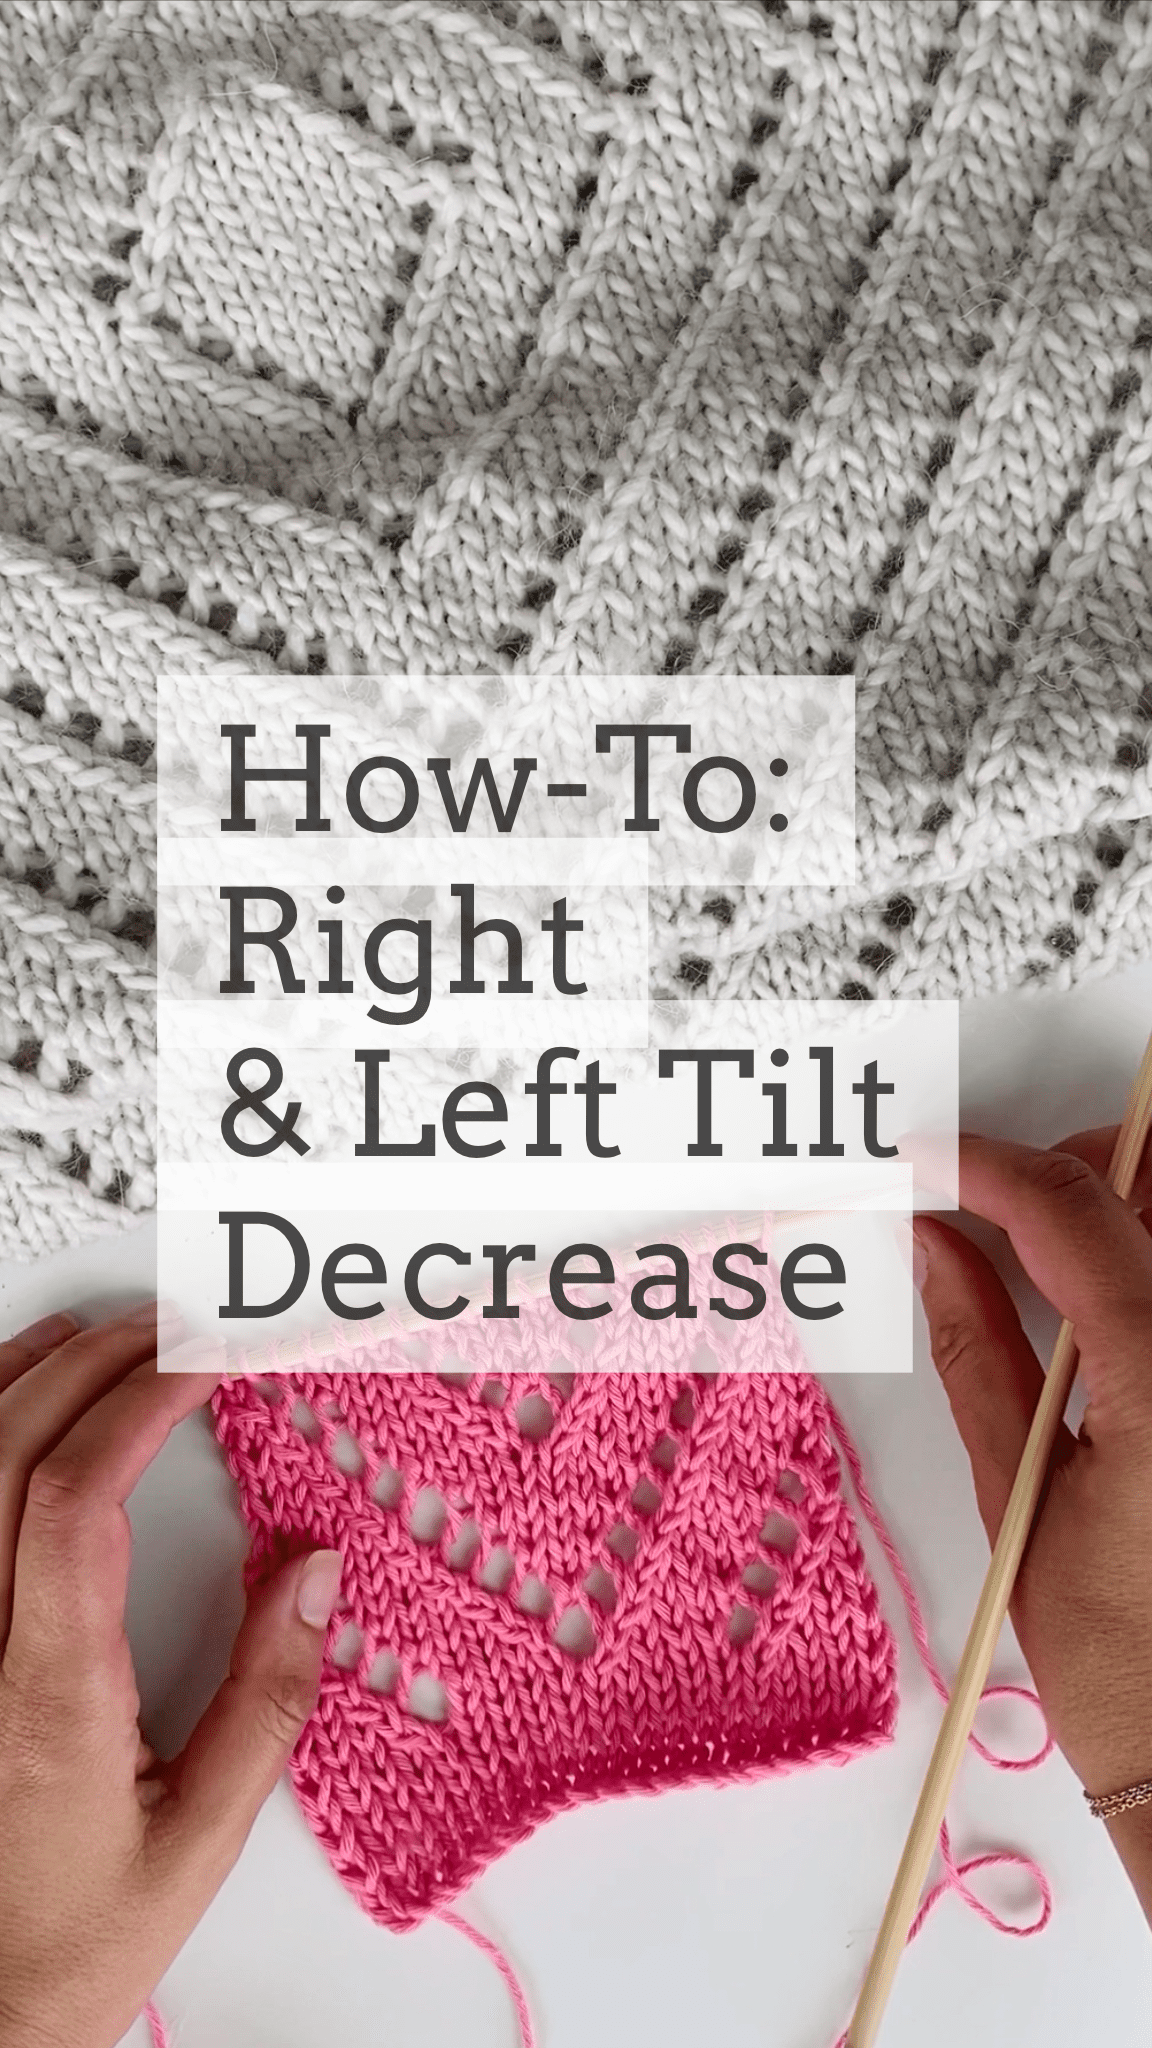
 Knit Tilt Decrease — Right & Left Slant Tutorial — clean, symmetrical decreases for shaping your knits
 Knit & Crochet Blocking Tutorial — the finishing step that makes your stitches look their best
 Mesh Stitch — Knit & Crochet Tutorial — an easy, airy stitch with free patterns to try it on
- How to Add Fringe to a Blanket — a simple way to finish off a cozy throw