Free Crochet All Adult Patterns Free Patterns
November 12th, 2026
Granny Stitch Sweater Crochet Pattern: The Sunday Granny (Free, No Seams)
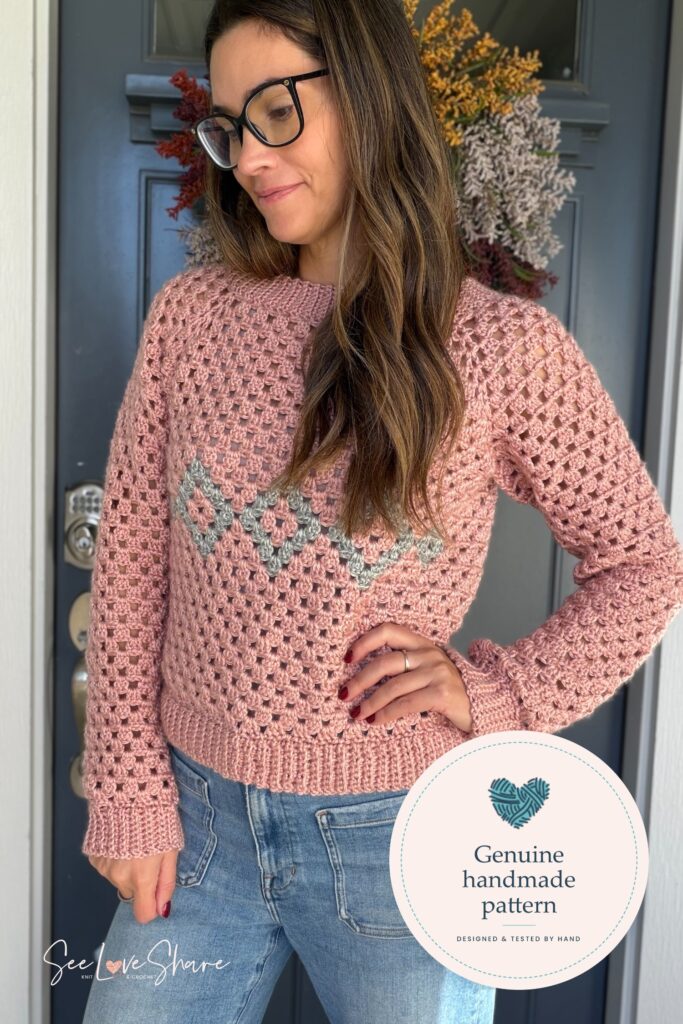
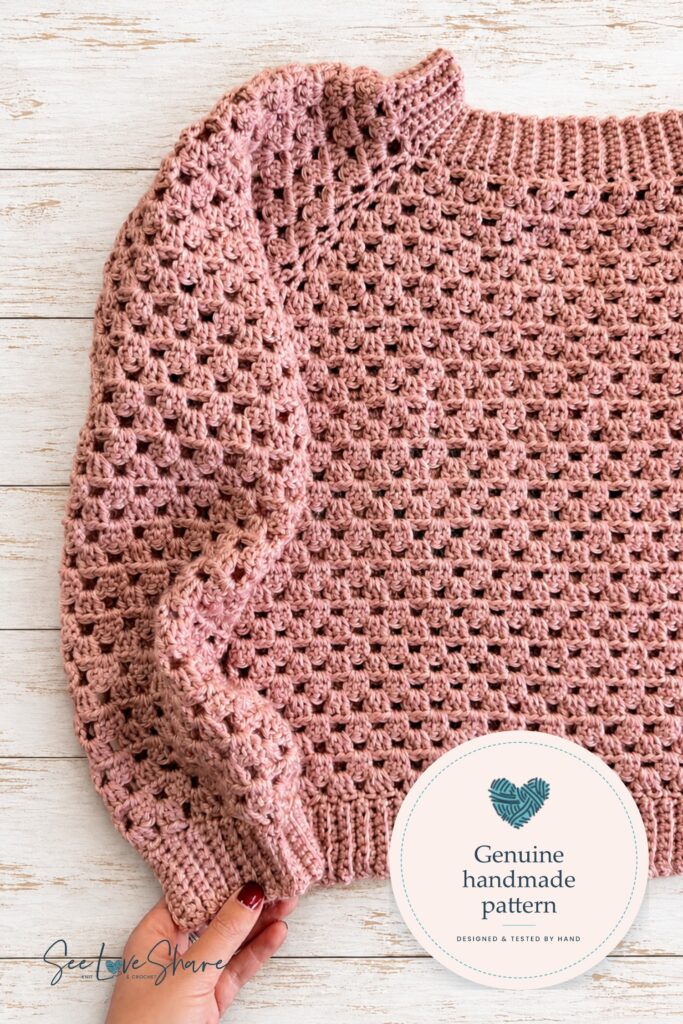
This free granny stitch sweater is the everyday pullover: granny clusters the whole way down, worked top down from a ribbed collar ring, so there are no seams anywhere and nothing is sewn. A four-point raglan yoke increases itself, then the body and sleeves grow straight down to soft ribbed bands that are joined on as you go.
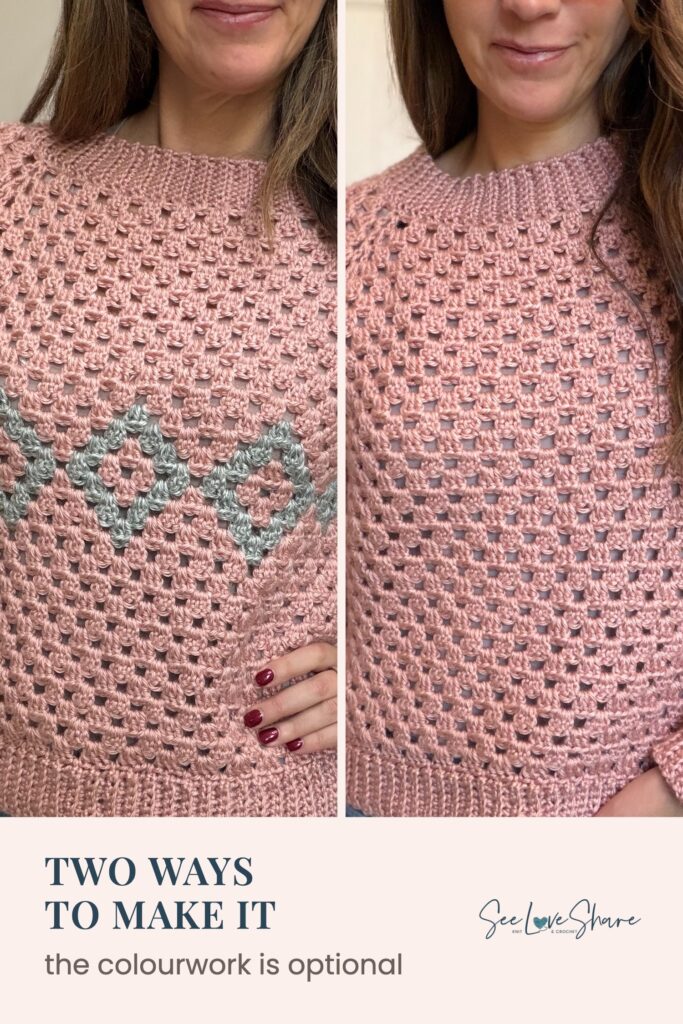
Make it plain, or add the optional band of colorwork diamonds across the chest. The full size S pattern is free right here on this page. All nine sizes, XS to 5X, are in the printable PDF.
Why You’ll Love This Granny Stitch Sweater
- No seams, nothing sewn. Collar, yoke, body, sleeves and bands are all one piece.
- One rhythm the whole way: work a cluster, skip 2. If you can make a granny square, you can make this sweater.
- The yoke increases itself. Four V-stitches mark the raglan lines and the yoke gains four clusters a round with no separate increase step.
- Optional colorwork diamonds across the chest, for a granny sweater that doesn’t look like everyone else’s.
- No blocking. Every length is a measurement, with fit checks as you go.
- Nine sizes, XS to 5X, in the printable PDF.
Prefer to print?
The ad-free printable PDF
Every size from XS to 5X, the full schematic, yarn amounts for every size, and both colorwork charts, in one clean printable with no ads and no scrolling.
Get the PDF on Etsy → Or on Ravelry →Use code SEELOVE15 for 15% off
What’s Free Here, and What’s in the PDF
The whole granny stitch sweater pattern is on this page. Not a teaser, not a summary. Every round, every cluster count, every checkpoint, in size S, including the written colorwork steps. Work straight down this page and you will finish a sweater.
The printable PDF is for when you want a different size, the colorwork chart, the step-by-step photo tutorial, or a copy you can print and mark up.
| Free on this page | Printable PDF | |
|---|---|---|
| Full pattern, size S | yes | yes |
| Optional colorwork, written steps | yes (size S) | yes |
| Colorwork charts | no | yes, both |
| Step-by-step photo tutorial | no | yes |
| Sizes XS, M, L, XL, 2X, 3X, 4X, 5X | no | yes |
| Schematic | no | yes |
| Yarn amounts for every size | no | yes |
| Ads | yes, sorry | none |
Check the neck first
Two things matter more than anything else in this pattern:
- Put the collar over your head the moment the ring is closed, before a single cluster goes on. This is the one thing a pullover can get wrong that a cardigan cannot, and it is unrecoverable late. Twenty minutes of work at risk instead of a day.
- Your ribbing gauge is not optional. The hem and cuffs are joined as you go, and how many rows of ribbing travel an inch is what sets the join rhythm. There is a checkpoint on every band.
Want a top-down cardigan instead? My First Cardi and the Striped Crochet Cardigan use the same no-seams, no-blocking approach, and both are free in size S too.
Materials
|
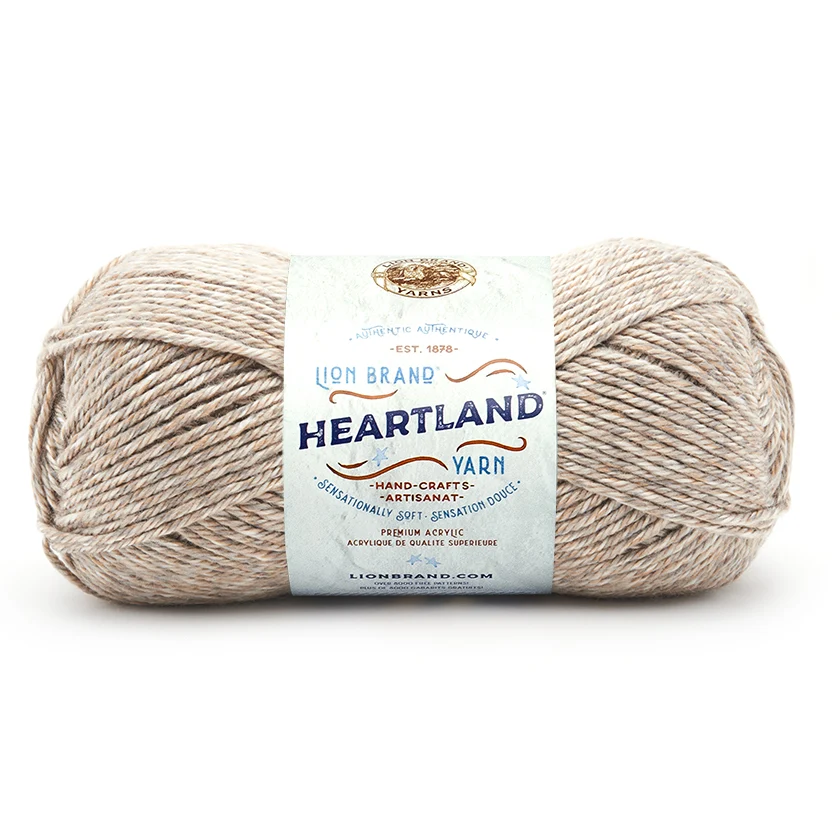
The yarn I used Lion Brand Heartland · Capitol ReefWorsted #4, 100% acrylic, 251 yds per skein. 5 skeins for size S, about 929 yards, plus a leftover ball of Great Smoky Mountains for the colorwork. Get Heartland → |
- Yarn: Lion Brand Heartland, #4 worsted, 100% acrylic, 5 oz / 142 g / 251 yds. 5 skeins for size S. Main color shown in Capitol Reef.
- Size S uses about 929 yards.
- Buy five, not four. 929 yards is 3.7 skeins, so four would run out in the hem band. Five covers a swatch and a cushion.
- Any worsted #4 that meets gauge will work.
- Contrast (colorwork only): about 25 yards of Lion Brand Heartland, shown in Great Smoky Mountains. A job for a leftover ball. Pick two shades with a clear difference in lightness, not just color, or the diamonds won’t read through the open granny fabric.
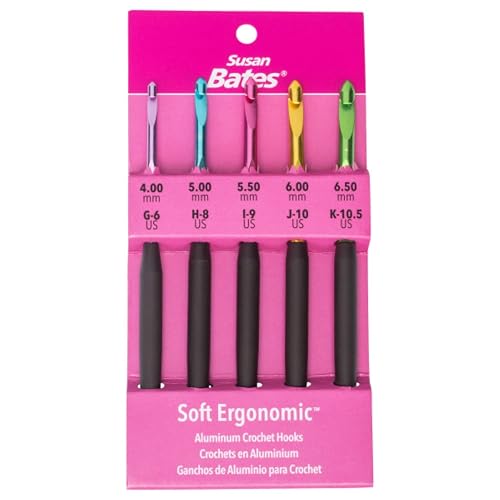
- Hooks: 5.50 mm (I-9) for the cluster fabric · 5.00 mm (H-8) for the collar, hem and cuffs. The Susan Bates Silvalume set has both.
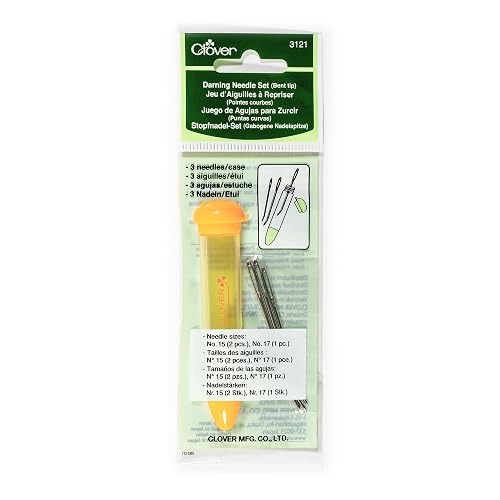
- Tapestry needle, bent tip for preference: Clover Chibi
- Measuring tape: you’ll measure this one a lot. iBayam tape measure
- Scissors, and one stitch marker for center front if you’re working the colorwork
Shop the materials
Pattern Details
Skill level: advanced beginner. Size: S (to fit a 34 in bust). Finished bust: 38 in, so +4 in of ease. Written in US crochet terms.
| Finished bust | 38 in |
| Body length from underarm | 13 in (11 in of clusters + the 2 in hem band) |
| Sleeve length from underarm | 21 in (19 in + the 2 in cuff) |
| Yoke depth | about 5¼ in from the collar |
| Collar, hem and cuffs | 2 in deep |
| Hem band, relaxed | about 33 in around |
| Cuff, relaxed | about 7 in around |
Gauge: 4 granny clusters and 8 rounds = 4 in on the 5.50 mm hook (one cluster is 1 in wide, one round is ½ in tall). 16 sc = 4 in and 23 rows = 5 in in sc BLO on the 5.00 mm hook. Written to fit straight off the hook, so don’t block your swatch.
Construction: you begin with a strip of sc ribbing worked flat and joined into a ring. That ring is the collar, and the neck is finished before anything else. A setup round of sc goes on top, four V-stitches mark the raglan lines, and the yoke grows from there in joined, turned rounds. At the underarm the body and sleeves separate; the body is worked straight to the hem and each sleeve is worked down. Nothing is sewn together at any point.
Notes
One rhythm, the whole garment: work a cluster, skip 2. That holds at the setup round, through every yoke round, and across the underarm chain. Worked positions always sit three apart.
Rounds are joined and turned, including the body and sleeves. Ch 1 between clusters is a spacing chain, not a stitch, and stitch counts at the end of each round count clusters, not individual stitches.
Give the body a measurement, not a round count. Acrylic relaxes under its own weight once there is length hanging, so measure with the sweater on, or held up by the shoulders. Laid flat it reads short. Sleeve length follows your arm, not your bust: try the first sleeve on before you make the second.
No blocking. Round height is not the same everywhere in this garment (the yoke gains more depth per round than the body, and sleeve rounds come out a little taller than body rounds), so every length is given as a measurement. Round counts are a guide only.
The colorwork is optional. The pullover is written plain; for the diamonds, work the colorwork section in place of body rounds 4 to 10. Everything else is identical.
Abbreviations
| ch | chain | rnd | round |
| sl st | slip stitch | rep | repeat |
| sc | single crochet | sk | skip |
| dc | double crochet | sp | space |
| V-st | V-stitch (see Special Stitches) | RS | right side |
| J | join (see Special Stitches) | WS | wrong side |
| BLO | back loop only | st(s) | stitch(es) |
Special Stitches
- Cluster: 3 dc worked into one ch-1 space.
- V-stitch (V-st): (dc, ch 1, dc) into one stitch or space. The ch-1 at its center is the raglan point, where the next round’s V-stitch goes.
- Granny decrease: skip one ch-1 space and work the next cluster into the following space. Takes out one cluster; used on the sleeves.
- Join (J): sl st into the next join point on the garment edge, at the end of a band row.
Setting the join rhythm
A join-as-you-go band adds two rows of ribbing for every join, and where you place the joins sets the band’s length. The rhythms here were calculated at 4.6 ribbing rows per inch.
Using a different yarn? Work ten joins, then lay the band against the edge beneath it. Band longer than the edge means fewer joins; shorter means more. Every band has a checkpoint, so use them.
The Pattern
Written for size S. For any other size, grab the PDF.
Collar
Worked flat in rows, then joined into a ring. With the 5.00 mm hook and the main color:
Row 1: Ch 9. Sc in 2nd ch from hook and in each ch across, turn. (8 sc)
Row 2: Ch 1, sc BLO in each st across, turn. (8 sc)
Rep Row 2 until the strip measures 20⅞ in, about 96 rows.
Bring the two short ends together without twisting and sl st or whipstitch them through the back loops, so the join reads as one more ridge.
Put it over your head now. Ribbing stretches, and this is sized to go on comfortably. If it doesn’t, add rows before you go any further. Nothing downstream can fix a neck that doesn’t fit.
Setup Round
Still with the 5.00 mm hook, join the main color at the collar seam.
Setup: Work 1 sc into the end of each row all the way around the ring, sl st to the first sc to join. (96 sc) Switch to the 5.50 mm hook.
One stitch per row-end, so your collar’s row count becomes this round’s stitch count. That is why the collar is measured rather than guessed.
Yoke
Four V-stitches mark the raglan lines; everything between them grows.
Rnd 1: Ch 4 (counts as dc, ch 1), dc in the same st, so the round opens on a V-stitch at the collar seam. Then, working “ch 1, sk 2, work the next unit” throughout: 9 clusters (back) · V-st · 5 clusters (sleeve) · V-st · 9 clusters (front) · V-st · 5 clusters (sleeve). Ch 1, sk 2, sl st into the ch-1 space of the first V-stitch to close. (28 clusters and 4 V-sts)
Every unit sits on three foundation stitches, cluster or V-stitch alike, so the units use all your setup stitches exactly. The round must open on a V-stitch: open it on a cluster and the join walks off the raglan line.
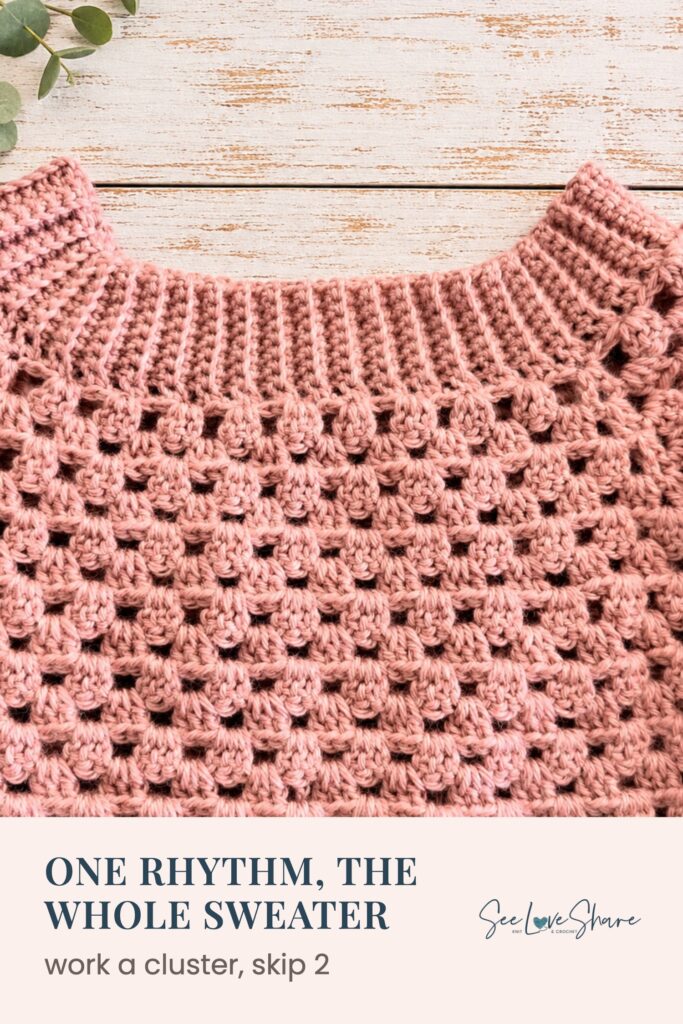
Following rounds: one unit into every ch-1 space: a cluster into each space between units, a V-stitch into each V-stitch’s own center space. There is no separate increase step. A V-stitch leaves two spaces behind it and a cluster leaves one, so the yoke gains 4 clusters a round, one per section, on its own.
To open each round: after the last cluster, ch 1, sl st into the top of the round’s starting stitch, turn, then sl st across to the raglan V-stitch’s ch-1 space, ch 4, dc in that space. Turning drops you one space short of the V, and the sl st walk puts you back on it.
The space you slip-stitched over still needs its cluster. It is the last space you reach at the end of the round, just before the closing ch 1.
Work 9 rounds in all. Ending counts: back and front 17 clusters each; each sleeve 13 clusters. (60 clusters and 4 V-sts)
Measurement check: the yoke should measure about 5¼ in deep from the collar, and the V-stitches should sit at your underarm when you try it on. If it doesn’t quite reach, work one more round in the same rhythm. Every extra yoke round adds about 2 in of finished bust, so add it to reach your underarm and nothing else.
Divide
Fasten off and rejoin with a slip knot at the first ch-1 space of a body section. (Turning leaves you on a sleeve, and slip-stitching across a sleeve would ridge the exact edge the sleeve is picked up from later.)
- Ch 3, 2 dc in that space (your first cluster), *ch 1, 3 dc in next ch-1 sp* across the body section. (17 clusters)
- Sl st past the V-stitch, then ch 4 for the underarm, skipping the V-stitch, all the sleeve clusters, and the next V-stitch.
- 3 dc in the next ch-1 sp, *ch 1, 3 dc in next ch-1 sp* across. (17 clusters)
- Sl st past the V-stitch, ch 4 for the second underarm, same skips.
- Sl st to the top of the beginning ch 3 to close. (34 clusters and 2 underarm chains)
Slip stitch past the V-stitch before you chain. Chaining from where the yarn naturally sits leaves half a V-stitch hanging off the body edge. Chain loosely: these stitches get worked into twice, once for the body and once for the sleeve.
Body
Rnd 1: Open with ch 3 and 2 dc in the same place, so the round begins on a full cluster. Work *ch 1, 3 dc in next ch-1 sp* around, putting 2 clusters into each underarm chain (cluster in the 1st ch, sk 2, cluster in the next). Sl st to the top of the beginning ch 3, turn. (38 clusters)
A turning chain left standing alone as a single post is not a cluster, and it loses you a stitch group every round. Always ch 3 plus 2 dc.
Measurement check: your clusters should measure 38 in around.
Rnds 2 and 3: Ch 3 and 2 dc in the first ch-1 sp, *ch 1, 3 dc in next ch-1 sp* around, sl st to close, turn.
Rnds 4 to 10: Plain, the same as Rnds 2 and 3. For the colorwork version, work the colorwork section below on these seven rounds instead.
Rnds 11 onward: Continue in plain rounds until the body measures 11 in from the underarm, about 22 rounds (your count may differ). The 2 in hem band takes the finished length to 13 in.
Do not fasten off. That loop starts the hem band.
Colorwork (optional)
Seven rounds of contrast diamonds across the front only, worked on body rounds 4 to 10. Skip this section entirely for the plain version. Size S uses the wide chart: a 16-cluster block. One square is one granny cluster; read each round top down, in the order you work it.
The colorwork chart is in the printable PDF, along with the step-by-step photo tutorial. Use code SEELOVE15 for 15% off.
Find center front first. Lay the sweater flat with the front facing you and the underarm folds at the sides. Count the clusters across the front: 19. Mark center front at cluster 10. The block is centered on that marker; the plain clusters either side are whatever is left over.
Read the chart from center front outward, not from an edge. On the offset rounds (2, 4 and 6), counting from the left edge and from the right edge give different answers, because those rounds sit half a cluster across. The center marker is the only anchor that works from either direction. Because the work turns, read the chart in the direction you are going.
Changing color: make the change on the last yarn over of the stitch before the one that needs it, so the new color is already on the hook.
Don’t float the contrast across the back. Granny fabric is open, and a float shows through the ch-1 spaces as dashes on the right side. Lay the carried strand along the top of the previous round’s spaces and make your clusters over it, so it is encased. The longest run of main between contrast clusters is 3 clusters, so the carries are short. Check the right side after the first colorwork round before you commit to six more.
Because the work turns, the contrast is dropped at one end of the block and the next round arrives back at that same end. Don’t cut and rejoin each round: the whole band costs two ends. The chart reads the same from either end, so you can’t put it in upside down.
The colorwork rounds may not work up to exactly the same height as plain rounds, since working over a carried strand changes the tension a little. That’s why the body is given as a measurement: measure as you go and both versions finish the same length.
Hem Band
Worked sideways in sc BLO, joined to the body as you go. Switch to the 5.00 mm hook. This band doesn’t gather: it comes out slightly shorter than the edge, which stops a straight hem flaring.
The join points are 2 per cluster: the ch-1 space, and the center dc of each cluster. (76 joins)
Row 1: Ch 9 straight from the loop on your hook. Sc in 2nd ch from hook and in each ch across, then J into the ch-1 space nearest the round’s seam, turn. (8 sc)
Row 2: Ch 1, sc BLO in each st across, turn. (8 sc)
Row 3: Ch 1, sc BLO in each st across, then J, turn. (8 sc)
Rep Rows 2 and 3 all the way around. (152 rows)
Don’t count the joins. Put one in each ch-1 space and one in each center dc, and the count takes care of itself. A cluster that has picked up three joins, or one, shows immediately against its neighbors.
Checkpoint at 10 clusters (20 joins, 40 rows): let the band relax and measure it. It should read about 8¾ in against 10 in of body edge. Running longer means it will ruffle, so drop a join; much shorter means it will drag, so add one.
To close: sl st or whipstitch the last row to the foundation chain edge through the back loops. Fasten off. The band is 2 in deep and about 33 in around relaxed.
Sleeves
Both the same. Don’t work the second until you have tried the first one on.
Rnd 1: With the 5.50 mm hook, join the main color at the underarm. Ch 3 and 2 dc into the first free loop of the underarm chain (your first cluster), then work the rest of the underarm clusters across the chain. Ch 1 over the V-stitch without working into it. Work clusters across the sleeve, ch 1 over the second V-stitch, sl st to the top of the beginning ch 3 to close, turn. (16 clusters)
The V-stitches are skipped, not worked and not slip-stitched across. A ch 1 spans each one, exactly like any other granny skip, so the seam stays at the underarm. Working them in adds 2 in to the sleeve top, which reads bulky on the arm.
Plain round: Ch 3 and 2 dc in the first ch-1 sp, *ch 1, 3 dc in next ch-1 sp* around, sl st to close, turn.
Decrease round: Ch 3 and 2 dc in the first ch-1 sp, ch 1, skip the next sp, 3 dc in the sp after it, then *ch 1, 3 dc in next ch-1 sp* around, sl st to close, turn. (1 cluster fewer)
Decrease on rounds 5, 9, 13 and 17 (4 decrease rounds). Every other round is plain. That takes you from 16 clusters down to 12. The decrease sits at the underarm; because the work turns, it falls alternately either side of the seam, which keeps the taper balanced.
After the last decrease, work plain rounds until the sleeve measures 19 in from the underarm, about 35 rounds (your count may differ). The 2 in cuff takes the finished sleeve to 21 in.
Try it on before the cuff. Lay the sleeve down your arm from the garment’s underarm and pinch where you want the cuff to end; the cuff adds 2 in. Don’t work this out from an underarm-to-wrist measurement off your body: a raglan underarm doesn’t sit where your armpit does. Any round you add is a plain round.
Adjusting the width: try the sleeve on at the last decrease round. It should skim your forearm with room to move, not grip. Too snug: stop decreasing and work plain to length. Too loose: work one more decrease round in the same rhythm. Nothing else changes; the cuff joins follow your cluster count on their own.
Do not fasten off. That loop starts the cuff.
Cuffs
Switch to the 5.00 mm hook. This is the one band that gathers, on purpose: a one-to-one band would give you a tube at the wrist, not a cuff. Expect it to look short while you work it. That is the gather doing its job.
The join points are every ch-1 space, plus the center dc of every third cluster. (16 joins)
Row 1: Ch 9 straight from the loop on your hook. Sc in 2nd ch from hook and in each ch across, then J, turn. (8 sc)
Row 2: Ch 1, sc BLO in each st across, turn. (8 sc)
Row 3: Ch 1, sc BLO in each st across, then J, turn. (8 sc)
Rep Rows 2 and 3 around the sleeve. (32 rows)
Checkpoint at half the joins: the band should measure about half its finished length against roughly 6 in of sleeve edge. It’s supposed to be short. If it’s matching the sleeve edge inch for inch, you’ve lost the gather.
To close: sl st the final row to the foundation edge through the back loops. Fasten off. The cuff is 2 in deep and about 7 in around relaxed. It must stretch over your hand, so check it before you make the second sleeve.
Finishing
- Weave in the ends. They sit at the underarms, the collar seam and, if you worked the colorwork, its two ends.
- Optional: a light steam on the collar, hem and cuffs helps them settle. It isn’t needed for fit. There is nothing to seam and nothing to block. You’re done!
Get the printable granny stitch sweater pattern
Want a different size, or a copy you can print and circle your numbers on? The PDF has everything.
Want your size?
Sunday Granny Sweater: the full printable PDF
All nine sizes XS to 5X, the schematic, yarn amounts for every size, both colorwork charts, and fit checkpoints on every band. Instant download, no signup.
Get the PDF on Etsy → Or on Ravelry →Use code SEELOVE15 for 15% off
Granny Stitch Sweater Tips
- Check the neck before the first cluster. It’s the only mistake that costs you the whole yoke.
- Always open a round with ch 3 plus 2 dc, never a lone ch 3, or you lose a cluster every round.
- Measure the body hanging, not flat. Acrylic stretches under its own weight.
- Pick colorwork shades by lightness. Two colors of similar value disappear into the open granny fabric.
- Trust the cuff. It’s meant to look short while you work it.
More Patterns You’ll Love
 My First Cardi: a free beginner crochet cardigan, top down, no seams, with pockets
- Striped Crochet Cardigan: the same seamless top-down construction, cropped, in stripes
 Granny Square Cardigan: a free granny crochet cardigan with a completely different look
- Diamond Stitch Crochet Top: a short-sleeve raglan, free plus PDF
- Free Crochet Cable Beanie: braided cables and a fold-up cuff
Granny stitch sweater FAQ
Is this granny sweater beginner friendly?
It’s written for an advanced beginner. If you can make a granny square and work single crochet in the back loop, you have every stitch you need. The whole garment repeats one rhythm: a cluster, then skip 2.
How much yarn do I need?
Size S uses about 929 yards of worsted, so buy 5 skeins of Lion Brand Heartland. The colorwork needs only about 25 yards of a contrast color. Yarn amounts for every size are in the PDF.
Can I use a different yarn?
Yes, any worsted #4 that meets gauge. Check your ribbing gauge too: the bands are joined as you go, and the join rhythm depends on how many ribbing rows make an inch. Each band has a checkpoint so you can adjust.
Do I need to block it?
No. It’s written to fit straight off the hook. A light steam on the bands is optional.
How do I make it longer or shorter?
Work plain body rounds until it measures what you want from the underarm, measured on the body. The hem band adds 2 in. Extra length uses extra yarn, so buy accordingly.
Do I have to do the colorwork?
No. The sweater is written plain. The diamonds replace body rounds 4 to 10 and nothing else changes.
Is there a bigger size?
Yes. The printable PDF covers nine sizes, XS to 5X, for a finished bust of 34 to 68 in.
Can I sell what I make from this pattern?
Yes, you’re welcome to sell finished sweaters made from this pattern. Please don’t copy, share or resell the pattern itself.