
October 8th, 2020
Crochet Pumpkin Wreath — Free DIY Fall Tutorial
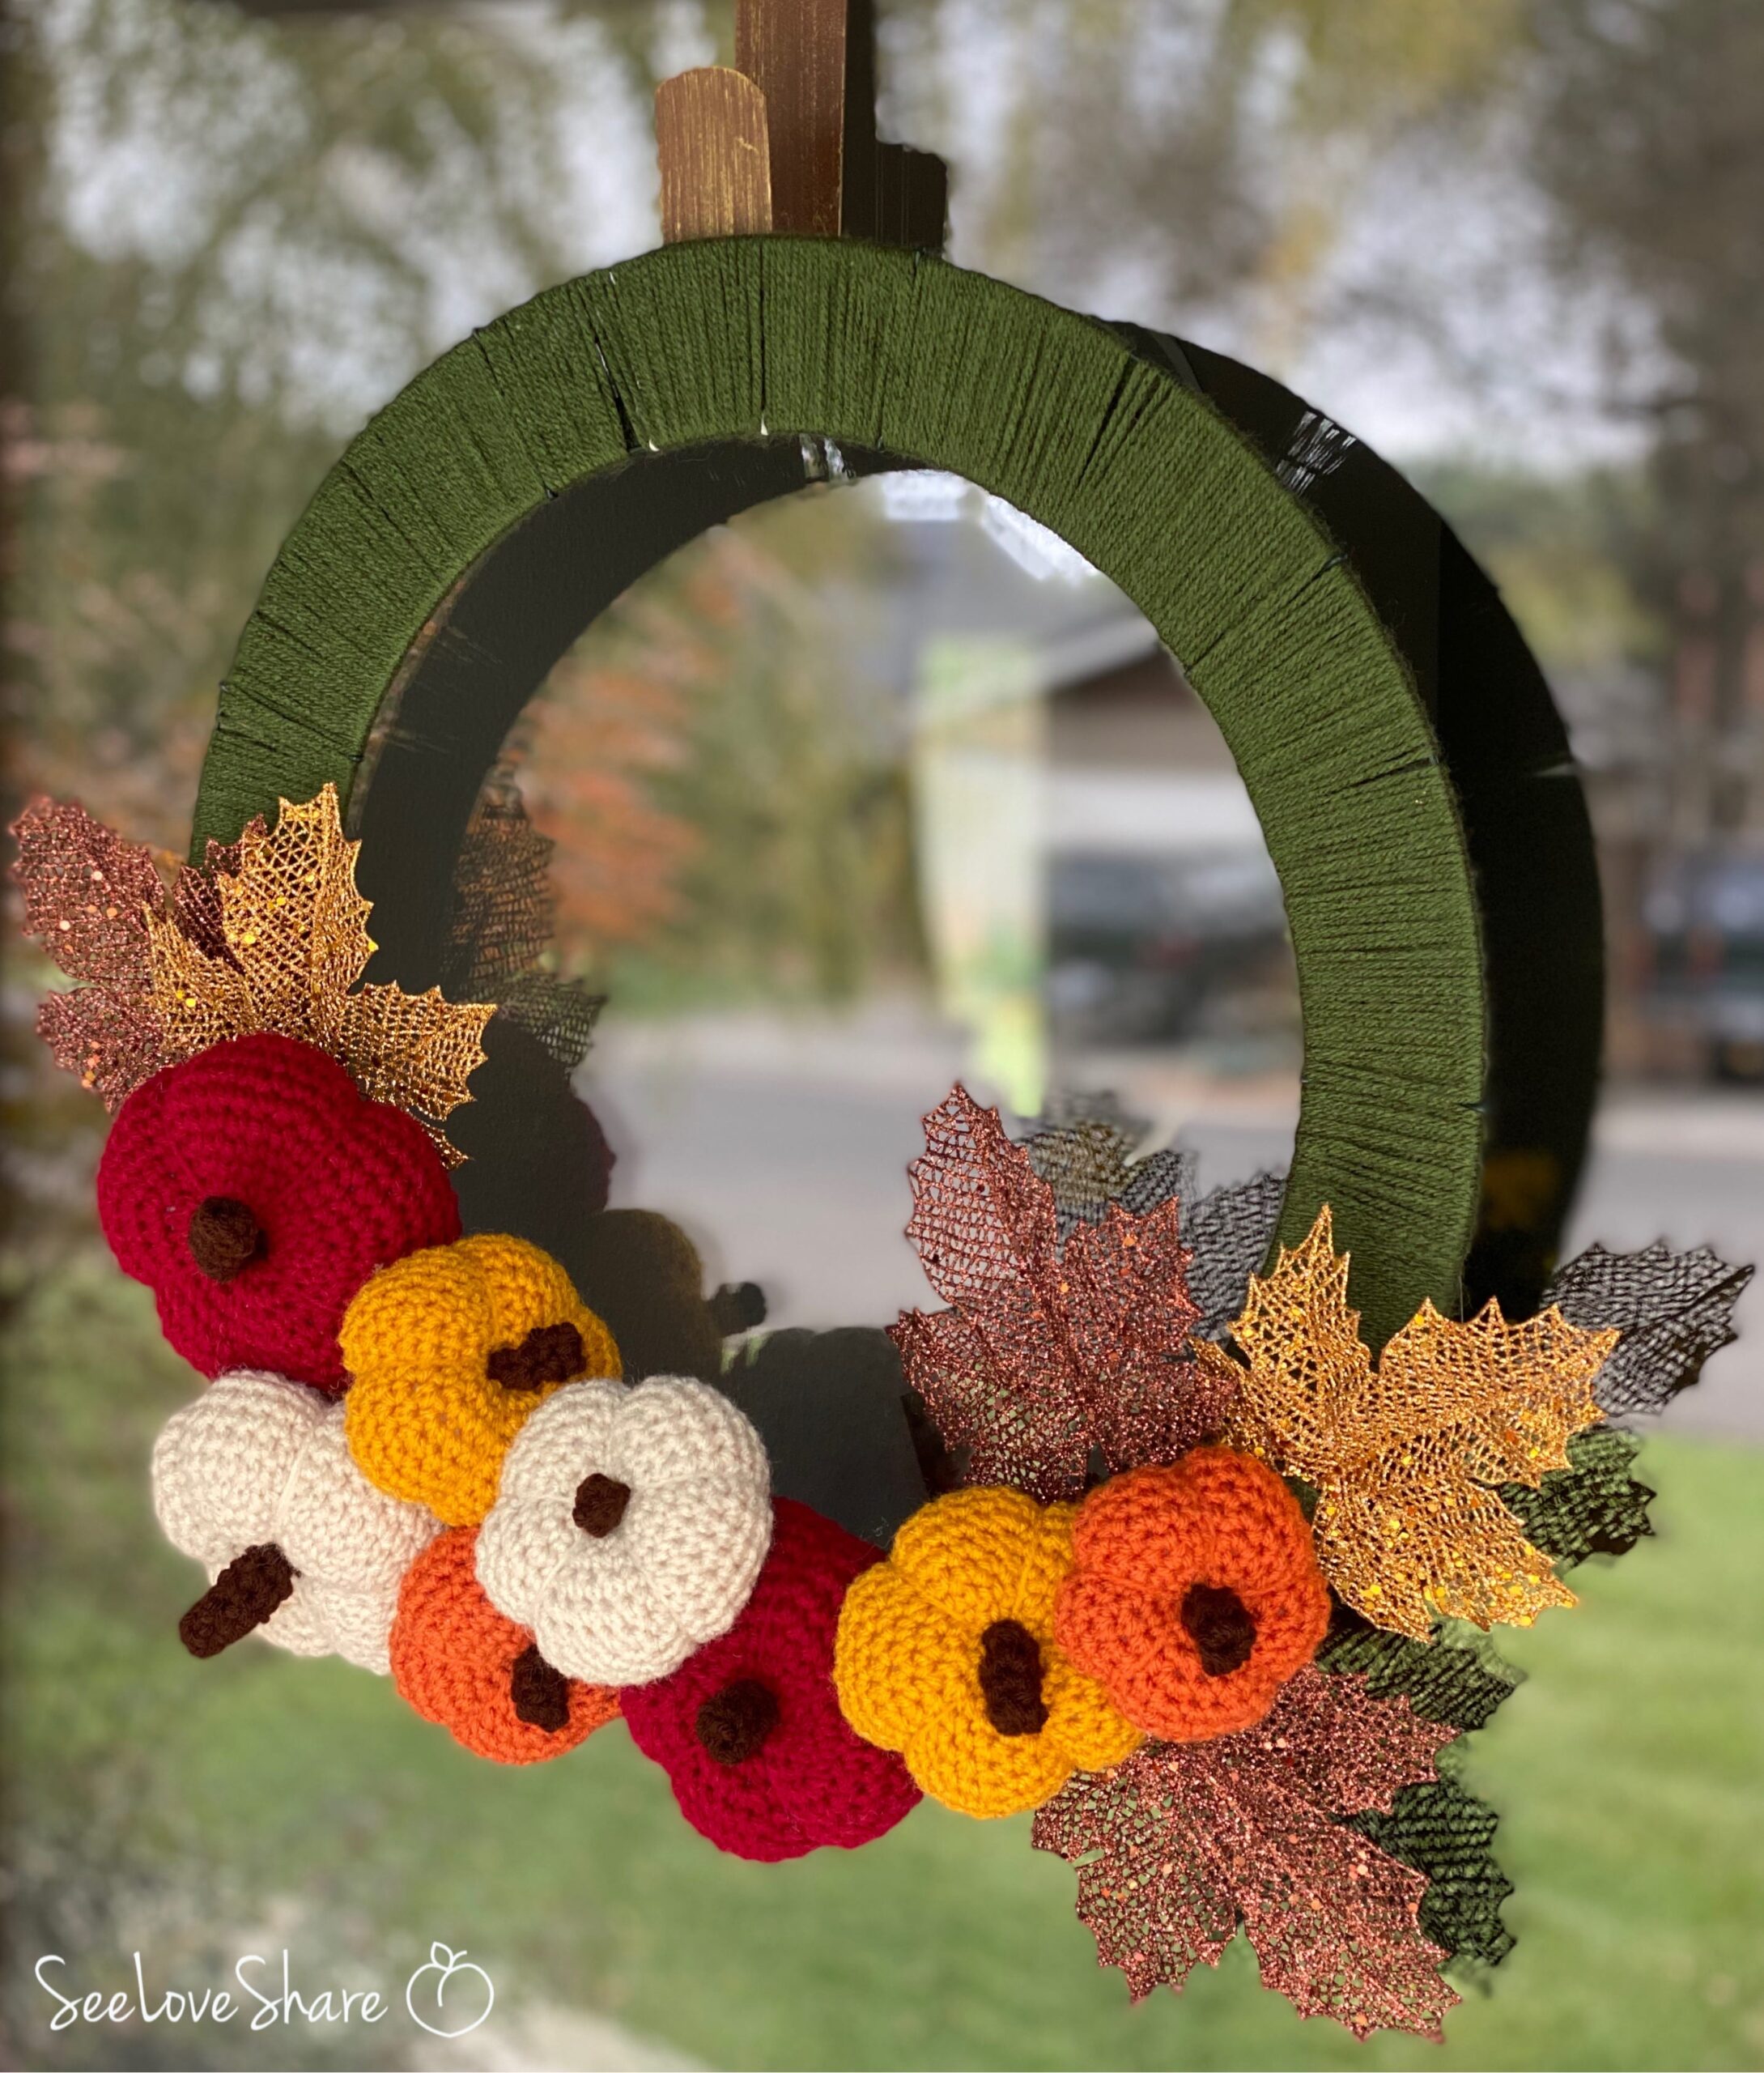
This crochet pumpkin wreath is the cosy, handmade fall door piece that makes everyone stop and smile. Built on a simple wire frame wrapped in green yarn and covered with multi-sized mini crochet pumpkins, it comes together in an afternoon and lasts season after season.
I made this crochet pumpkin wreath when I moved into my new house — new home, new wreath rule! As soon as September rolls around I’m all about pumpkin season, and this design uses a mix of three pumpkin sizes in warm fall colourways for a layered, textural look that beats anything you can buy off the shelf.
Why You’ll Love This Crochet Pumpkin Wreath
This crochet pumpkin wreath is the kind of project that looks impressive but is really just an afternoon of stitching plus a fun assembly session. The multi-sized pumpkin approach gives it visual depth and the freedom to play with colour combinations.
- ✅ Uses one free mini pumpkin pattern in three sizes — quick stash-busters that come together in 15–20 minutes each
- ✅ Customizable colour palette — mix and match warm fall tones for a layered, textural look
- ✅ No-sew assembly option — a glue gun makes attaching the pumpkins fast and forgiving
- ✅ Lasts for years — store flat between seasons and pull it out every September
- ✅ Perfect stash-buster — uses small amounts of multiple yarn colours you already have
- ✅ Beginner-friendly project — basic crochet stitches plus simple wrapping and assembly
Crochet Pumpkin Wreath Project Details
| Skill Level | Beginner — basic crochet stitches plus simple assembly |
| Construction | Wire wreath frame wrapped in yarn, mini pumpkins attached with glue gun or sewn |
| Finished Size | Depends on your wreath frame (standard 14–18 in works well) |
| Pumpkin Count | 8 mini pumpkins (3 large, 3 medium, 2 small) |
| Time to Make | Plan on one weekend — about 4 hours of crochet plus 1 hour of assembly |
| Yarn Used | Worsted weight (#4) in 5–7 pumpkin colours + green for wrapping |
Materials for the Crochet Pumpkin Wreath
- 🧶 Red Heart Super Saver yarn in assorted pumpkin colours. I used: Pumpkin, Aran, Gold, Burgundy, Carrot, Coffee (for the stems), and Medium Thyme (to wrap the wreath wire)
- 🌿 Wire wreath frame — standard 14–18 in size works beautifully
- 🪝 Wreath hanger for over-the-door display
- 🔥 Hot glue gun (this is the faster assembly option — sewing also works)
- 🌟 Polyfil stuffing for the mini pumpkins
- 🧵 Tapestry needle for finishing and the sew-on assembly option
- 🍃 Decorative leaves (optional but lovely — silk or felt fall leaves layered in)
Shop the materials


Yarnspirations stocks the full Red Heart colour range if you want more pumpkin shades. The Craft Yarn Council yarn weight system has a helpful chart if you want to substitute yarn.
Love Pumpkin Patterns?
Crochet Cable Pumpkin Pattern
If you love the cosy fall vibe of this wreath, my Crochet Cable Pumpkin is one of my bestselling Etsy patterns — beautiful cabled texture, beginner-friendly. Use code SEELOVE15 for 15% off.
How to Make the Crochet Pumpkin Wreath
Step 1: Make Your Mini Pumpkins
Start by making 8 mini pumpkins in the colours of your choosing. Grab my FREE mini crochet pumpkin pattern — it makes pumpkins in three sizes so you can build a layered, textural wreath.

For this crochet pumpkin wreath I made 8 pumpkins total:
- 3 large minis
- 3 medium minis
- 2 small minis
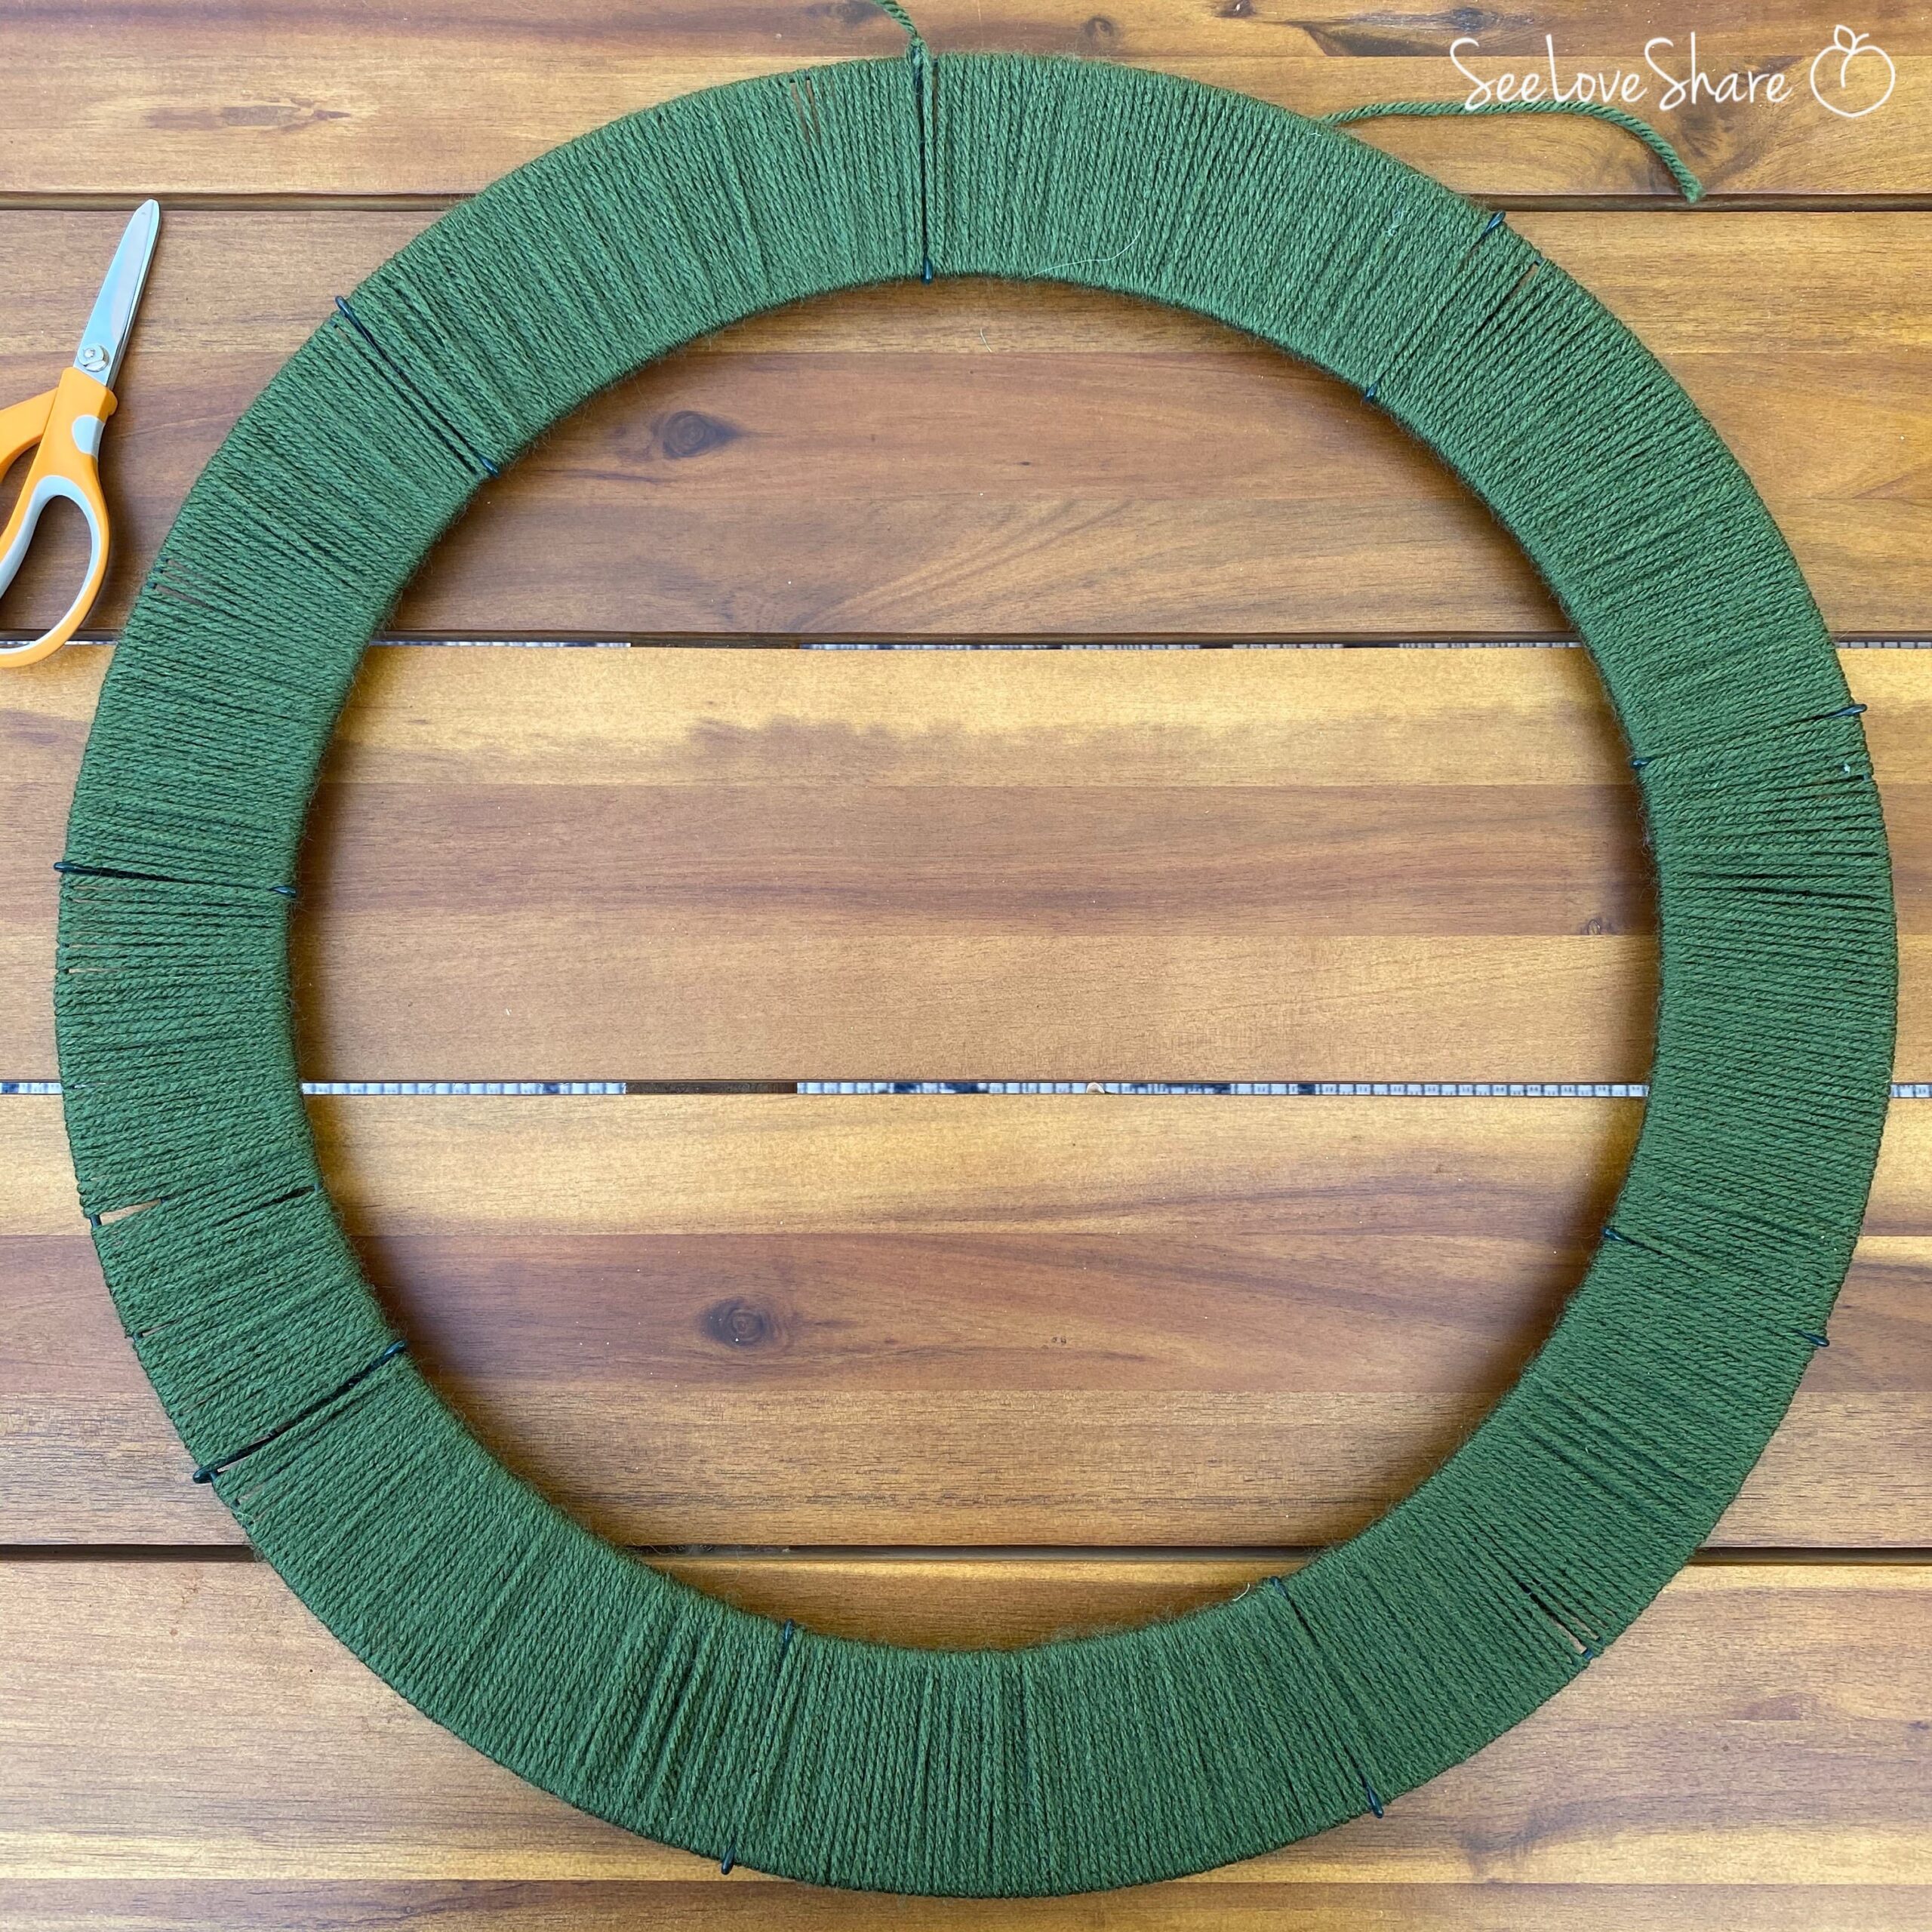
Step 2: Wrap the Wreath Frame
Wrap the wire wreath frame with Medium Thyme yarn (or any green). Start by tying the yarn to one side and wrapping tightly enough that it won’t slip out of place. Take your time and overlap slightly as you go — the wrap is part of the visible texture of the finished wreath.

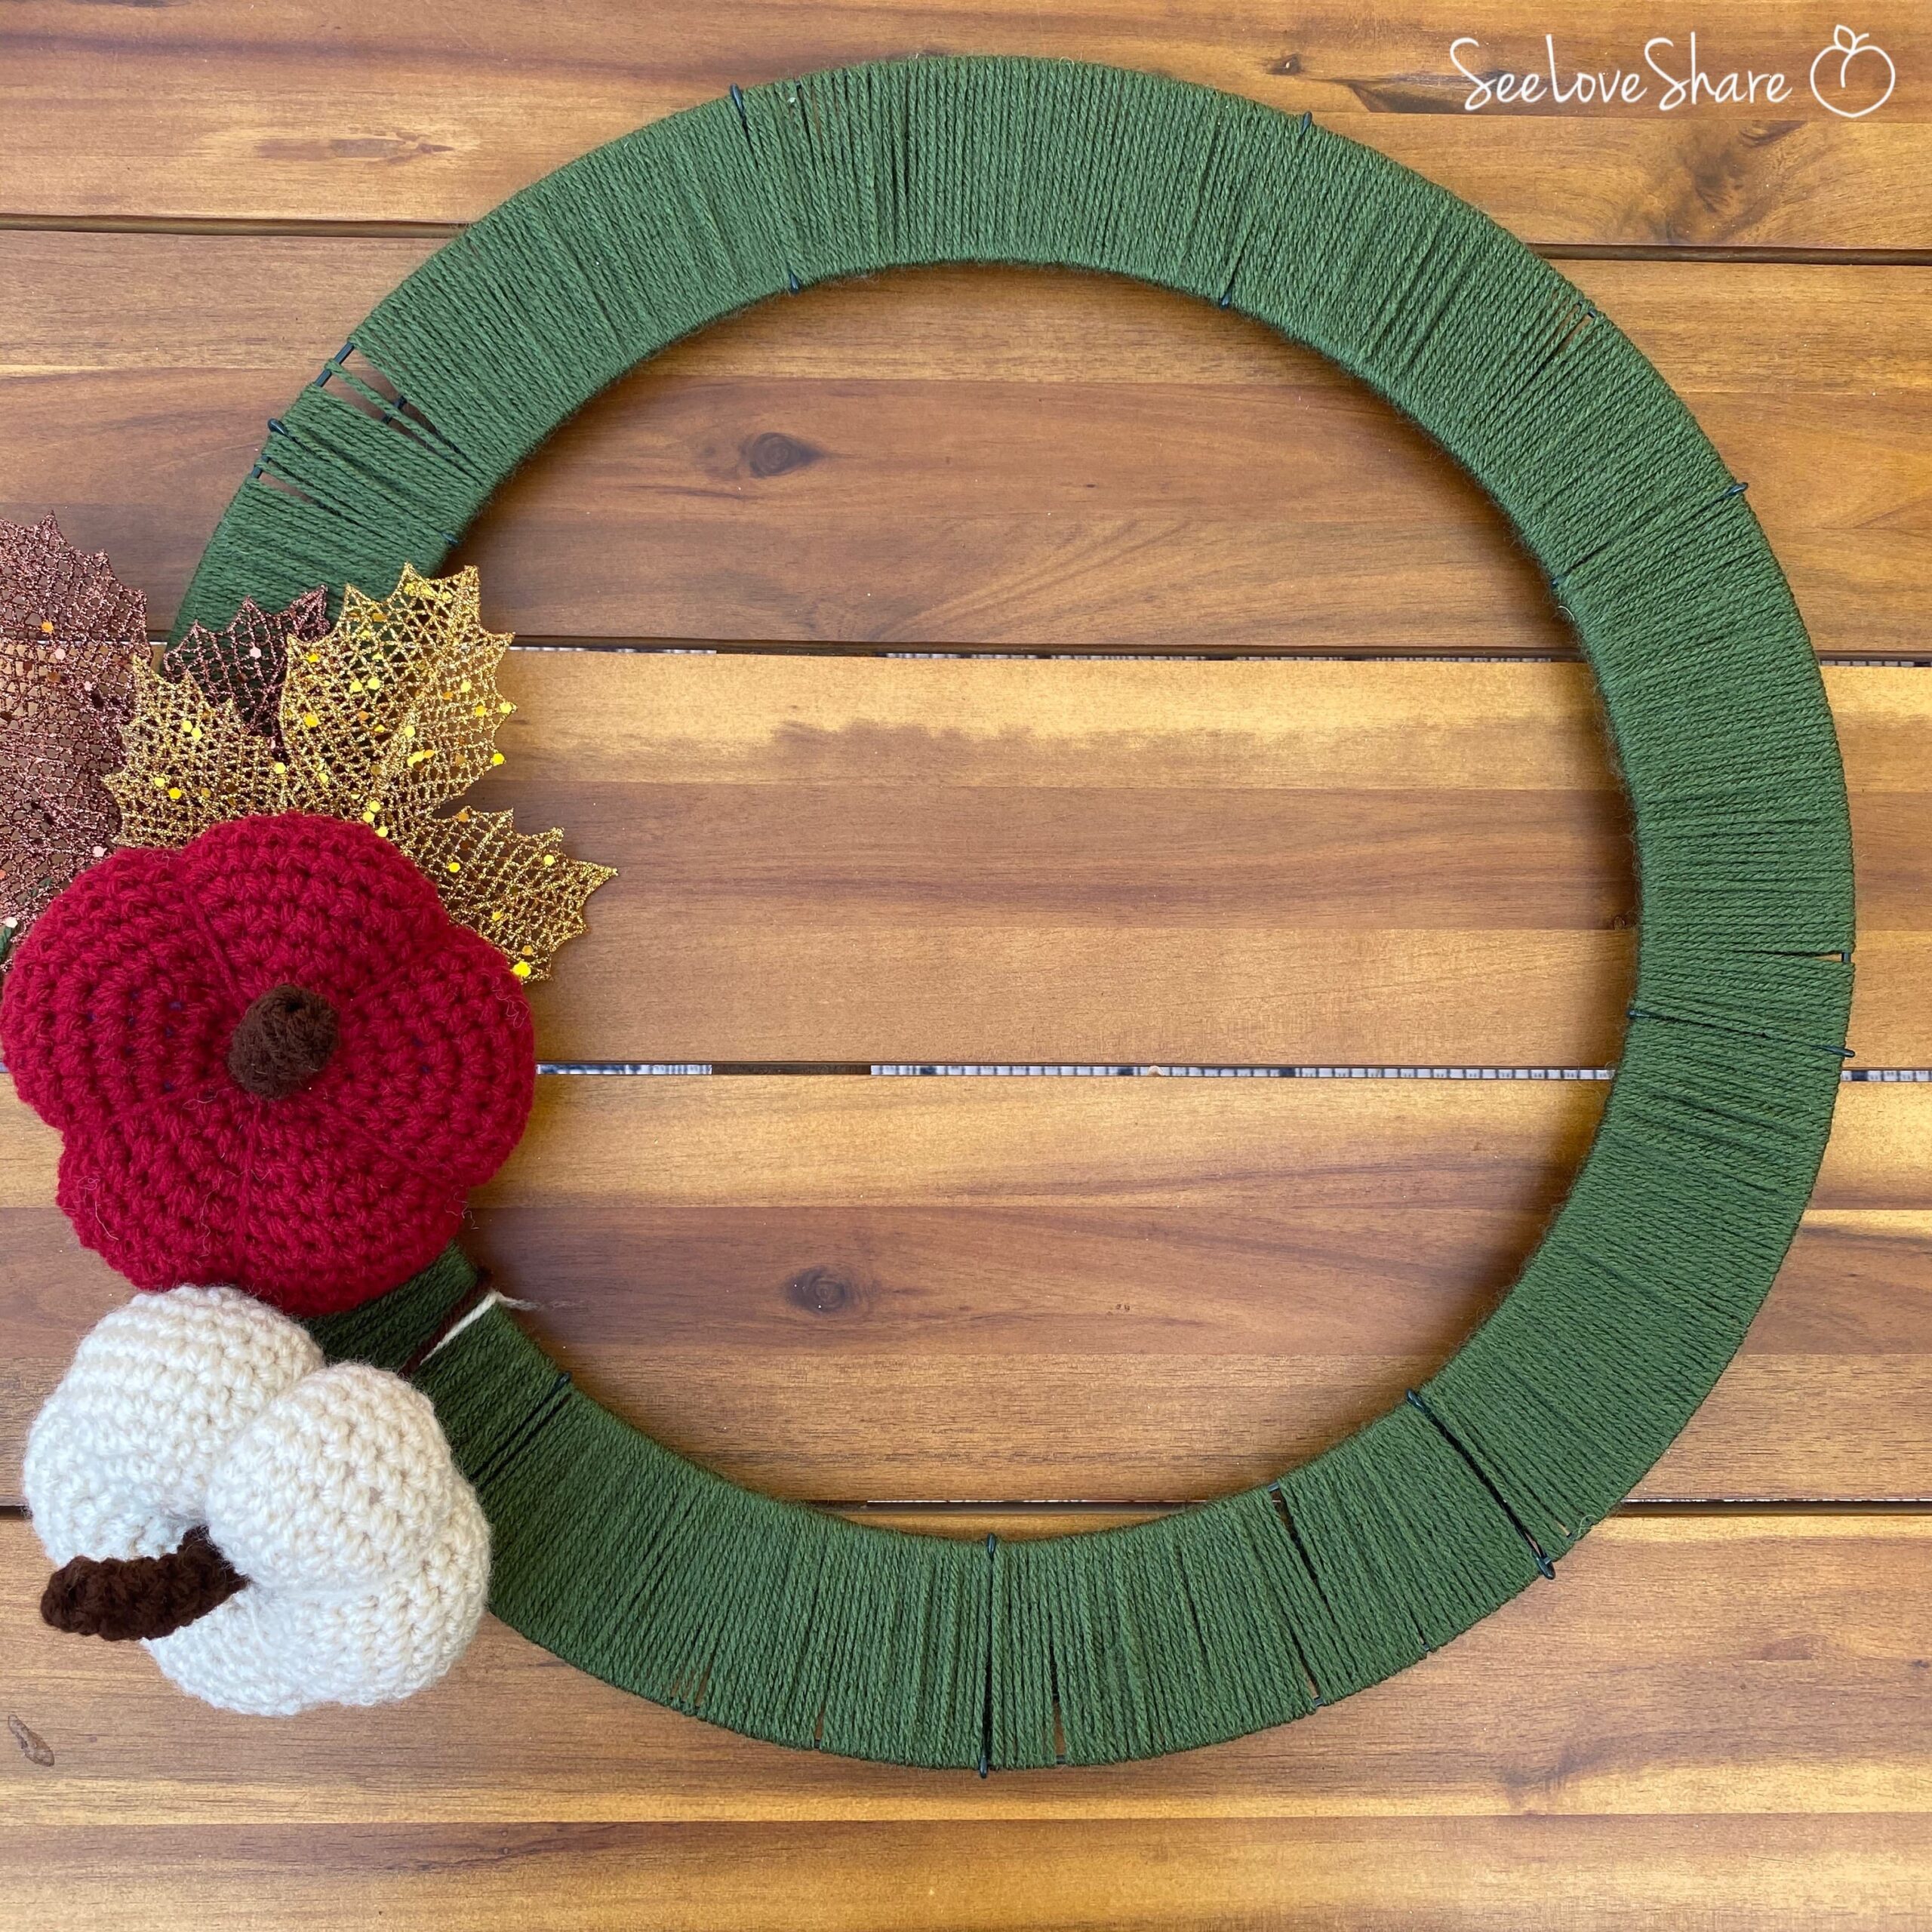
Step 3: Lay Out Your Embellishments
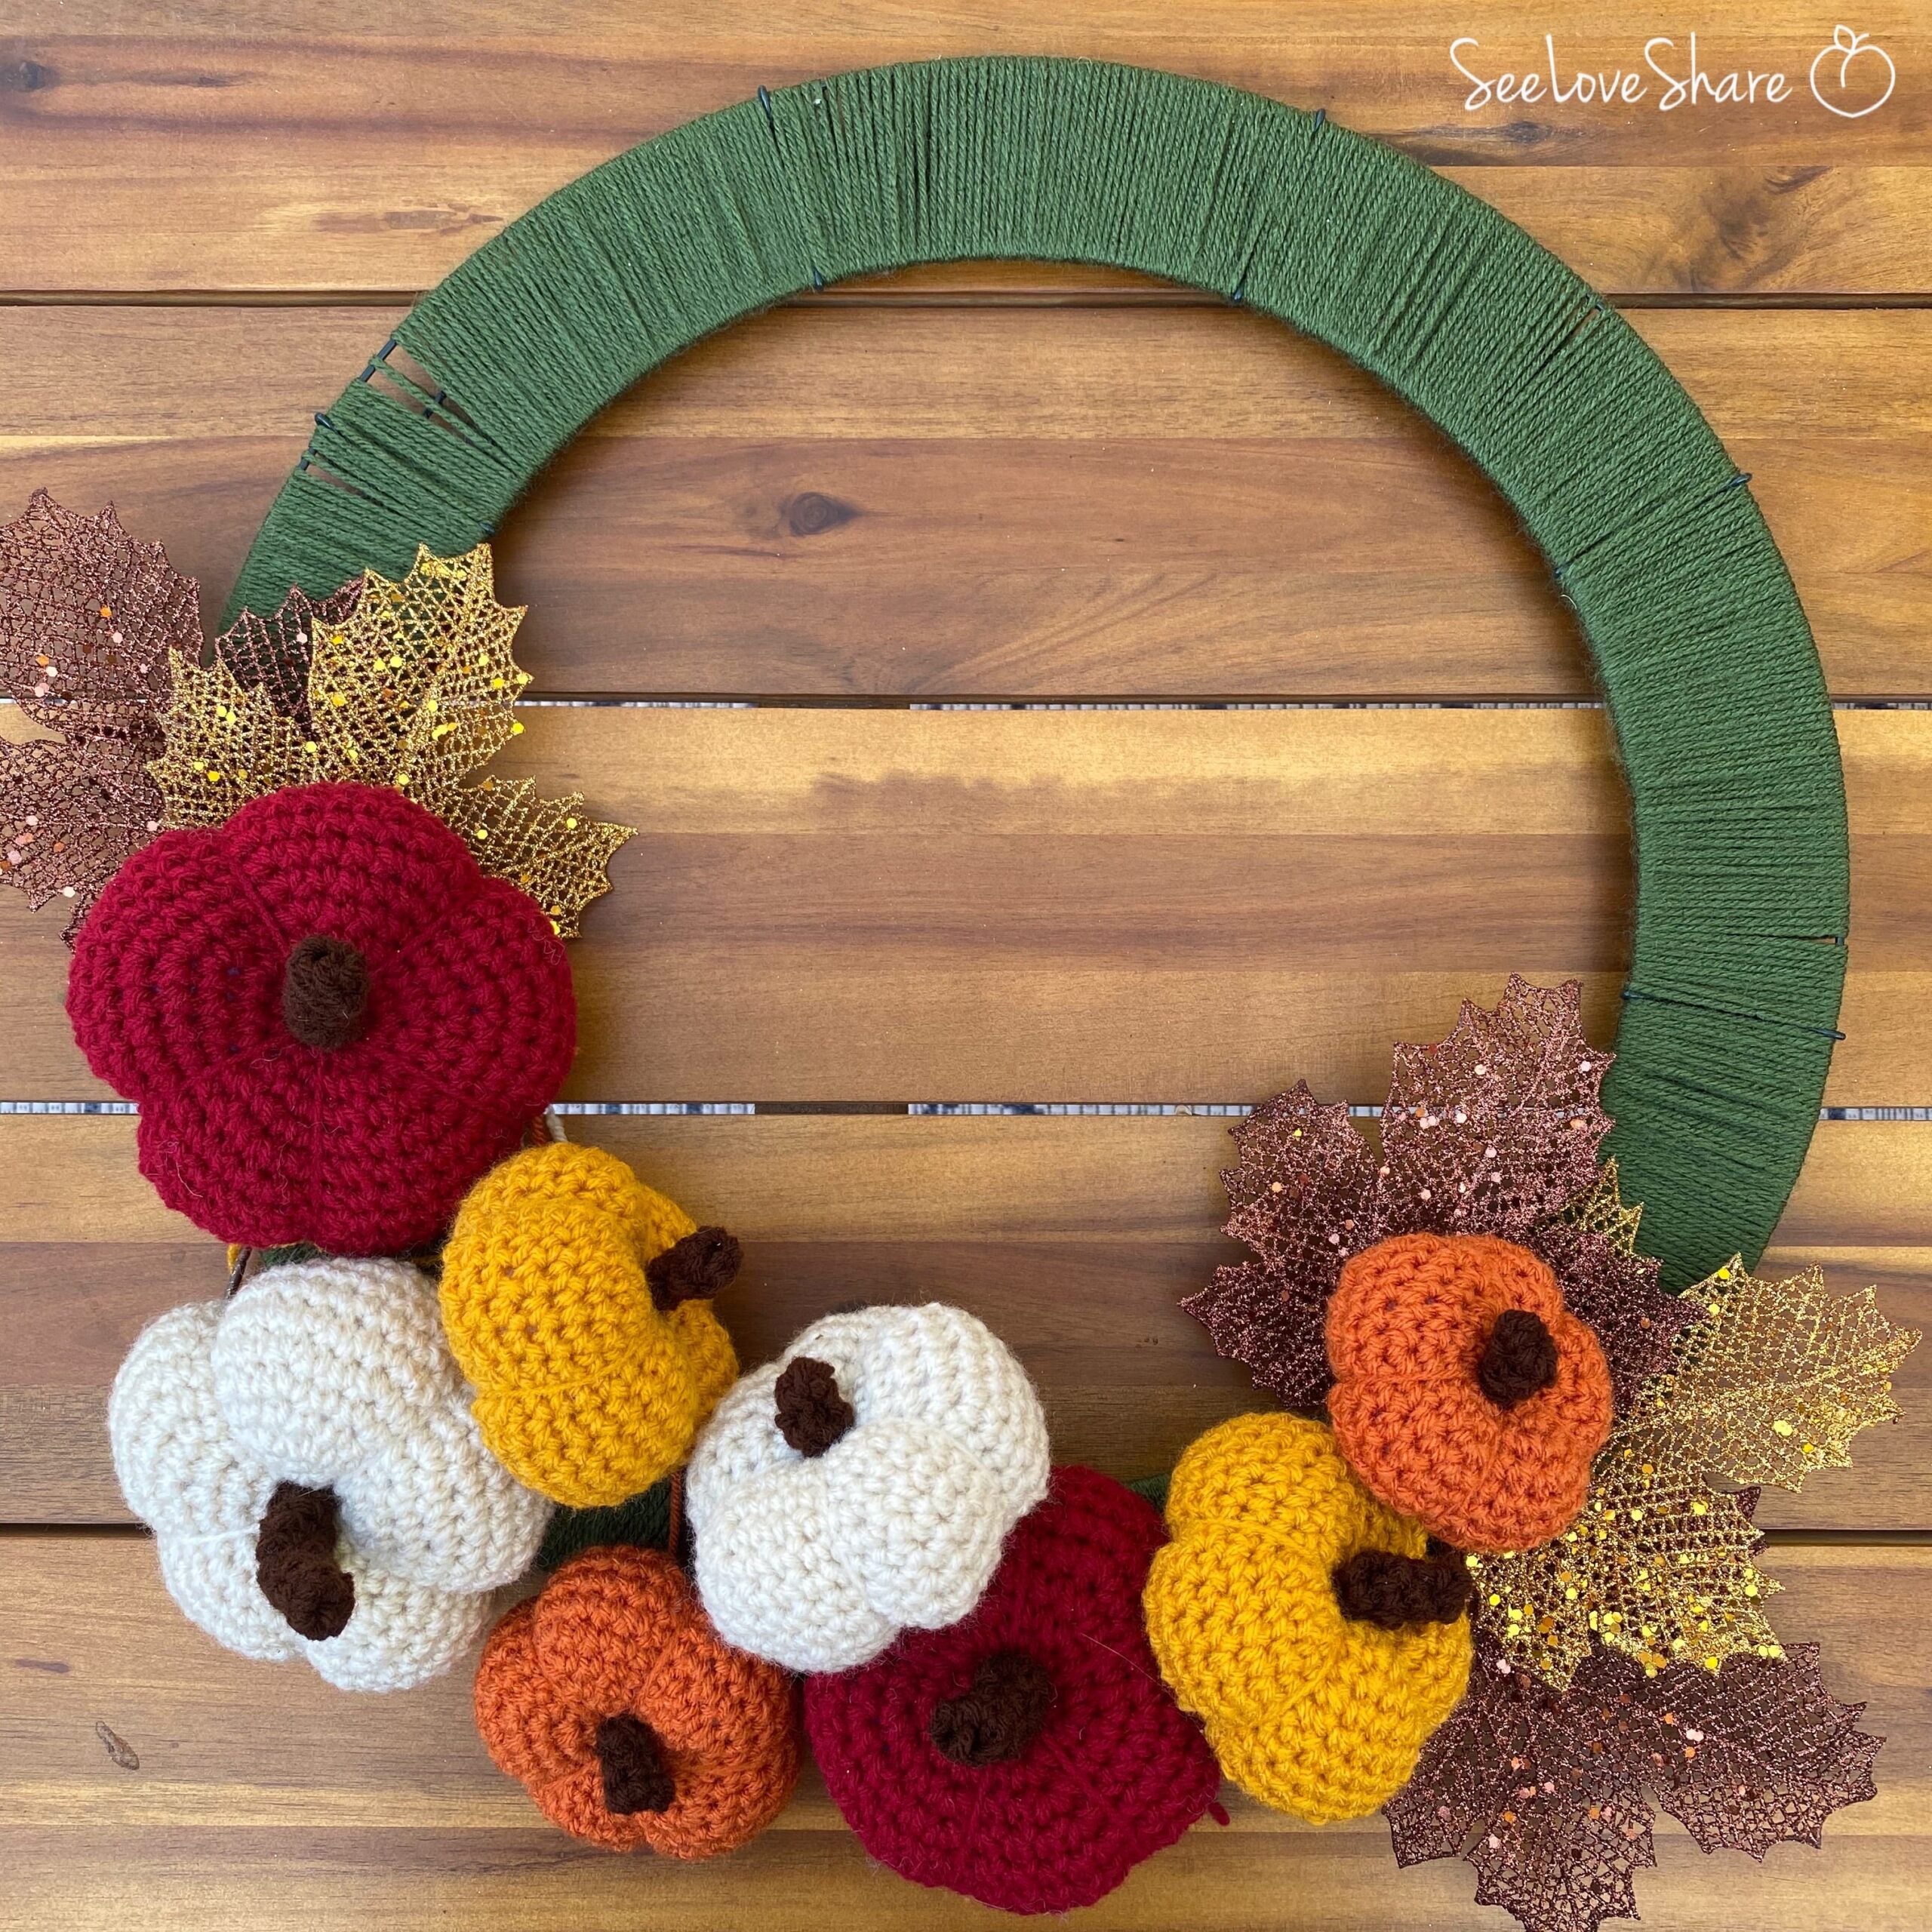
Before you commit anything with glue, place your pumpkins and decorative leaves on the wrapped frame to plan the composition. If you’re using decorative leaves, position those first as the back layer, then layer in the pumpkins by size — usually large in the center of clusters, with smaller pumpkins filling the gaps. Play with the placement until you love the shape and balance.
Step 4: Take a Picture, Then Attach
Once you love the layout, take a picture so you can remember exactly what it looked like. Then pull out your glue gun and attach each piece in place (this is the fastest option). If you’d rather sew them on, use your tapestry needle and matching yarn to stitch each pumpkin to the wrapped frame. Either way, you may need to attach pumpkins to each other in addition to attaching them to the frame — the layering is what gives the wreath its abundant, textural look.
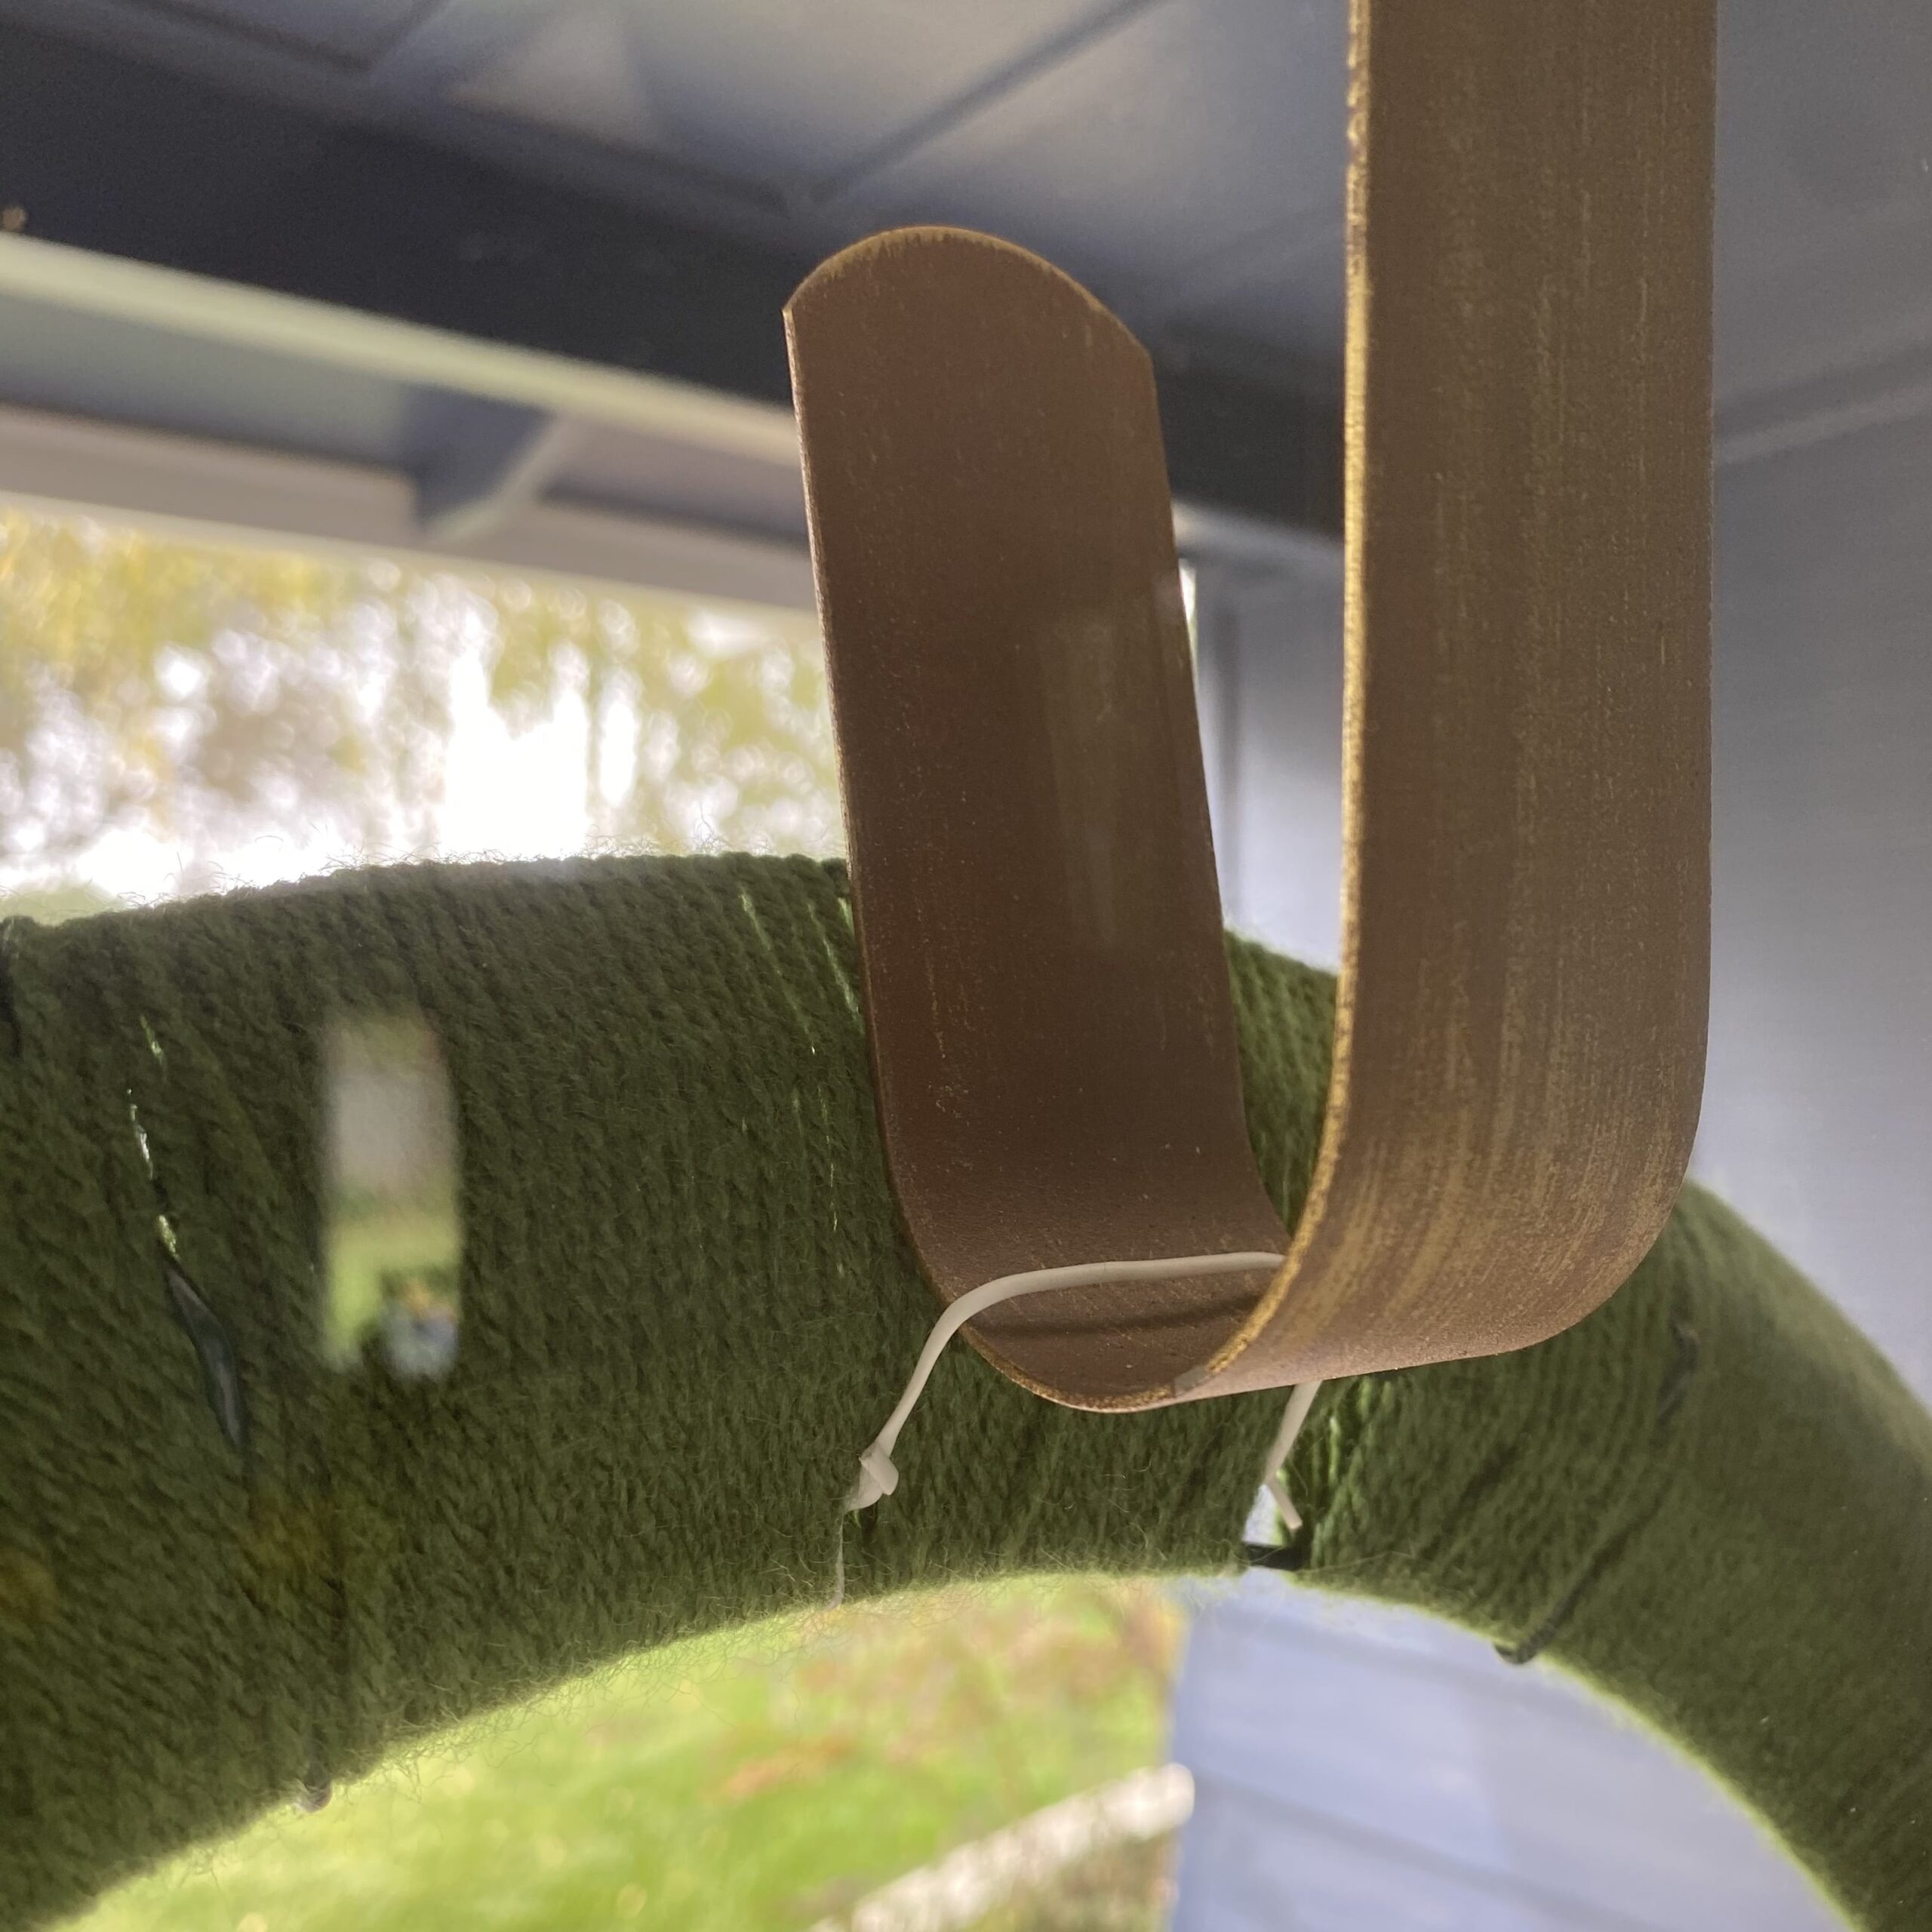
Step 5: Attach the Hanging Hook
Attach a small wire hook to the back/top of the wreath. Positioning it slightly off-center lets you hang the wreath at a more interesting angle if that’s the look you want.
Step 6: Hang and Enjoy
Place the finished crochet pumpkin wreath on your wreath hanger and admire your handiwork! Snap a photo for Pinterest while you’re at it. 🎃
Tips for the Best Crochet Pumpkin Wreath
- Mix at least 4 colours. A monochrome wreath looks flat — a mix of warm tones (rust, pumpkin, gold, burgundy, cream) gives that abundant fall look.
- Vary the pumpkin sizes intentionally. Clusters of one large + one medium + one small read as natural groupings; all-same-size looks too uniform.
- Cluster, don’t space evenly. Group pumpkins in 2s and 3s rather than spacing them evenly around the wreath — it looks more organic.
- Layer decorative leaves underneath. Slip silk or felt fall leaves under the pumpkin clusters so they peek out — instant designer look.
- Wrap the frame extra tight. Loose wraps slip and show gaps. Keep tension consistent and overlap each pass slightly for a smooth base.
- Glue from the back when you can. Glue dots on the back of each pumpkin (then press to the wrapped frame) hide cleaner than visible glue lines.
Want More Pumpkin Patterns?
Crochet Cable Pumpkin Pattern
My most popular fall pattern — perfect for the mantel, the tiered tray, or as a bigger statement piece next to your finished wreath. Use code SEELOVE15 for 15% off.
Crochet Pumpkin Wreath FAQ
How long does the crochet pumpkin wreath take to make?
Plan on about one weekend — roughly 4 hours of crochet for the 8 mini pumpkins (each is 15–20 minutes), plus 30 minutes to wrap the frame and another 30 minutes for layout and assembly. It’s a great project to crochet in front of a movie and assemble the next day.
What size wreath frame should I use?
A standard 14–18 inch wire wreath frame works beautifully for 8 mini pumpkins. If you go bigger, plan to make 10–12 pumpkins so the wreath looks abundantly covered.
Do I have to use a glue gun?
No — sewing each pumpkin to the wrapped frame with your tapestry needle and matching yarn works just as well. It takes longer but gives you cleaner, fully reversible attachments. A glue gun is just the faster option.
Can I leave the crochet pumpkin wreath outside?
It does best in a sheltered spot — under a covered porch or behind a storm door. Direct rain or snow will mat the yarn over time, and prolonged sun will fade the colours.
How do I store the wreath between seasons?
Store flat in a large box or zip-top storage bag with a few mothballs or cedar blocks. Don’t hang it in storage — the weight of the pumpkins can distort the shape over time. Stored properly, it will last many fall seasons.
Can I sell finished crochet pumpkin wreaths?
Yes — small batch sales of finished items made from my mini pumpkin pattern are welcome. Please credit SeeLoveShare as the designer and don’t redistribute or resell the pattern itself.
Get Free Patterns by Email
More Pumpkin & Fall Patterns You’ll Love
- Mini Crochet Pumpkin Pattern — the free pattern in three sizes used in this wreath
- Crochet Cable Pumpkin — beautiful cabled texture, beginner friendly
- Crochet Pumpkin Trio — three pumpkin sizes from one ball of yarn
- Farmhouse Stackable Crochet Pumpkins — a beginner trio for the mantel
- Rustic Ribbed Crochet Pumpkins — fall farmhouse style
- Browse All Crochet Fall Patterns
Save This Crochet Pumpkin Wreath for Later
Want to come back to this crochet pumpkin wreath later? Save it to Pinterest so you can find it when you’re ready to start your fall door project. I’d love to see your finished wreaths — tag @seeloveshare on Instagram! 🎃
This crochet pumpkin wreath tutorial, photos, and the linked mini pumpkin pattern are © SeeLoveShare LLC. For personal use only — please do not redistribute or resell the pattern. Small-batch sales of finished items are welcome with credit. Thank you for supporting an independent designer! 🎃