
October 8th, 2020
Mini Crochet Pumpkin Pattern — Free Fall Embellishments in 3 Sizes
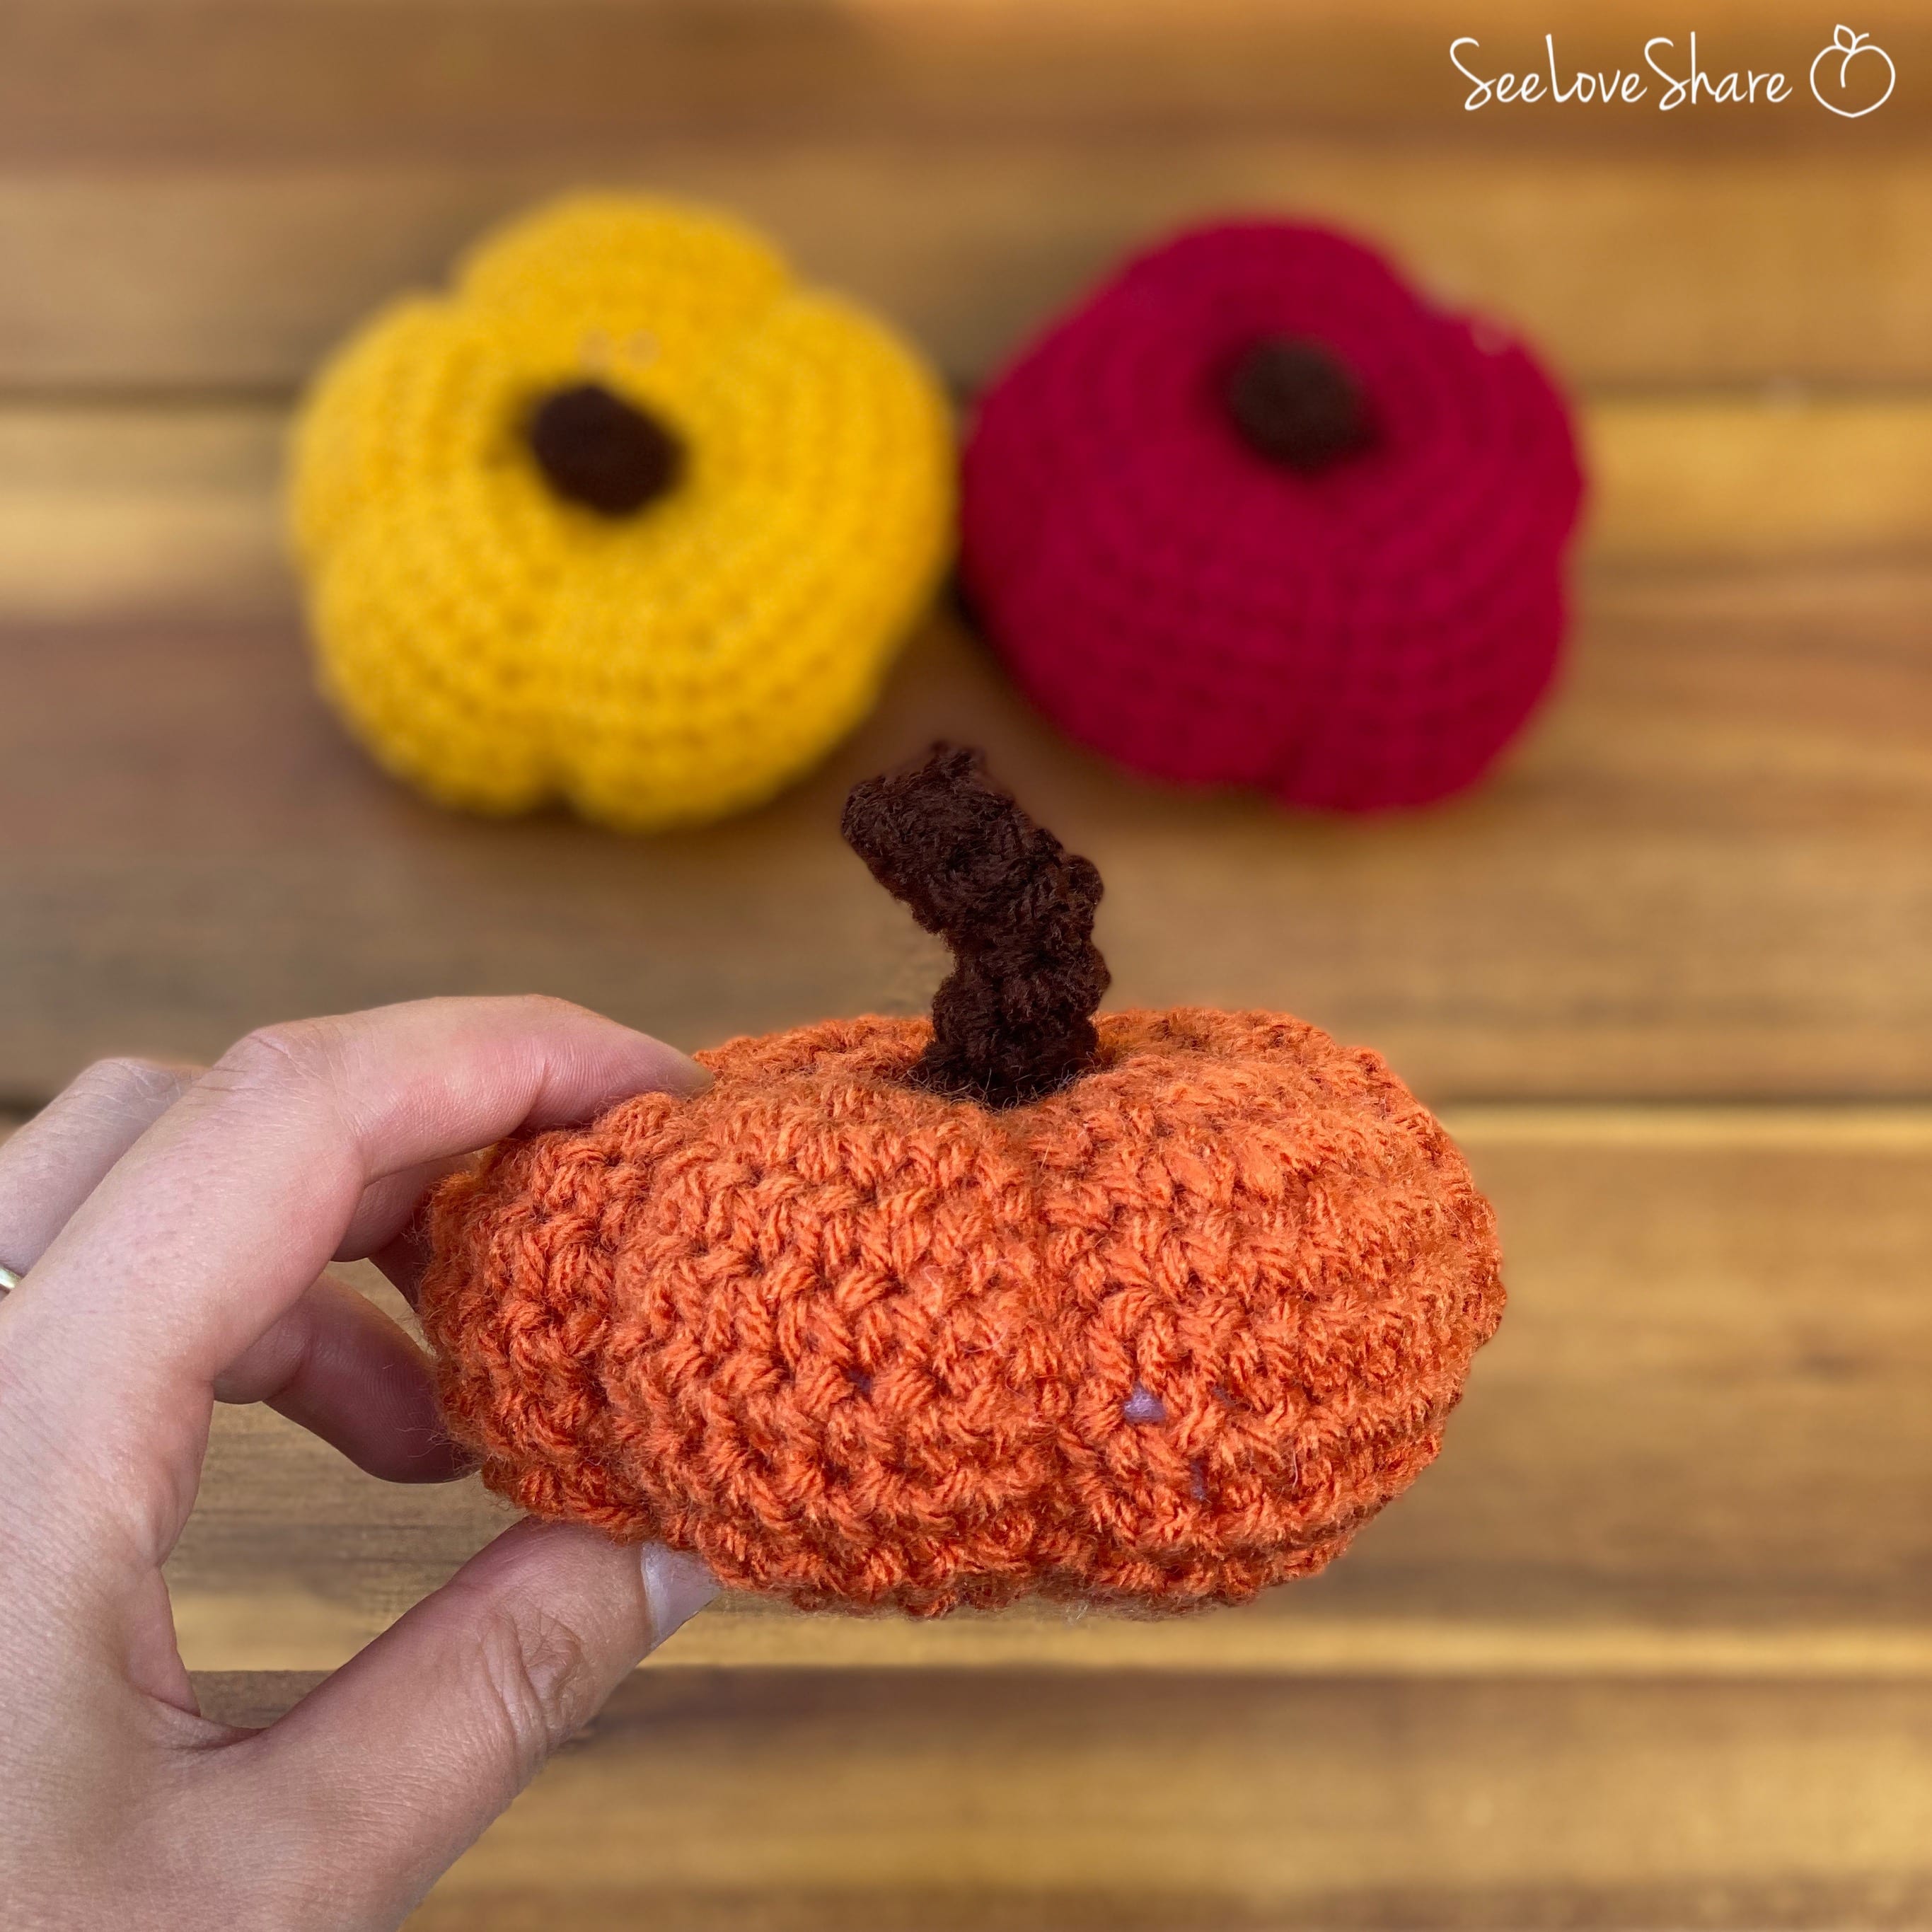
This mini crochet pumpkin pattern works up three sizes of darling little pumpkin embellishments — perfect for fall garlands, wreaths, table centerpieces, gift toppers, jar decor, Halloween crafts, and Thanksgiving table styling. Quick, beginner-friendly, and endlessly customizable in any pumpkin colour you love.
I designed these for a fall wreath I made for my new house — and they’ve become one of the most versatile crochet embellishments in my collection. Stitch up a whole bundle in a weekend and use them everywhere: scattered across your mantel, tied to napkin rings, attached to gift packages, or arranged as a centerpiece.
And here’s the fall wreath I created with these little pumpkins:

Why You’ll Love The Mini Crochet Pumpkin Pattern
These little pumpkins are a go-to for fall crafting:
✔ Three sizes in one pattern — small, medium, and large
✔ Quick weekend project — each pumpkin works up in 30-45 minutes
✔ Beginner-friendly — only chain and single crochet required
✔ Endlessly versatile — wreaths, garlands, gift toppers, centerpieces
✔ Perfect stash-busting project — uses small amounts of yarn
✔ Customizable in any pumpkin colour — traditional orange, coral, white, sage
✔ Makes adorable handmade gifts paired with a hostess gift
✔ Works with any worsted weight yarn — no special supplies
Pattern Details
Skill Level
Easy. If you can magic circle, single crochet, and decrease, you can make these.
Finished Sizes
- Small: 2 inches
- Medium: 3 inches
- Large: 4 inches
Materials You’ll Need
- 1 skein in your favourite pumpkin colour — I love Red Heart Super Saver for projects like these because it’s affordable, durable, and comes in so many colors. I used Pumpkin, Carrot, and Coral.
- Small amount of light brown for the stems (perfect use for scraps from other projects)
- Poly-fil stuffing to plump them up
- 5.5mm crochet hook from this complete hook set
- Tapestry needle for sewing seams and creating pumpkin grooves
- Scissors
Want a more rustic look? Try a worsted weight wool blend like Lion Brand Wool-Ease in heathered tones for a farmhouse feel. The pattern works beautifully in any worsted weight yarn.
Abbreviations (US Terms)
- ch — chain
- sc — single crochet
- sc2tog / sc dec — single crochet two stitches together (decrease)
- st(s) — stitch(es)
The Mini Crochet Pumpkin Pattern
You’ll be working in continuous rounds, starting with a magic circle in your pumpkin colour of choice. Sizing is written as Small (Medium, Large).
Pumpkin Body
Row 1: 6 (7, 7) sc in magic circle
Row 2: 2 sc in each st around — 12 (14, 14 sts)
Row 3: *2 sc in next st, sc in next st* repeat from * around — 18 (21, 21)
Row 4: *2 sc in next st, sc in next 2 sts* repeat from * around — 24 (28, 28)
Row 5: Small size only — skip to Row 7. For Medium and Large: *2 sc in next st, sc in next 3 sts* repeat from * around — (35, 35)
Row 6: Medium size — skip to Row 7. For Large only: *2 sc in next st, sc in next 4 sts* repeat from * around — (42)
Rows 7-10: sc in each st around — 24 (35, 42)
Row 11: Small — skip to Row 12. Medium — skip to Row 12. Large only: *sc2tog, sc in next 4 sts* repeat from * around — (35)
Row 11 (continued): Small — skip to Row 12. For Medium and Large: *sc2tog, sc in next 3 sts* repeat from * around — (28, 28)
Row 12: *sc2tog, sc in next 2 sts* repeat from * around — 18 (21, 21)
Row 13: *sc2tog, sc in next st* repeat from * around — 12 (14, 14 sts)
Row 14: sc2tog around — 6 (7, 7)
Stuff with Poly-fil before closing. Bind off, leaving a long tail (12-15 inches) for creating pumpkin creases.
Create the Pumpkin Grooves
Thread the long tail through your tapestry needle. Push the needle up through the centre bottom of the pumpkin, around the outside (creating a vertical groove), and back through the centre bottom. Pull snug to create a defined groove. Repeat 5 times spaced evenly around the pumpkin, creating that classic ribbed pumpkin shape.
Stems
With brown yarn:
Row 1: 4 sc in magic circle
Rows 2-4: sc around, working right-side facing
Bind off, leaving a long tail to attach the stem to the centre top of the pumpkin. Sew firmly in place.

Project Ideas — How to Use Your Mini Pumpkins
- Fall wreaths — arrange in clusters of three with greenery for a classic farmhouse look
- Garlands — string them along twine to drape across a mantel or doorway
- Table centerpieces — scatter across a wooden tray with candles for Thanksgiving
- Napkin ring toppers — attach one to each napkin ring for a festive dinner
- Gift toppers — tie one onto a wrapped gift for fall birthdays or hostess presents
- Mason jar decor — attach to twine wrapped around a jar holding candles or flowers
- Halloween jar/vase decor — mix oranges with deep coral and black for a spooky table
- Pumpkin garland for kids’ rooms — use bright colours for a playful fall feel
Tips for Picture-Perfect Mini Pumpkins
- Stuff firmly, not lumpy: add small amounts of Poly-fil at a time to keep the shape uniform and round
- Even grooves matter: use stitch markers to evenly space your 5 grooves before sewing — eyeballing creates a wonky pumpkin
- Pull grooves tight: the more snug you cinch them, the more defined the pumpkin shape becomes
- Mix your colours: a trio of one large + two small in coordinating colours looks gorgeous
- Try non-traditional colours: sage green, cream, dusty blue, or burgundy give a modern look
- Add a curly tendril: for extra detail, attach a curled brown yarn vine alongside the stem
Frequently Asked Questions
How long do these mini crochet pumpkins take to make? The small pumpkin takes about 30 minutes, the medium about 40, and the large around 45 minutes. Great for batch-making while watching a movie.
Can I make these without a magic circle? Yes — you can substitute ch 2 and work the first round into the second chain from the hook. The magic circle creates a cleaner closed start, but ch 2 works in a pinch.
What yarn weight works best? Any worsted weight (#4 medium) yarn works perfectly. The pattern is forgiving — heavier yarns will make slightly larger pumpkins.
How do I get nice defined pumpkin grooves? Use a tapestry needle with the long tail, and pull each groove snugly. Five evenly-spaced grooves around the pumpkin create the classic ribbed shape. Use stitch markers to space them evenly before sewing.
Can I sell finished pumpkins? Yes — small batch sales are allowed for personal income. Please credit SeeLoveShare as the designer.
What colours look best? Traditional Pumpkin Orange is a classic, but Coral, Carrot, Cream, Sage, Burgundy, and even Dusty Blue create beautiful modern looks. Mix sizes and colours for the most visual impact.
More Crochet Pumpkin Patterns You’ll Love
- Farmhouse Stackable Crochet Pumpkins — Free Pattern
- Rustic Ribbed Crochet Pumpkin — Free Pattern
- Bobble Pumpkin Pillow — Crochet Pattern
- Gingham Plaid Crochet Pumpkin Pattern
- Crochet Cable Pumpkin — Free Pattern
- Baby’s First Crochet Pumpkin — Easy Free Pattern
Save This Mini Crochet Pumpkin Pattern
Want to come back to this mini crochet pumpkin pattern later? Save it to Pinterest so you can find it when fall crafting season hits — and share it with your crocheting friends!