

All Home Decor Crochet Crochet Home Decor
September 25th, 2022
3-Stack Jack-O-Lantern Topiary – Free Crochet Pattern & How-To
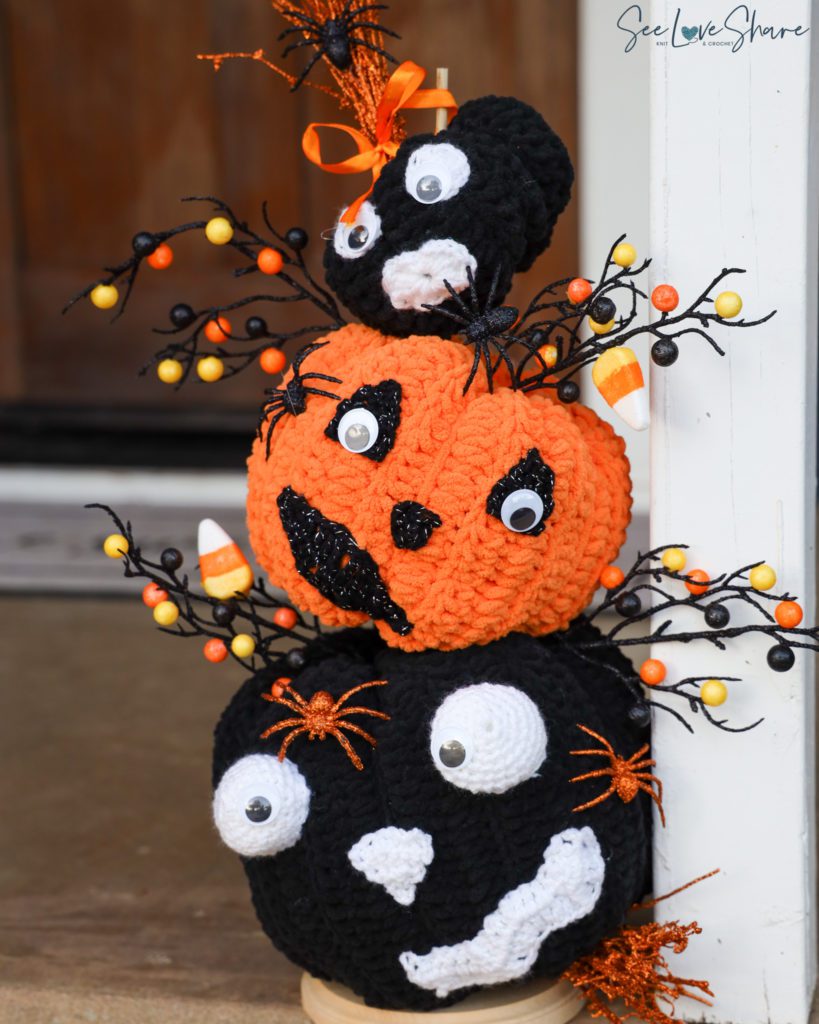
This year we decided to ditch a real pumpkin and go with something handmade. This topiary can be used for your front porch or to spruce up a Halloween dinner table as a centrepiece. It is a lot easier to work up than you’d think but we’ll be walking you through all the moving parts as it comes together.
First things first… let’s grab some additional supplies that you may not have around. Grab your wallet and head to JoAnn for the following non-yarn items!
[DISPLAY_ULTIMATE_SOCIAL_ICONS]
Non-Yarn, Non-Crochet Materials:
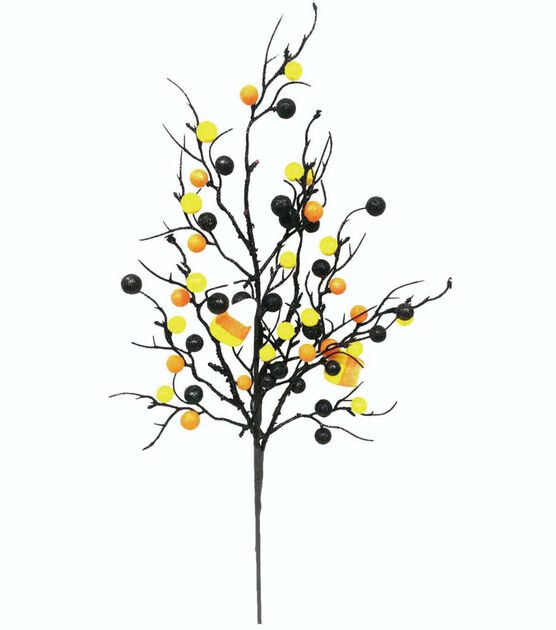
Let’s grab 2 of these – we’ll end up pulling them apart into smaller bunches but the pop of colour and candy corn addition really takes this up to a new level.
Really any of these would do also…. grab a few with spiders in them also!

Now we move on to the Crochet part of the project! Here’s how we bring this one to life!
Pattern Notes:
We are going to make 3 simple crochet pumpkins and the faces to go with. Each pumpkin will be a different size to create a bottom, heavy topiary. Feel free to change up the yarn for the faces and bring yours to life in a whole other way!
Measurements:
Large pumpkin: 10in tall, 12in wide
Medium pumpkin: 8in tall, 10in wide
Small pumpkin: 5in tall, 6in wide
Total Topiary Size, approx. 24in tall, 12in wide.
Materials:
- Crochet Hook: 8.0mm for pumpkins
- Crochet Hook: 5.5mm for faces
- Tapestry needle
- Bernat Blanket Yarn: for pumpkins
- Black (1 ball)
- Brights: Carrot Orange (1 ball)
- Red Heart Super Saver: for faces
- White (metallic yarn works here also)
- Black
- Tapestry Needle
- Large Googly eyes x6 (mine are 3/4in)
- Polyfill stuffing
- Glue gun
- Non crochet related materials as listed above:
- Halloween sprays
- spiders
- floral
- wooden dowel
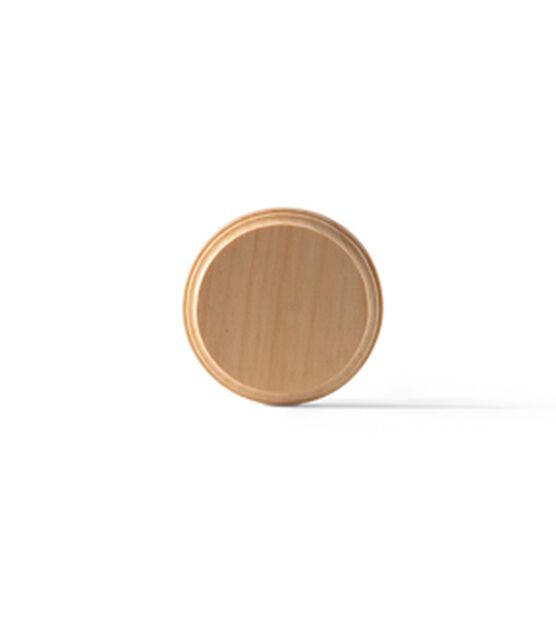
- wooden base
Gauge:
For Pumpkins: 7 sc and 8 rows with a 8 mm (U.S. L/11) crochet hook
Abbreviations:
SC: Single crochet
DC: Double crochet
Ch: Chain
Sts: Stitches
Slst: Slip Stitch
Sk: Skip
Sc2tog: Single crochet two stitches together
Pattern & Guide:
PUMPKIN PATTERNS:
Large Base Pumpkin:
With black: ch 36
Row 1: HDC in 2nd ch from hook to end.
Row 2-28: HDC in BLO to end, ch 1, turn.
Rectangle should be approx 16in x 25in
Medium / Middle Pumpkin
With orange, ch 26
Row 1: HDC in 2nd ch from hook to end.
Row 2-24: HDC in BLO to end, ch 1, turn.
Rectangle should be approx 12in x 21in
Small / Top Pumpkin
With black: ch 16
Row 1: HDC in 2nd ch from hook to end.
Row 2-20: HDC in BLO to end, ch 1, turn.
Rectangle should be approx 8in x 17in
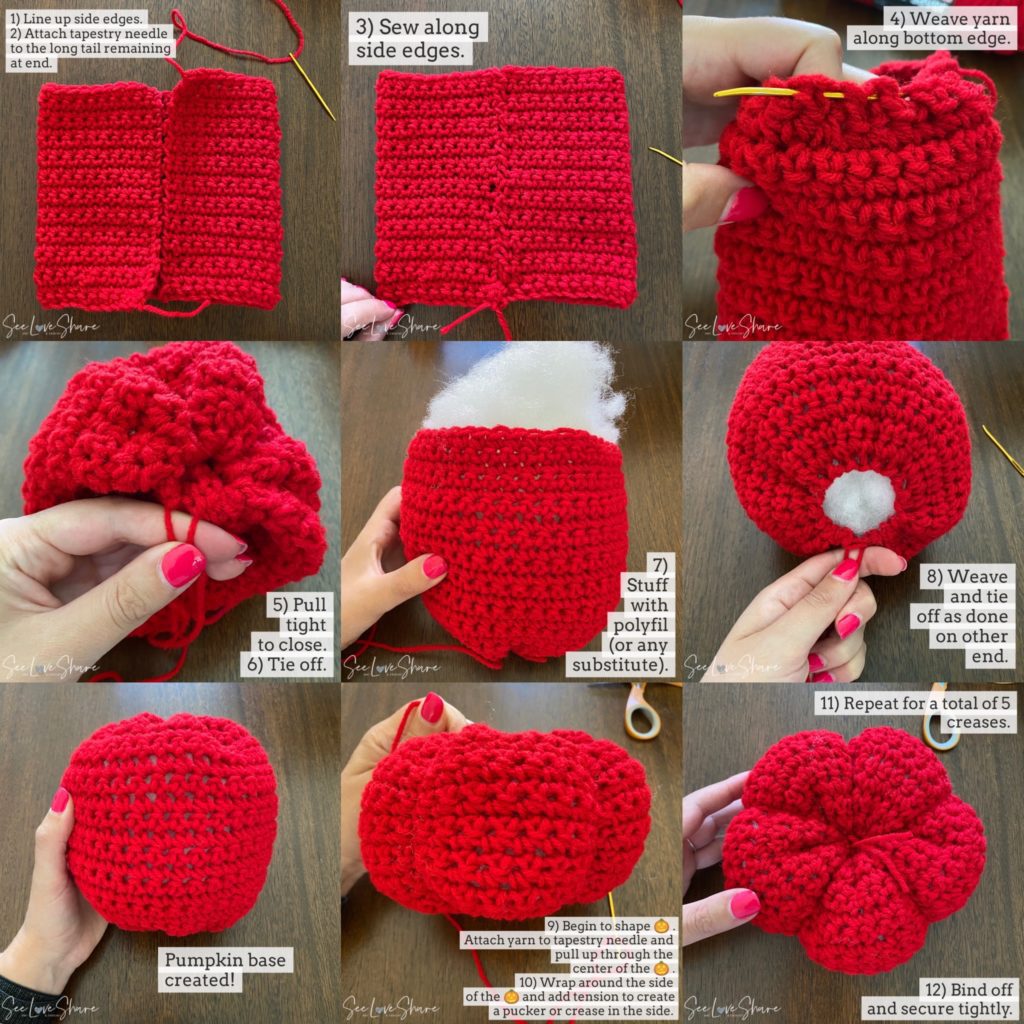
Assembly: All pumpkins
PUMPKIN FACE PATTERNS:
Large Pumpkin Face:
Eyes: Make 2: With White ch 3, join with slst to 1st ch to create loop
Rnd 1: 6 sc
Rnd 2: 2 sc in each sc around (12 sts)
Rnd 3: *sc, 2 sc in next st* repeat within ** around (18 sts)
Rnd 4: 5 sc, 2 sc in next 2 sts, 7 sc, 2 sc in next 2 sts, 2 sc (22 sts)
Rnd 5: 7 sc, 2 sc in next st, 10 sc, 2 sc in next st, 3 sc (24 sts)
Rnd 6-7: sc in each st around (24 sts)
Rnd 8: 5 sc, sc2tog 3x, 13 sc (21 sts)
Bind off leaving a long tail to sew to pumpkin
Mouth:
With white chain 24
Row 1: Dc into the fourth chain from the hook (3 chs skipped counts as dc), *1 dc in each of the next 3ch, dc3tog over next 3ch, 1 dc in each of next 3 ch**, 3dc in next ch; rep from * to end, ending last rep at **, 2 dc in last ch, turn.
Row 2: Ch 3 (counts as dc), 1 dc in first dc, *1 dc in each of the next 3dc, dc3tog over next 3dc, 1 dc in each of next 3dc, 3dc in next dc; rep from * ending last rep with 2dc in top of ch 3 from previous round, turn.
Medium Pumpkin Face:
Eyes: make 2
With black ch 6
Row 1: sc in 2nd ch from hook to end, ch 1 turn. (5 sc)
Row 2-3: sc in each st across, ch 1 turn (5sc)
Row 4: sc2tog, sc, sc2tog, ch 1 turn (3 sc)
Row 5: sc in each st across, ch 1 turn (3 sc)
Row 6: sc3tog bind off, leaving a long tail to sew to pumpkin.
Nose:
With black ch 4
Row 1: sc in 2nd ch from hook to end, ch 1 turn. (3 sc)
Row 2: sc in each st across, ch 1 turn (3)
Row 3: sc3tog, bind off, leaving a long tail to sew to pumpkin
Mouth:
With black, ch 16
Row 1: 2 sc, 2 Hdc, 2 dc, 3 tr, 2 dc, 2 Hdc, 2sc (15 sts), continue around to the other side of chain, 2 sc, 2 Hdc, 2 dc, 3 tr, 2 dc, 2 Hdc, 2sc (15 sts), bind off, leaving a long tail to sew to pumpkin
Small Pumpkin Face:
Eyes: make 2
With White ch 3, join with slst to 1st ch to create loop
Rnd 1: 2 sc, 2 hdc, 2 dc, 2 tr, 2 dc, 2 hdc, join with a slst to top of first sc. Bind off leaving a long tail to sew to pumpkin.
Mouth:
With White ch 4, join with slst to 1st ch to create loop
Rnd 1: all within loop – 2 sc, 2 hdc, 2 dc, 2 tr, 2 dc, 2 hdc, 2 sc, 2 hdc, 2 dc, 2 tr, 2 dc, 2 hdc join with a slst to the top of the firs sc. Bind off leaving a long tail to sew to pumpkin
Assembly:
Sew faces on to formed pumpkins, tucking in ends as you go. Glue googly eyes to crochet eyes.
Of course… you can skip the faces, they still look super festive!
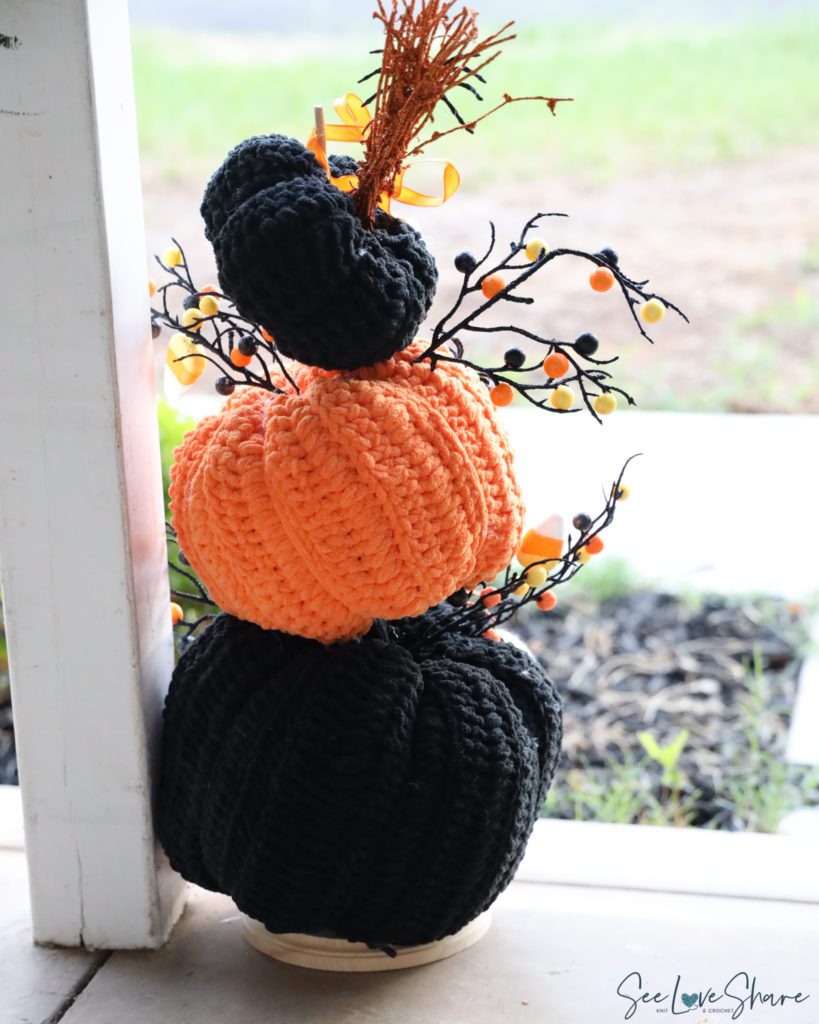
Now the Fun Part: Bringing it all together!
These next few steps are up to your creative imagination. I will show you how I assembled mine but there aren’t any rules here.
First: I glued the dowel to the center of the base. As it stands with the glue gun, it isn’t entirely sturdy so really pile on the glue there. Don’t worry, once you add the pumpkins they will keep the dowel in place with their own weight.
Second: start stacking the pumpkins. I offset mine to give them a bit more of a quirky look but you can certainly stack them directly on top of each other, through the center.
Third: Start to decorate. I used wire cutters to break down the halloween floral sprays and tucked them in along the sides. I scattered spiders around. I step back and rearranged as needed! Done and done! To the front porch we go…!
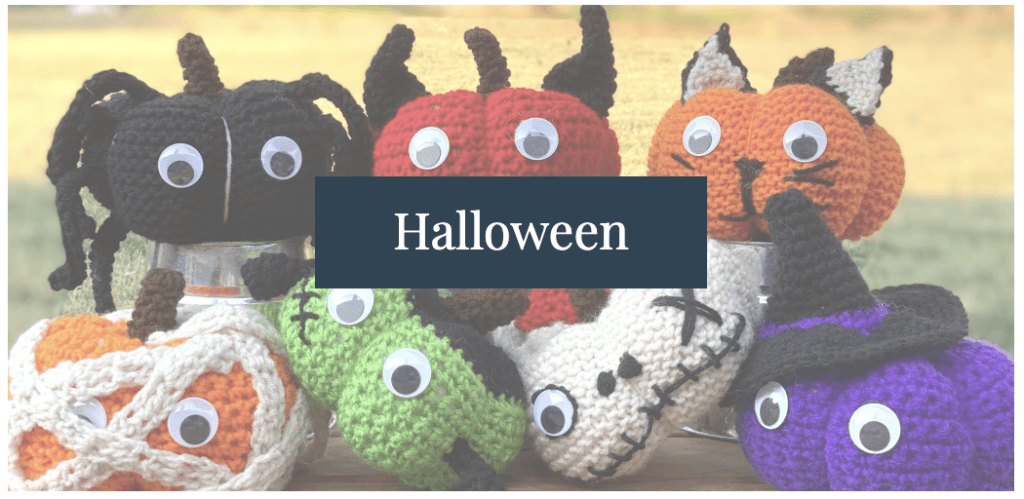
We have loads of other Crochet Halloween ideas for you. Check them out…
2 COMMENTS