All Holiday All Home Decor Crochet
September 25th, 2024
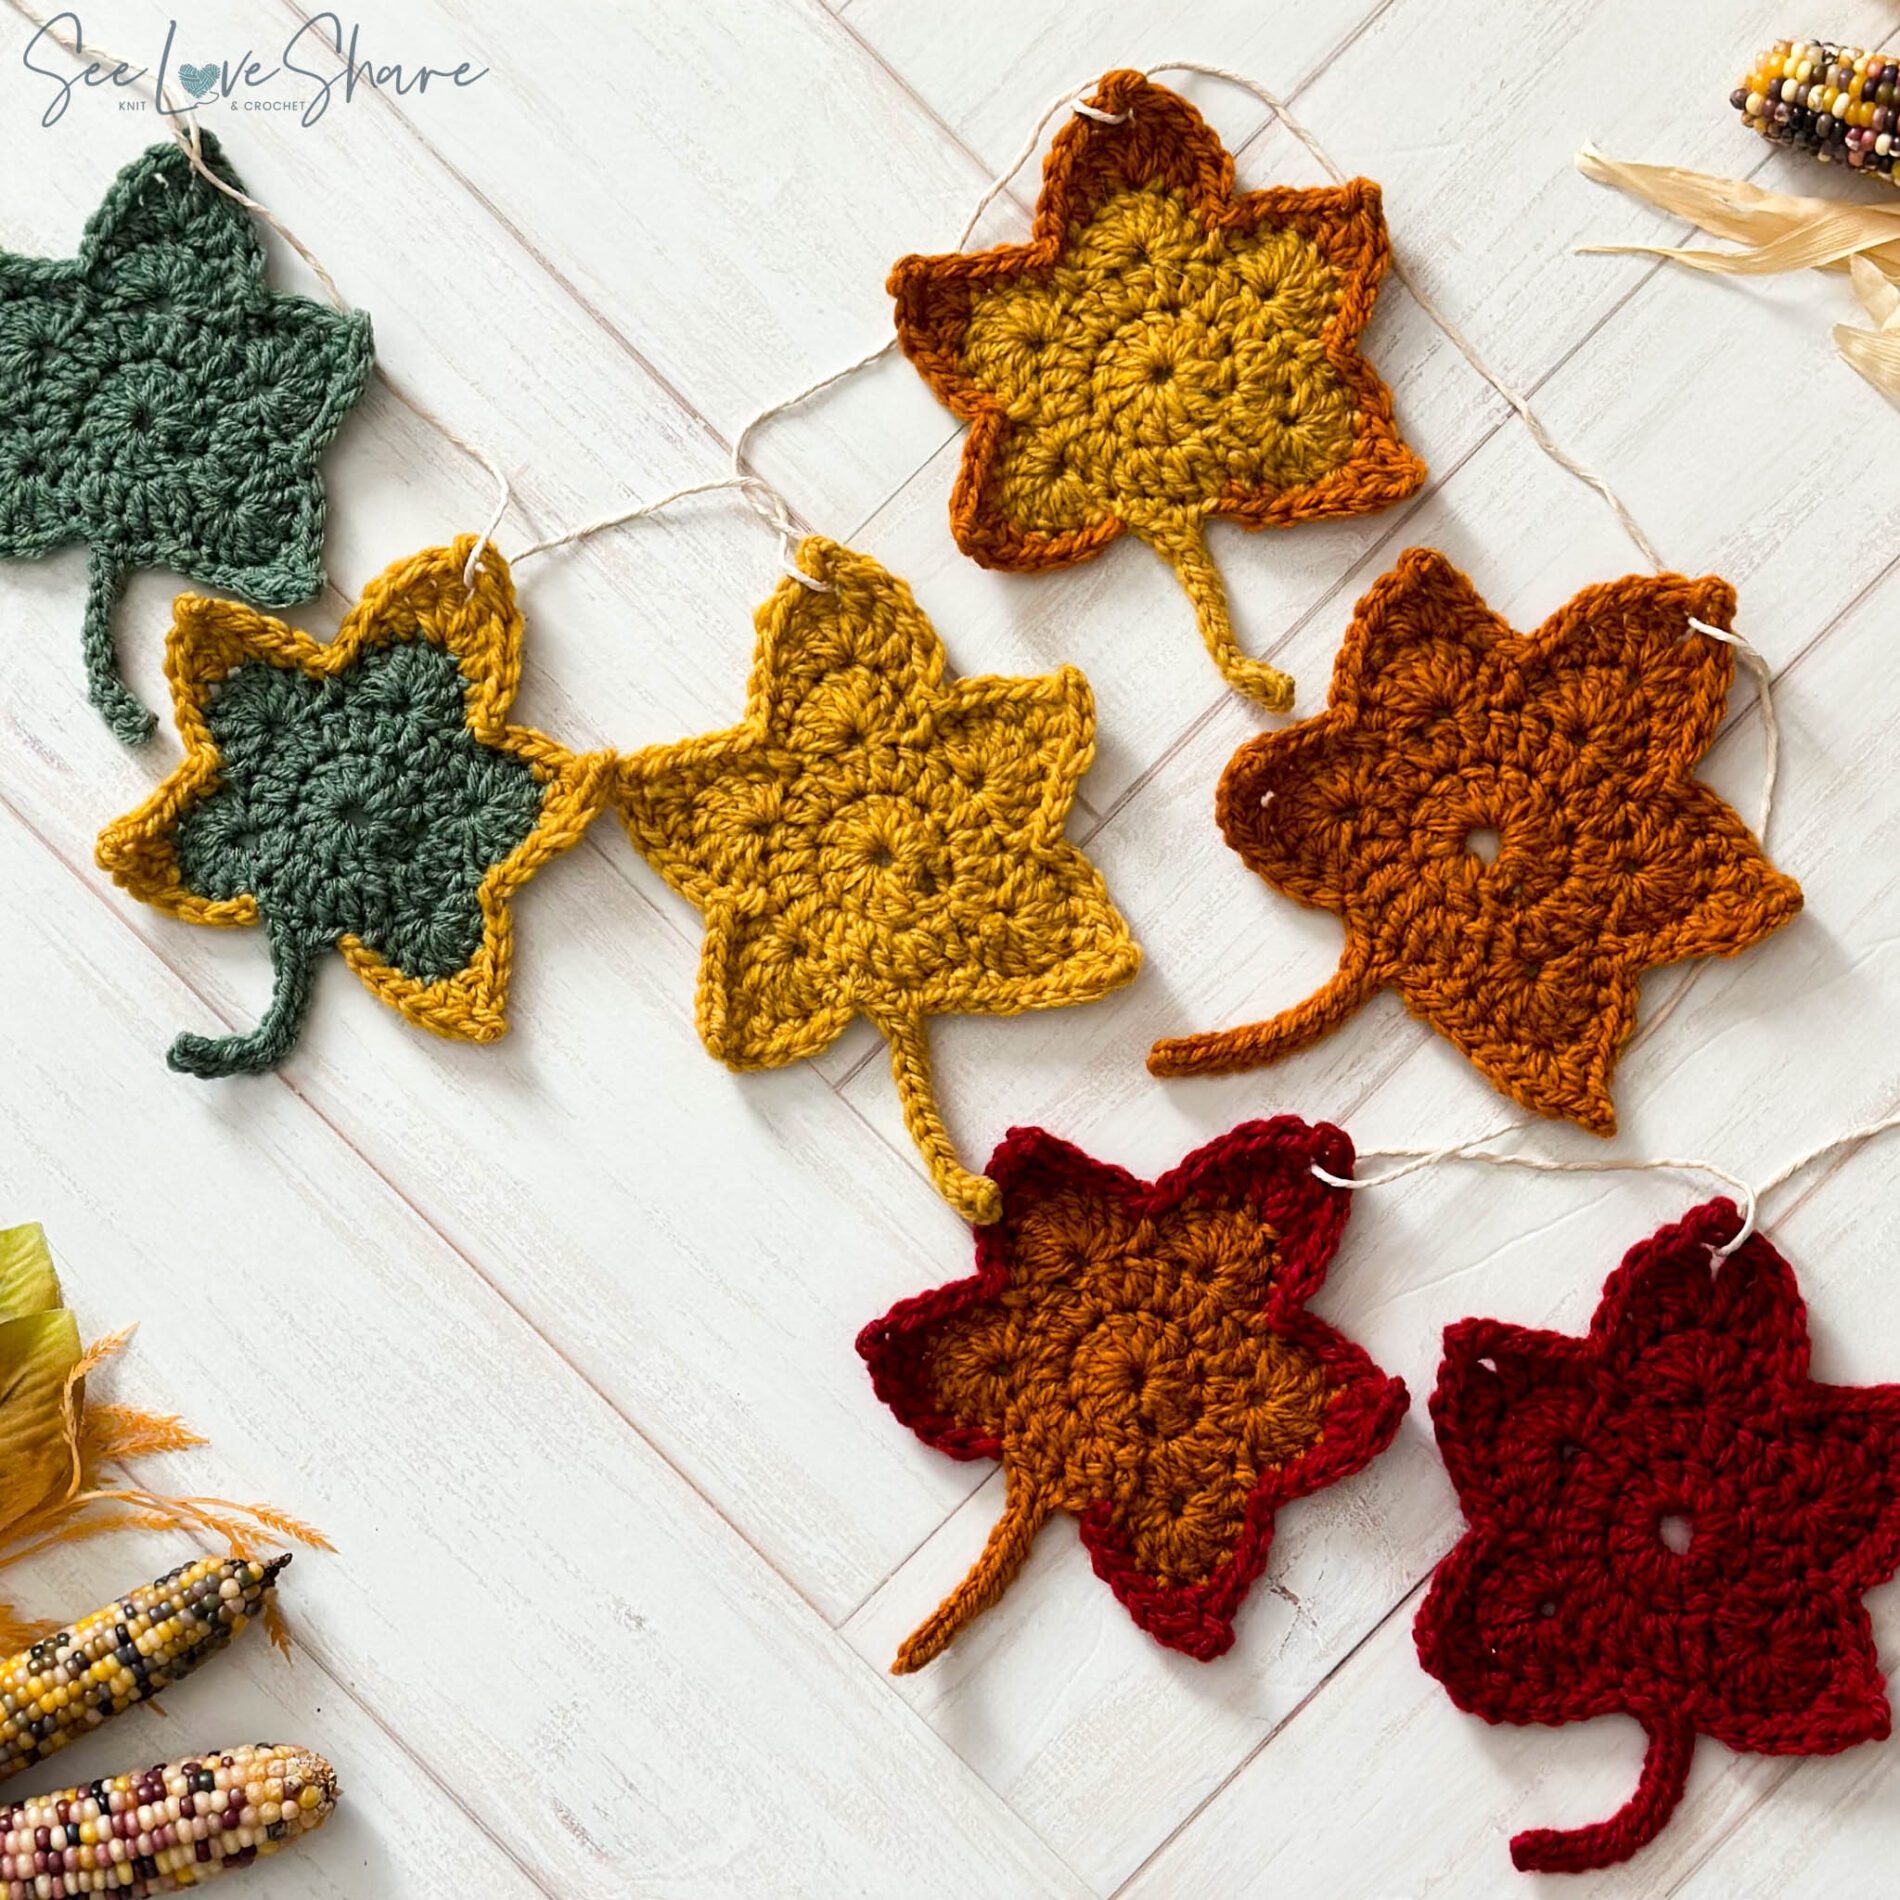
Autumn Maple Leaf Garland [Embellishment, Place Setting]
Bring the beauty of fall indoors with this DIY Crochet Maple Leaf Garland!
Perfect for creating a warm and welcoming atmosphere in your home, this easy-to-follow crochet Autumn Maple Leaf Garland [Embellishment, Place Setting] pattern allows you to craft stunning maple leaves that capture the essence of autumn. Whether you’re decorating your living room, crafting for a seasonal event, or gifting a handmade item, this garland is sure to impress!
UPDATE November 2024:
I hope that you’re enjoying your current knitting projects. It has been such a pleasure sharing my patterns with you and seeing your creativity bring them to life.
After much thought, I have made the difficult decision to no longer offer my patterns for free. This was not an easy choice—designing and sharing these patterns has always been a passion of mine and a way to connect with this amazing community.
However, the time, effort, and resources required to create, test, and perfect each pattern are significant. To continue bringing you high-quality, unique designs and to support the sustainability of my work, I will now be offering my patterns for purchase on Etsy.
I am incredibly grateful for your support over the years. Your kind words, encouragement, and enthusiasm mean so much to me. I hope you’ll continue to enjoy my patterns and support this new chapter.
Please visit my Etsy shop HERE to view and purchase my collection.
Thank you for your understanding and for being an integral part of this journey.
![Autumn Maple Leaf Garland [Embellishment, Place Setting]](https://seeloveshare.it/wp-content/uploads/2024/09/Maple-Leaf-Garland-SeeLoveShare-1-1024x1024.jpg)
Autumn Maple Leaf Garland [Embellishment, Place Setting] Pattern Notes:
Each leaf is worked in 4 continuous rounds. Color changes for two-toned leaves are marked accordingly. These leaves tend to curl so blocking may be required. Blocking crochet work helps to shape and set your finished pieces for a more polished appearance. You’ll find a step-by-step guide on how to block your crochet project below.
Tips on Changing Colors:
- Finish the Last Stitch with the Old Color:
- Work until there are two loops on the hook with the old color.
- Yarn Over with the New Color:
- Before completing the last stitch with the old color, yarn over with the new color.
- Pull Through Loops:
- Finish the last stitch by pulling through the last two loops with the new color.
- Secure the Old Color:
- Once you’ve changed colors, secure the yarn of the old color by either crocheting over the tail or by weaving it in later.
Skill Level:
Easy/Intermediate – Suitable for crocheters familiar with basic stitches such as chain, single crochet, and slip stitch.
Measurements:
Each leaf is approx. 5in, 7in including the stem
Materials:
- #5 Bulky yarn
- As photographed: PATONS INSPIRED YARN in Scarlet, Ginger, Honey Spice & Olive
- 6 mm (US J-10) Crochet Hook
- Twine (if stringing as a garland)
- Tapestry needle
Blocking Materials:
- Blocking mat: A foam mat, yoga mat or thick towel will do.
- Pins: Rust-proof T-pins or sewing pins.
- Towel
If blocking is new to you, here are some helpful links to get you going (these are the exact materials I use):
Blocking Mats: https://amzn.to/3MT88QV
Blocking Pins: https://amzn.to/3MY9IRs
Gauge:
4″ x 4″ (10cm x 10cm) 11 sc x 12 r with 6 mm (US J-10) Crochet Hook
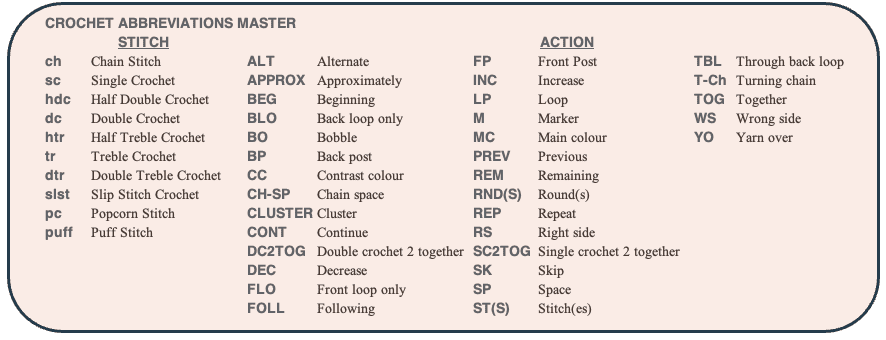
Abbreviations:
Autumn Maple Leaf Garland [Embellishment, Place Setting] Pattern:
If you’d like an Ad-Free Version or if you’d just like to support my effort – please consider purchasing a downloadable & printable version from my Etsy Shop! A little goes a long way. Thank you!
Blocking & Finishing:
Step 1:
- Fill a bowl with lukewarm water and submerge your crochet piece.
- Let it soak for about 10-15 minutes to ensure the fibers absorb the water evenly.
- Gently remove the piece and squeeze out excess water without wringing it.
- Place the piece on a towel, roll it up, and press to remove more water.
- Lay the piece flat on a blocking mat or thick towel, stretch it to the desired shape, and pin it in place.
- Allow it to dry completely (24-48 hours depending on the thickness of the yarn).
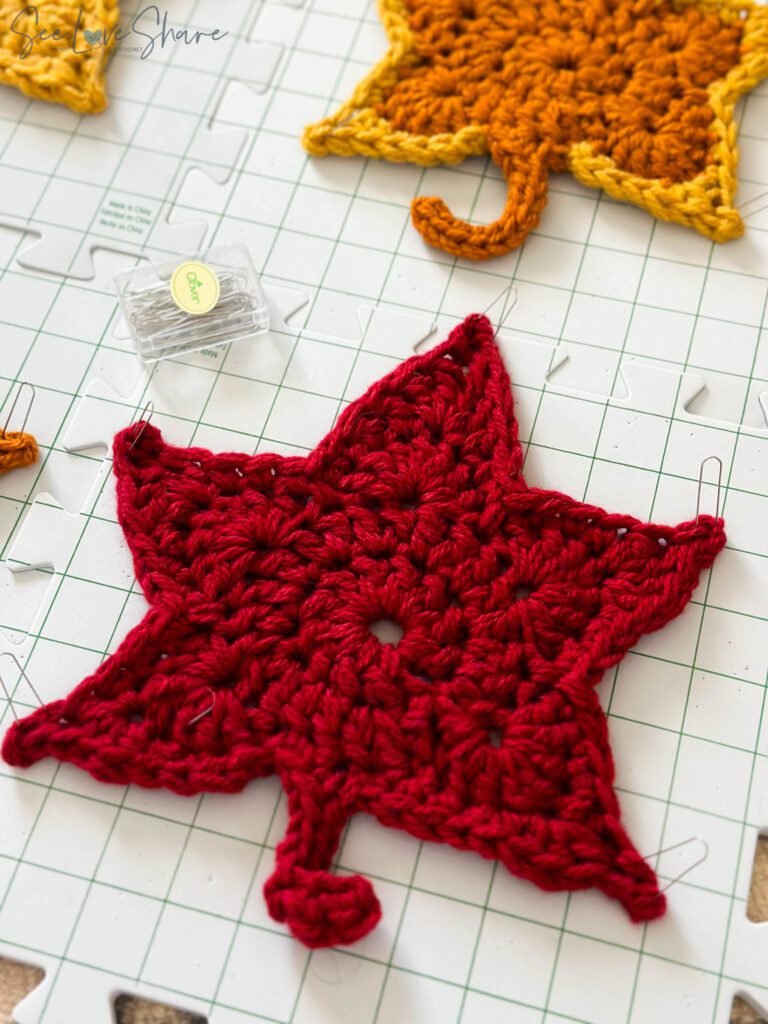
Shaping & Drying:
- While the project is pinned on your blocking mat, make sure to smooth and shape each part of the work evenly.
- Once the piece is completely dry, remove the pins and your crochet piece will retain the blocked shape.
Blocking can greatly improve the look and feel of your final crochet projects, especially when working on detailed patterns like lace or geometric shapes.
Garland Assembly:
Make a combination of 5-7 leaves depending on length of garland. Play with color combinations! I made a 6ft garland with 7 leaves and spaced them evenly across the twine.
With Twine, weave at the top of the point of the leaf, leaving around 6in slack between ornaments.
As Place Setting / Name Tag:
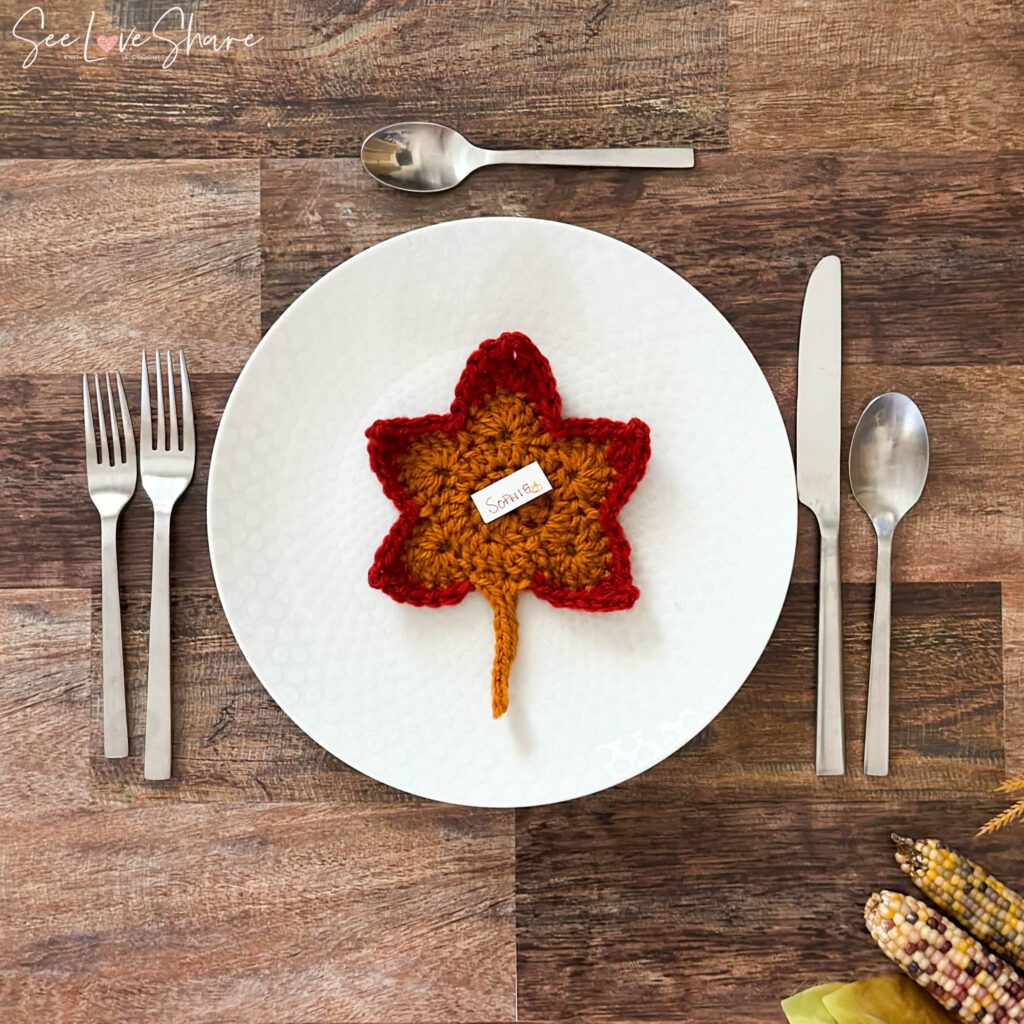
There are no hard rules here! I didn’t want to actually attach the name to the leaf because I want guests to take them home so I just laid a written name on top.
Looking for more holiday patterns? Check them out!