All Baby/Toddler/Kids Crochet Crochet Baby/Toddler/Kids
October 5th, 2023
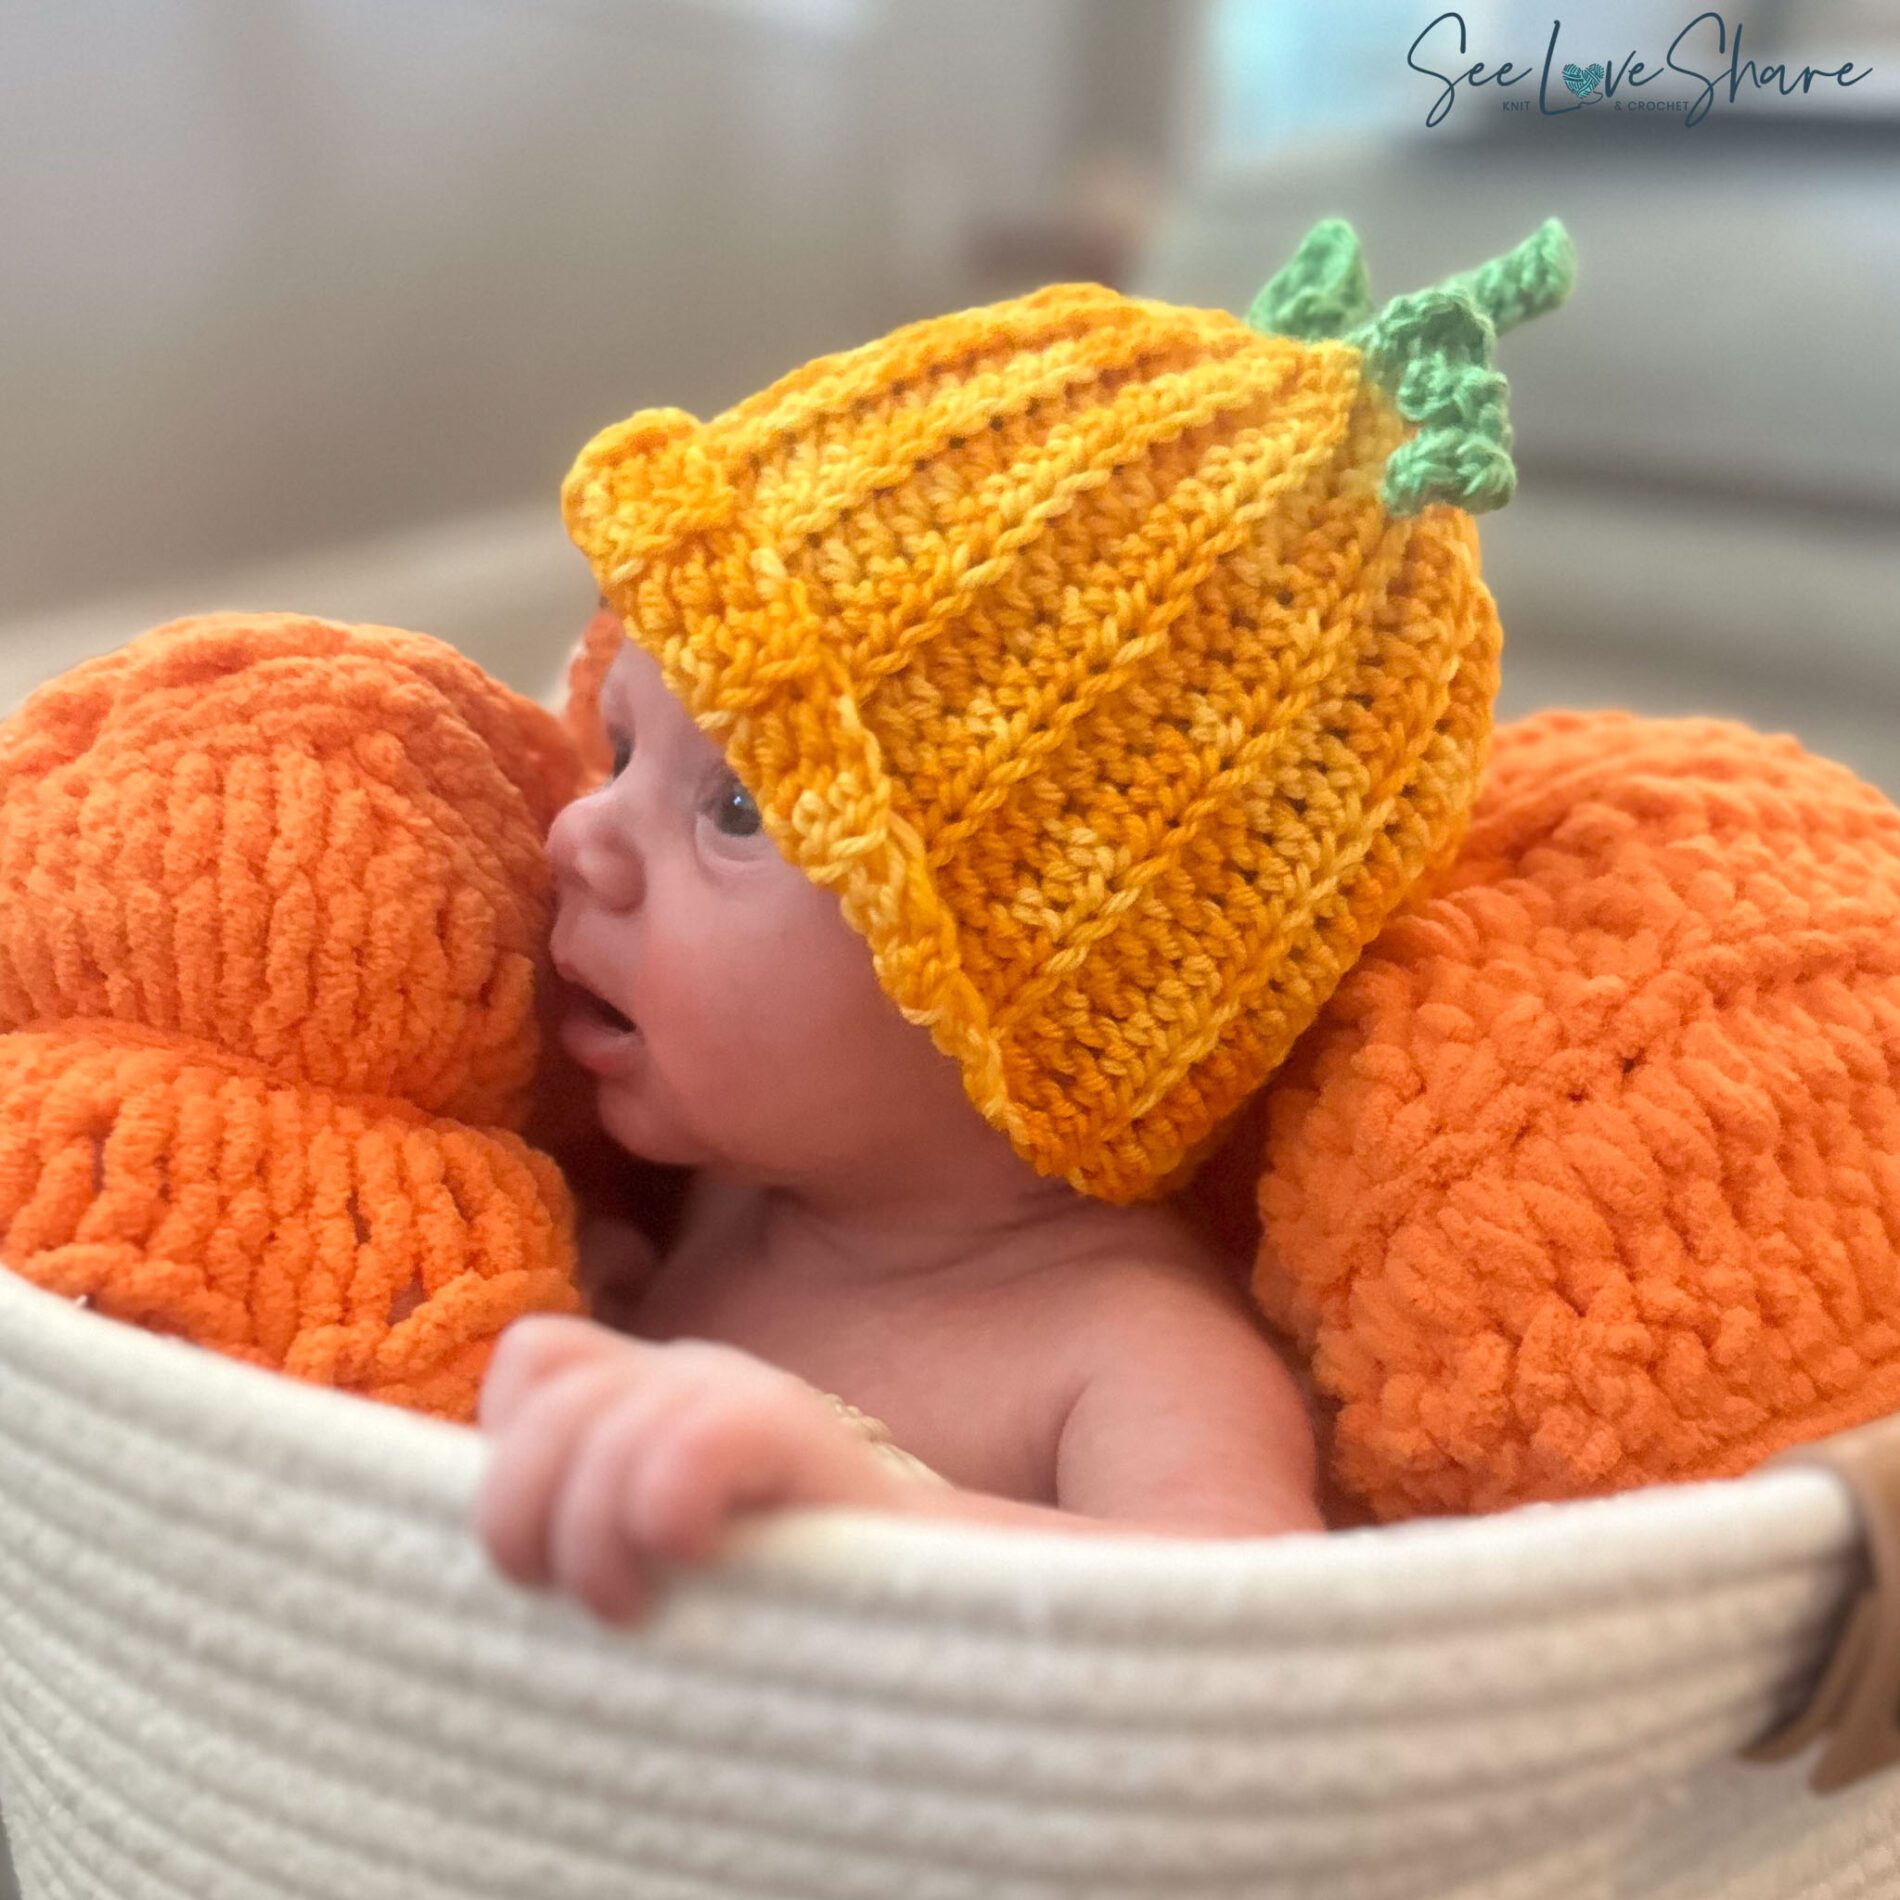
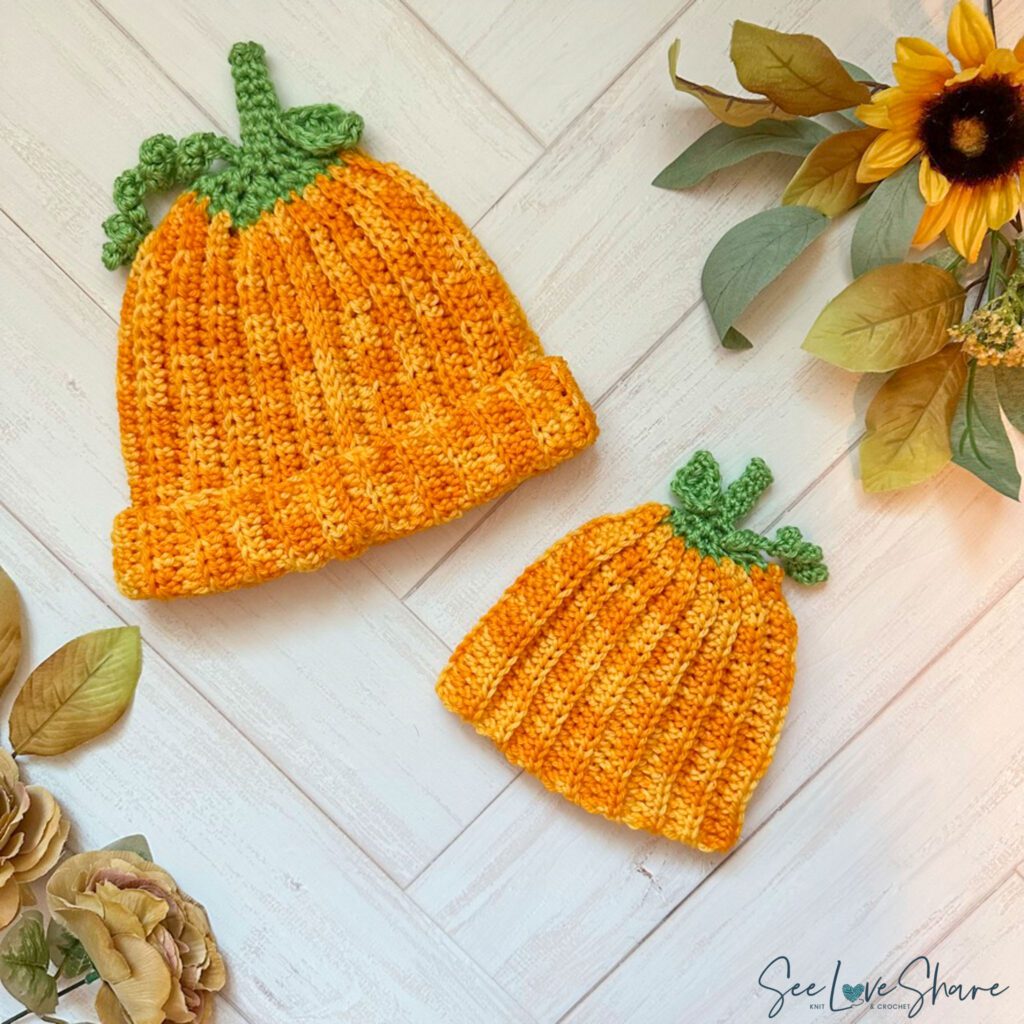
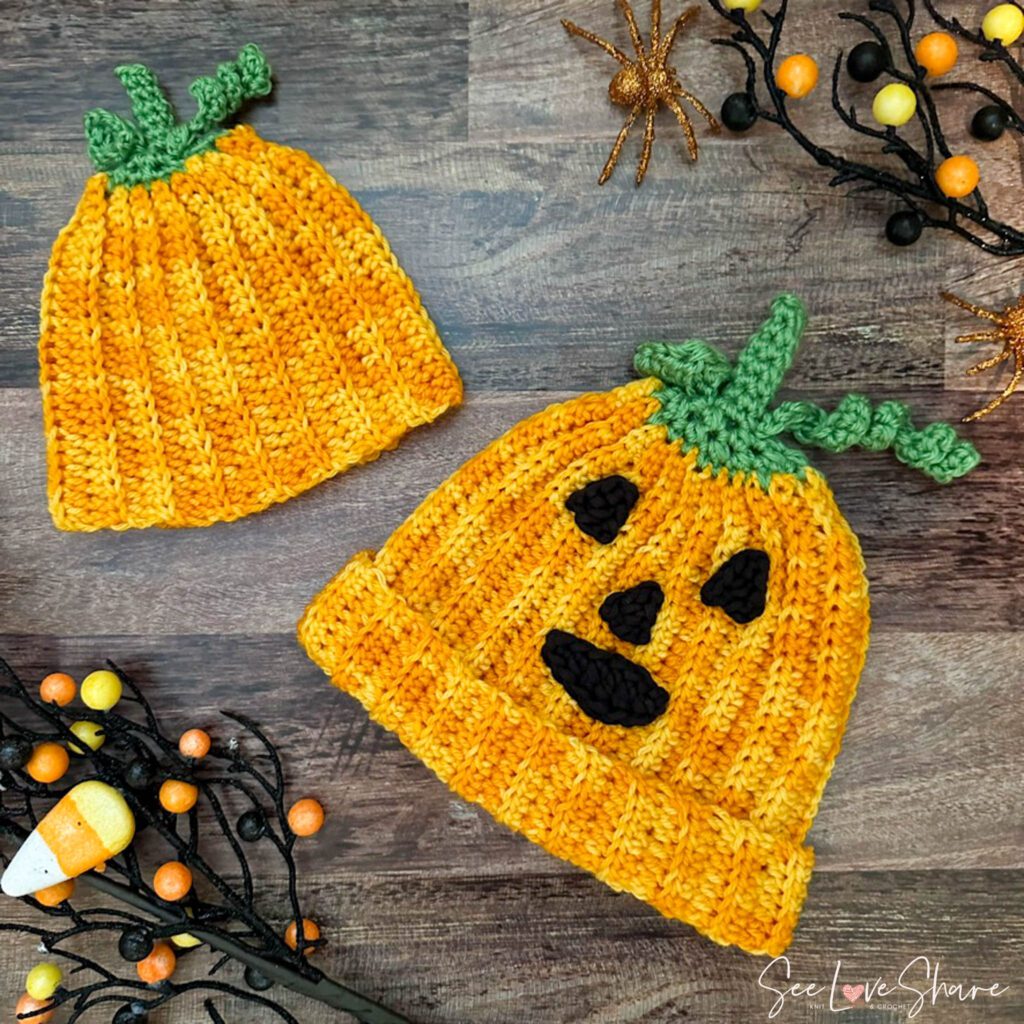
Baby’s First Pumpkin/Jack-O-Lantern Crochet Beanie Pattern
I couldn’t help it, my lil girl is 4 weeks old today so I celebrated by adding her to our growing pumpkin patch! Then her little brother saw it and wanted one for himself… just with a “happy face!” to wear for Halloween. Easy peasy! This pattern is beginner friendly and works up in a snap for any/all fall festivities.
UPDATE November 2024:
I hope that you’re enjoying your current knitting projects. It has been such a pleasure sharing my patterns with you and seeing your creativity bring them to life.
After much thought, I have made the difficult decision to no longer offer my patterns for free. This was not an easy choice—designing and sharing these patterns has always been a passion of mine and a way to connect with this amazing community.
However, the time, effort, and resources required to create, test, and perfect each pattern are significant. To continue bringing you high-quality, unique designs and to support the sustainability of my work, I will now be offering my patterns for purchase on Etsy.
I am incredibly grateful for your support over the years. Your kind words, encouragement, and enthusiasm mean so much to me. I hope you’ll continue to enjoy my patterns and support this new chapter.
Please visit my Etsy shop HERE to view and purchase my collection.
Thank you for your understanding and for being an integral part of this journey.

Pattern Notes:
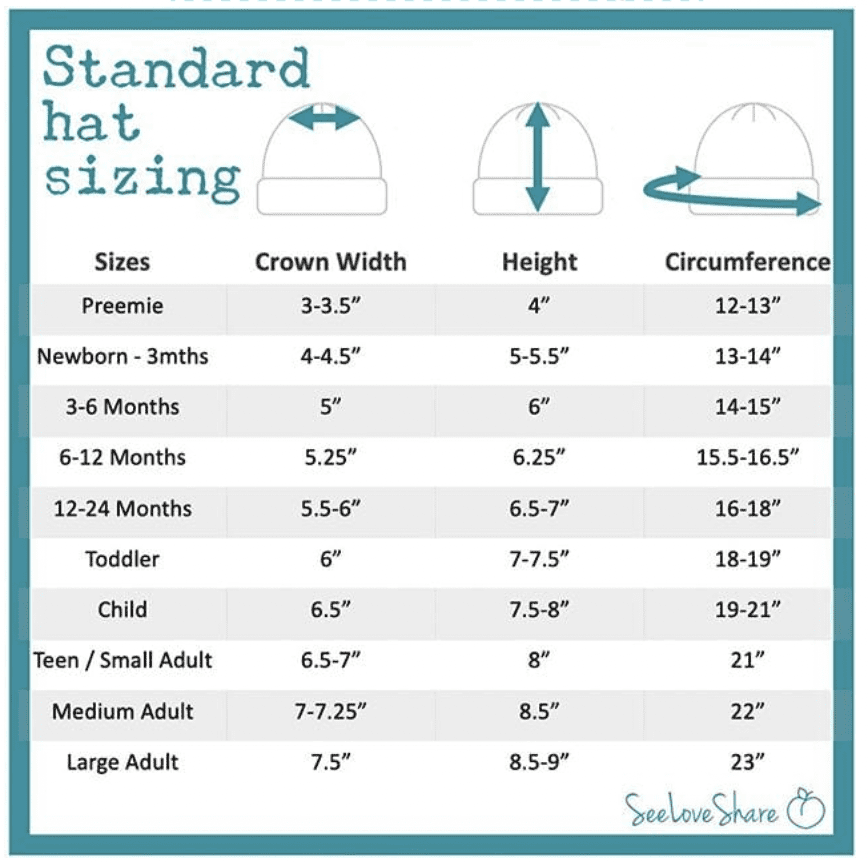
This pattern is written for a newborn but you can easily modify both the length and the width in the following instructions. Be sure to refer to the sizing chart below to adjust to the exact size you are looking to make.
Skill Level:
Beginner: For crocheters with understanding of basic crochet stitches.
Measurements:
Newborn – 3 Months: 7in high (with brim folded 5.5in), 13 in circumference (as noted above). Be sure to check your gauge, the following adjustments will only work if you are using similar yarn weight.
Add 4 sts for every inch in height you want to increase.
Add 4 rows for every inch in circumference you want to increase.
Materials:
- Any #4 DK yarn in a festive pumpkin colour + green for the stem
- Black #5 bulky yarn for face (optional)
- 5.0mm Crochet hook
- Tapestry needle
Gauge:
Crochet Gauge: 13 sc and 14 rows with a 5 mm (U.S. H/8) crochet hook
Abbreviations:
Ch: Chain
St: Stitch
SC: Single Crochet
SLST: Slip Stitch
HDC: Half double crochet
DC: Double crochet
TR: Treble crochet
BLO: Back loop only
Pattern:
For an Ad-Free Version or if you’d just like to support my effort – please consider purchasing a downloadable & printable version from my Etsy Shop! A little goes a long way. Thank you!
Looking for more Halloween Inspiration? Check out our catalogue here!