All Baby & Kids Free Knit Free Baby & Kids
March 19th, 2022
Bunny Ear Beanie – Free Knit Pattern
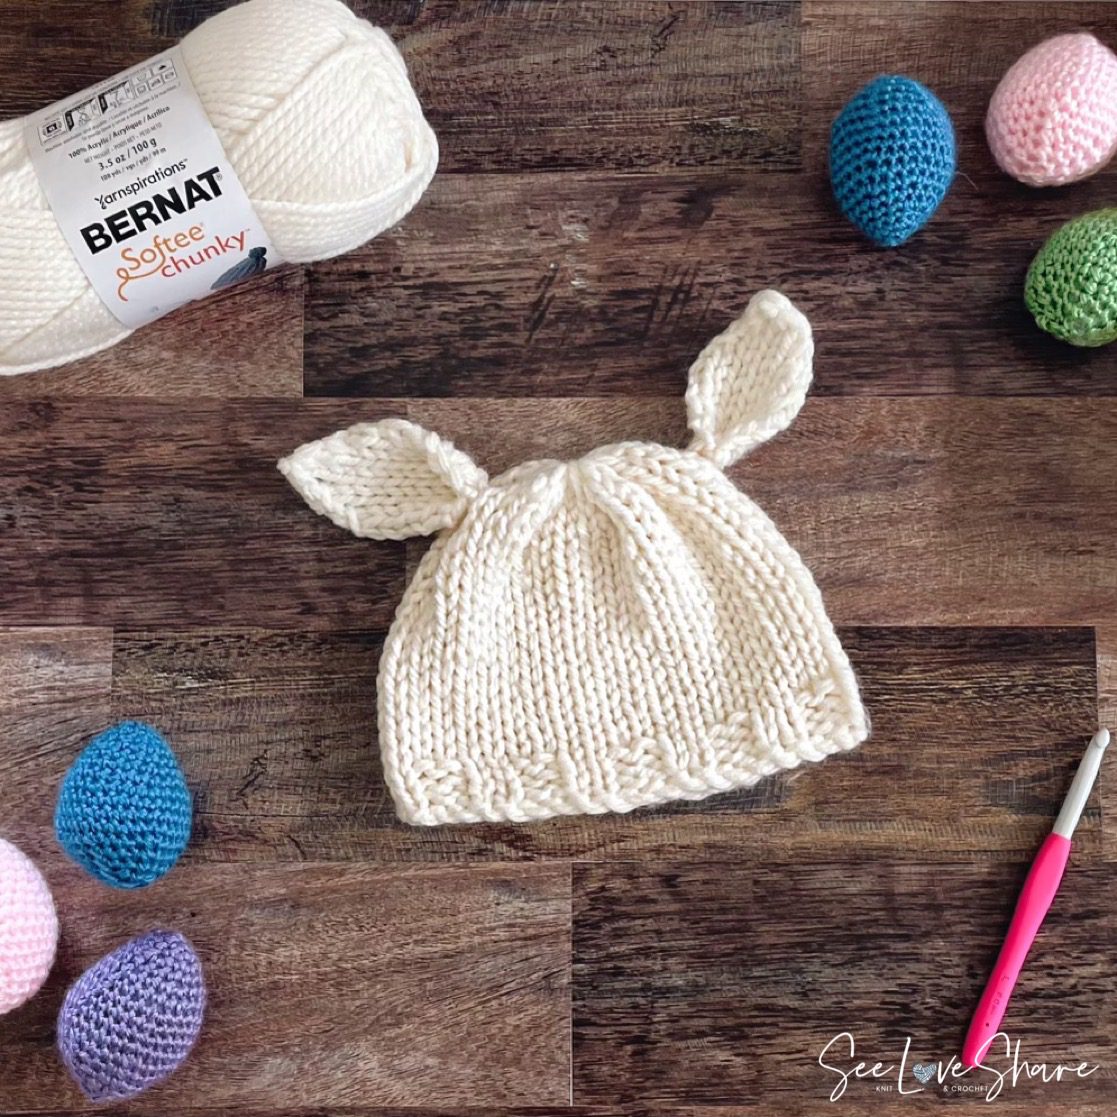
Looking for a quick, beginner-friendly knit baby hat pattern? This bunny ear beanie is one of the fastest baby hats I’ve ever made — I worked it up in 30 minutes for my little guy, and those floppy bunny ears are about the most adorable finishing touch on any baby hat. Worked in super bulky yarn on circular needles, it’s a perfect last-minute baby shower gift, Easter photo prop, or just-because handmade hat for the smallest member of your family.

This pattern is sized for 3–6 months but adjusts easily in 2-stitch increments for newborn through 6–12 months. The body is worked in the round on circular needles, the ears are knit flat in stockinette, and the assembly is just sewing the ears onto the finished hat. Beginner-friendly and beginner-fast. Let’s get into it.
Why You’ll Love This Bunny Ear Beanie Pattern
- Lightning fast — 30 minutes for the hat body, plus 10–15 for ears and assembly
- Beginner-friendly — only knit, purl, and basic decreases required
- Adjustable — sizes easily from newborn to 6–12 months in 2-stitch increments
- Adorable on Easter photos — those floppy ears are a photo-prop dream
- Stash-busting — needs just 1 ball of super bulky yarn
- Last-minute gift ready — perfect for that baby shower you forgot was tomorrow
Prefer the printable PDF?
Grab the Ad-Free Bunny Ear Beanie Pattern PDF
Get the same pattern in a clean, ad-free, printable PDF format — perfect for printing, saving to your pattern library, or following along offline. Use code SEELOVE15 for 15% off.
Prefer it ad-free?
Get the printable pattern PDF
The full written pattern, photos and notes — clean, ad-free, and yours to keep and print. Use code SEELOVE15 for 15% off.
Get the printable PDF on Etsy →Materials
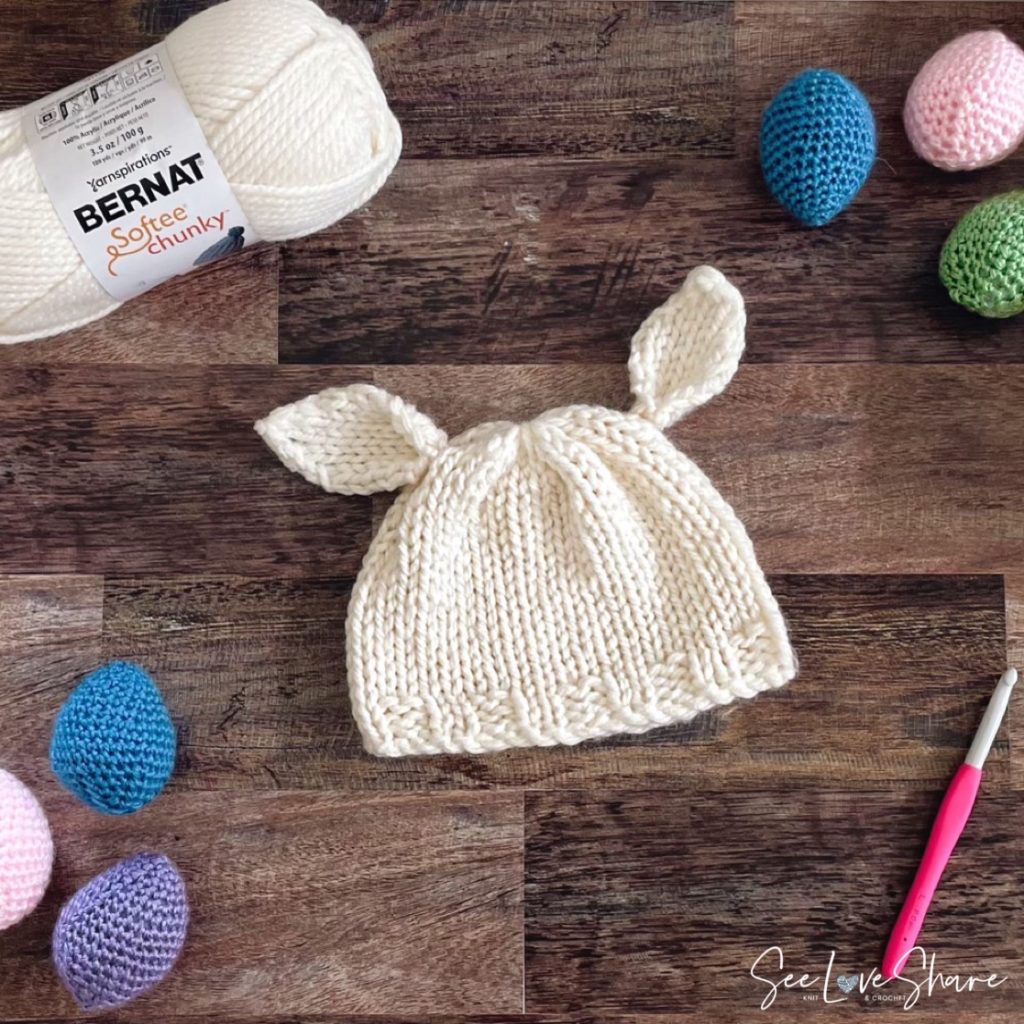
- 1 ball Bernat Softee Chunky yarn in Natural (or any super bulky #6 yarn)
- US 11 / 8mm circular knitting needles (6-inch length)
- Tapestry needle for finishing
- Scissors
Shop the materials


Pattern Details
| Skill level | Beginner |
| Gauge | 11 sts and 14 rows = 4 in with 8mm needle |
| Needle size | US 11 / 8mm circular (6 in) |
| Yarn weight | Super bulky #6 |
| Time to make | ~30 minutes (hat) + 15 min (ears) |
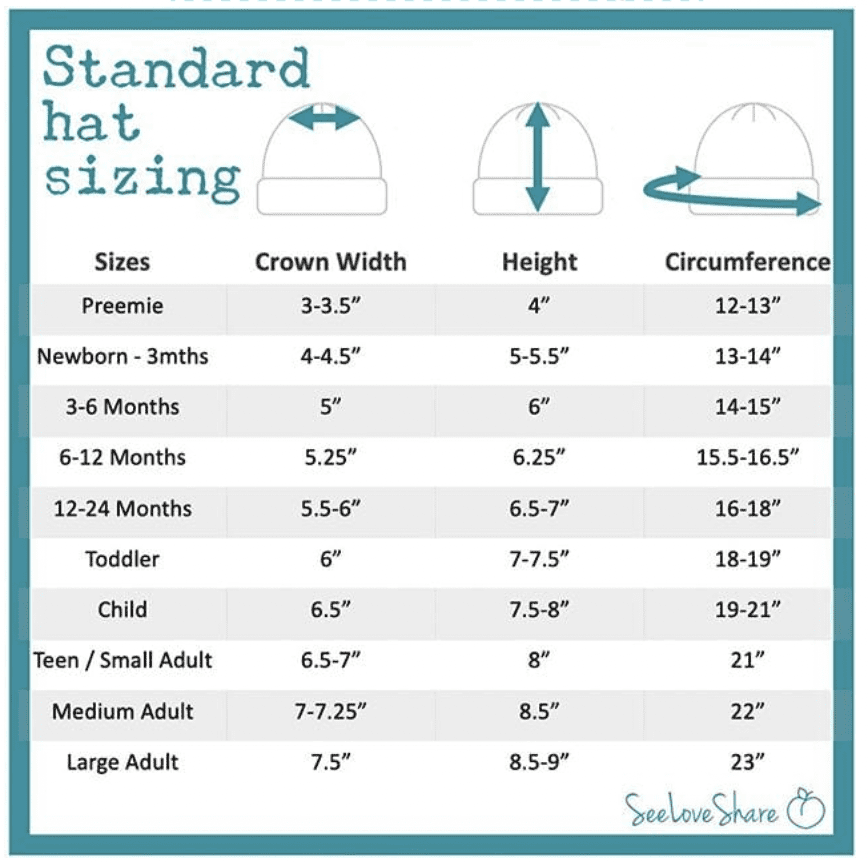
Size Chart
Pattern is written for 3–6 months. Adjust in 2-stitch increments for other sizes — cast on 38 stitches for newborn, 42 for 6–12 months, etc.
Abbreviations
- K — knit
- P — purl
- K2tog — knit 2 together
- P2tog — purl 2 together
- K3tog — knit 3 together
- St(s) — stitch(es)
The Pattern
Hat Body
Cast on 40 sts.
Ribbing: Working in rounds, repeat *K2 P2* around for 3 rounds.
Body: Knit every round until piece measures 1/2 inch shorter than desired height. For 3–6 months, work until length from beginning is 5.5 inches.
Crown:
Round 1: *K3, K2tog* around
Round 2: *K2, K2tog* around
Leave stitches on needles. Cut yarn leaving an 18-inch tail. Thread tail onto tapestry needle and weave through all loops while removing from needles. Pull tightly to cinch top closed. Weave in ends.
Ears (Make 2)
Cast on 7 sts.
Work stockinette stitch for 7 rows, ending with a WS row.
Row 8: P2tog, purl to last 2 sts, P2tog
Row 9: Knit
Repeat rows 8 and 9 until 3 sts remain. K3tog and bind off.
Assembly
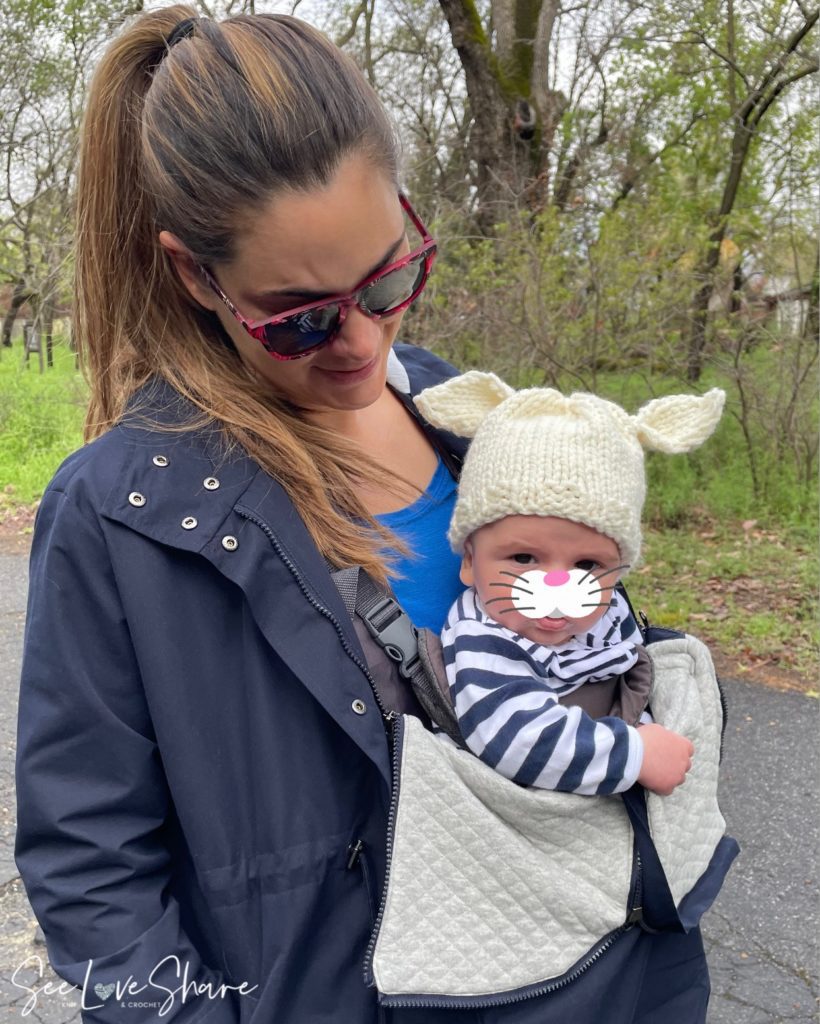
Position the two ears on either side of the top of the beanie, about 2 inches apart, with the pointed ends facing up. Pin in place if needed. Using your tapestry needle and a length of matching yarn, stitch each ear securely to the hat. Weave in all ends and enjoy!
Tips for the Best Bunny Ear Beanie
- Check your gauge — super bulky yarn varies a lot between brands, and even a small gauge difference can make a noticeable size change on a baby hat
- Use a stitch marker to mark the beginning of your round so you don’t lose your place
- Position the ears thoughtfully — placing them too close to the center makes them look like horns; about 2 inches apart gives a natural bunny look
- Block the ears if they want to curl — a quick steam or wet block helps them lie flat
- Color variations work beautifully — try pink, grey, brown, or pastel for spring photos
Pair It With More Easter Patterns
Building an Easter photo setup or putting together a gift basket? These free patterns pair beautifully with the bunny ear beanie:
- Crochet Bunny Tail Poms — adorable little bunnies to scatter around a basket or photo setup
- Crochet Easter Bunny & Carrot Garland — a sweet backdrop for newborn Easter photos
- Free Crochet Bunny Appliqué — add a matching appliqué to a baby blanket
- Knit Bunny Block — a soft bunny stuffie that pairs with the hat for a complete baby gift
More Free Baby Hat Patterns You’ll Love
- Hudson’s Baby Beanie — another quick free knit baby hat in a different style
- Baby and Kiddo Moose Hat — a sweet crochet hat with antlers for the winter season
Frequently Asked Questions
What size does this bunny ear beanie pattern make?
The pattern as written makes a 3–6 month size. To adjust: cast on 38 stitches for newborn, 42 stitches for 6–12 months, or 44 stitches for toddler. Always work in multiples of 4 to keep the ribbing pattern intact.
Can I use a different yarn weight?
Yes — any super bulky #6 yarn will work in this pattern. If you want to use a different weight, you’ll need to adjust your needle size and gauge accordingly, and likely your stitch count too. The pattern is fastest with super bulky because the stitches grow quickly.
How long does this bunny hat take to knit?
About 30 minutes for the hat body itself, plus another 10–15 minutes for the ears and assembly. So under an hour total for experienced knitters. Perfect for a last-minute baby shower gift or a quick Easter project.
Can I make this with straight needles instead of circular?
It’s possible, but you’d need to work the hat flat in rows and seam it up the back. This adds about 15 minutes to the project and creates a visible seam line. Circular needles are strongly recommended for a seamless finish — they’re also a worthwhile investment for any hat or sock knitter.
Can I sell items made from this pattern?
Yes — you’re welcome to sell finished items made from this free pattern. Please credit SeeLoveShare as the pattern designer when listing your items. The pattern itself may not be reproduced, redistributed, or resold.
More Baby & Easter Patterns You’ll Love
 Baby Bunny C2C Throw — the matching bunny blanket for this hat
- Free Crochet Bunny Appliqué — a 10-minute Easter accent
- Hudson’s First Baby Beanie — a free beginner crochet beanie
- Baby & Kiddo Moose Hat — another animal-ear hat to make next