April 26th, 2021
Crochet Bunny Tail Poms (Easy Easter Crochet Pattern)
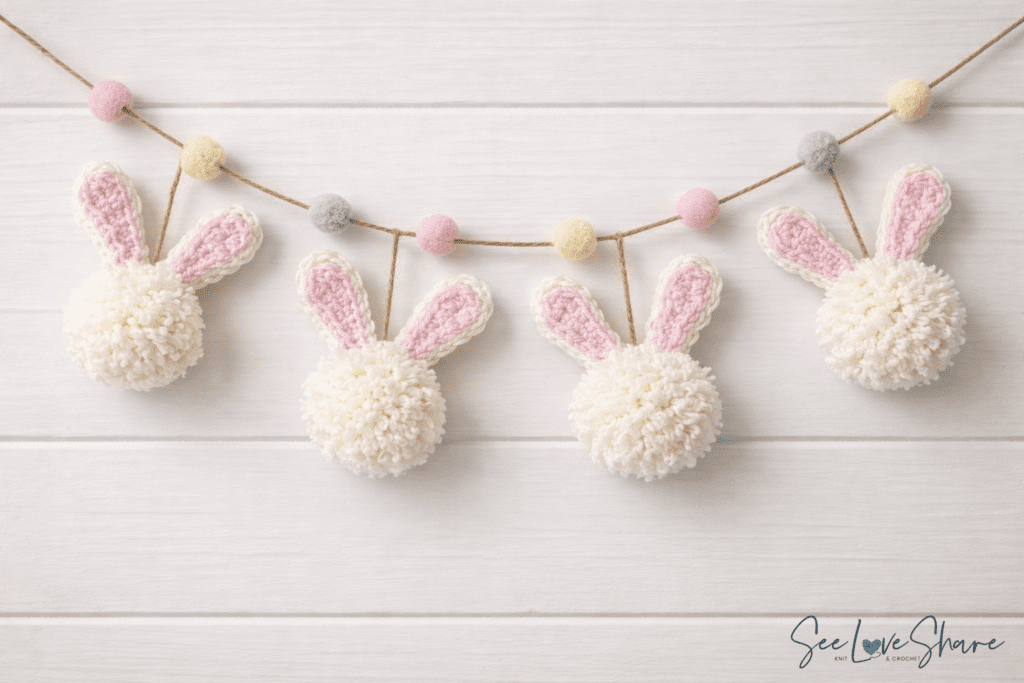
Looking for a cute and easy Easter crochet project? This adorable crochet bunny tail pattern are the perfect way to add a handmade touch to your spring decorations. This beginner-friendly pattern works up quickly with a pom maker and a small amount of bulky yarn, and the finished bunnies are versatile little spring decor pieces that look sweet on a garland, in a basket, on a tiered tray, or as a finishing touch on Easter gifts.

Whether you’re decorating for Easter, putting together a baby shower table, or just looking for a fun spring craft to do with the kids, these crochet bunny tails are a fun, fast, and satisfying project. Grab your pom maker and some squishy chunky yarn — let’s work some up.
Why You’ll Love This Crochet Bunny Tail Pattern
- Beginner-friendly — only basic crochet stitches required (single, half double, double crochet, slip stitch)
- Quick to make — each bunny takes about 30 minutes including the pom
- Stash-busting — uses small amounts of bulky yarn, perfect for using up leftover skeins
- Kid-friendly — kids love helping with the pom maker
- Endlessly versatile — string them as a garland, drop them in a basket, or use as gift toppers
- Sweet handmade spring decor — adds that handmade touch every Easter table deserves
Ways to Use Crochet Bunny Tail Pattern
These little crochet bunny tails are some of the most versatile spring decor pieces I make. Here are a few of the ways I’ve used them:
- Easter garland — string 5-7 bunnies on natural twine across a mantel or doorway
- Basket decoration — tuck a few into your Easter basket display
- Tiered tray decor — perfect-sized accent for spring tray styling
- Gift toppers — attach to a wrapped gift instead of a bow
- Spring table settings — one at each place setting as a sweet favor
- Nursery decor — soft and safe enough for a baby’s room shelf

Prefer the printable PDF?
Grab the Ad-Free Bunny Tail Pattern PDF
Get the same pattern in a clean, ad-free, printable PDF format — perfect for printing, saving to your pattern library, or following along offline. Use code SEELOVE15 for 15% off.
Materials for the Crochet Bunny Tail Pattern
- Yarn: Bernat Softee Chunky in Natural and Baby Pink — small amounts of each (less than half a skein per bunny)
- Hook: 8.0mm (US L/11) crochet hook
- Pom maker: A pom maker set makes this much faster (you can also make poms by hand without a tool)
- Tapestry needle for sewing pieces together
- Scissors


Crochet Bunny Tail Pattern Details
- Skill level: Beginner-friendly
- Finished size: Approx. 4 inches wide by 8 inches tall
- Gauge: 8 sc and 9 rows = 4″ with an 8mm (US L/11) crochet hook (gauge isn’t critical for this project)
- Time: About 30 minutes per bunny including the pom
Abbreviations
- ch — chain(s)
- cont — continue
- sc — single crochet
- hdc — half double crochet
- dc — double crochet
- sl st — slip stitch
- st(s) — stitch(es)
The Pattern
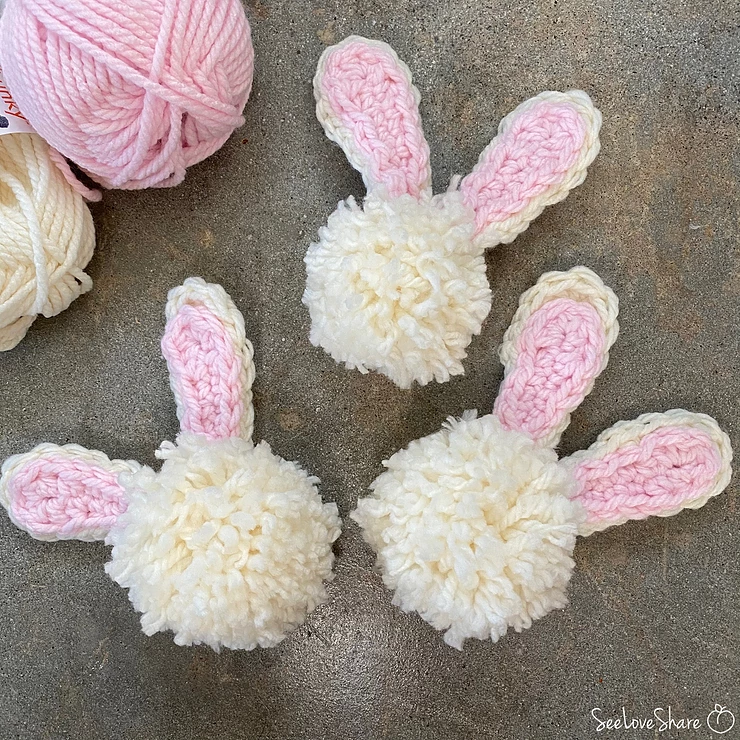
Step 1: Make the Pom (Bunny Body)
Using the Natural yarn, work up a pom using your pom maker (or hand-wind one if you don’t have a pom maker tool). Trim and shape the pom into a tidy round, leaving a long tail on the tie so you can attach the ears later.
Step 2: Crochet the Ears (Make 2 of Each Color)
Outer Ear — With Natural: Ch 10.
Row 1: Sc in 2nd ch from hook, sc in next 2 sts, hdc in next 3 sts, dc in next 2 sts, 5 dc in the last st (wrapping around to other side). Continuing on the back of the chain: dc in next 2 sts, hdc in next 3 sts, sc to end. Bind off.
Inner Ear — With Baby Pink: Ch 9.
Row 1: Sl st in 2nd ch from hook, sl st in next 2 ch, sc in next 3 ch, hdc in next ch, 5 hdc in last ch (wrapping around to the other side). Continuing on back of the chain: hdc, sc in next 3 ch, sl st to end. Bind off with a long tail to sew to the Natural piece of the ear.
Repeat both pieces to make your second ear (so you’ll have two Natural pieces and two Baby Pink pieces total).

Step 3: Assembly
With the front side facing, sew the Baby Pink inner ear snugly inside the larger Natural outer ear. Repeat with the second ear.
Attach the assembled ears to the pom by securing them through the centre of the pom, attached to the loop holding the pom together. The ears should sit upright at the top of the pom, slightly tilted.
Trim any uneven yarn ends on the pom for a clean, tidy bunny shape.

Finishing Tips
- For a garland: String 5-7 finished bunnies on natural twine, jute, or yarn — space them about 4 inches apart
- For a basket or tray: Make a small batch in different sizes (try a bigger pom for a “mama” bunny and smaller for babies)
- For gifts: Tie a small ribbon around the base where ears meet body for a finished look
- Color variations: Try gray + light pink, brown + cream, or all white for a “snow bunny” look
More Easter Crochet Patterns You’ll Love
- Knit Bunny Ear Beanie — a quick 30-minute baby hat with adorable floppy ears, perfect for Easter photos
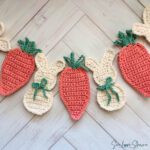
- Crochet Easter Bunny and Carrot Garland — pair this garland with your bunny tail poms for a full mantel display
- Free Polka Dot Easter Egg Pattern — sweet beginner-friendly amigurumi eggs that look adorable in a basket with your bunny tails
- Crochet Easter Wreath — Eggs in the Nest — a sweet wreath pattern that pairs beautifully with the bunny tail garland
- Free Crochet Bunny Appliqué Pattern — a flat bunny appliqué that complements these 3D bunny tails beautifully
Frequently Asked Questions
Do I need a pom maker to make this crochet bunny tail pattern?
No — a pom maker speeds things up considerably, but you can absolutely hand-wind poms by wrapping yarn around a fork or cardboard. A pom maker just gives you more consistent, fuller poms with less effort. If you’re making more than a couple of bunnies, the time savings are worth it.
Can I use a different yarn weight?
Yes, this pattern is flexible. Worsted weight yarn will make smaller, more delicate bunnies. Super bulky yarn will make oversized statement bunnies. Just match your hook size to your yarn weight, and adjust the ear chain count by 1-2 stitches if your tension differs.
How many bunnies do I need for a garland?
For a standard 5-6 foot mantel garland, 5-7 bunnies spaced about 4 inches apart looks balanced. For a doorway garland, you might want 7-10. Make a few extras to have spares for baskets, gifts, or tucking in around other decor.
Are these bunnies safe for kids or pets?
The yarn pieces are durable and child-friendly for display purposes, but they’re not toys — small loose yarn fibers from the pom could be a hazard for very young children or pets who chew. Use them as decor and store out of reach of curious mouths.
Where can I get the printable PDF pattern?
The ad-free printable PDF version is available in my Etsy shop. The PDF includes the full pattern with step-by-step photos in a clean, printable layout. Use code SEELOVE15 for 15% off at checkout.
More Easter & Spring Patterns You’ll Love
 Crochet Easter Bunny & Carrot Garland — a charming beginner spring garland
- Crochet Easter Eggs — Free Pattern — polka dot eggs to fill your basket
 Polka Dot Easter Basket — the perfect basket to hold them all
- Baby Bunny C2C Throw — a sweet bunny blanket for the nursery