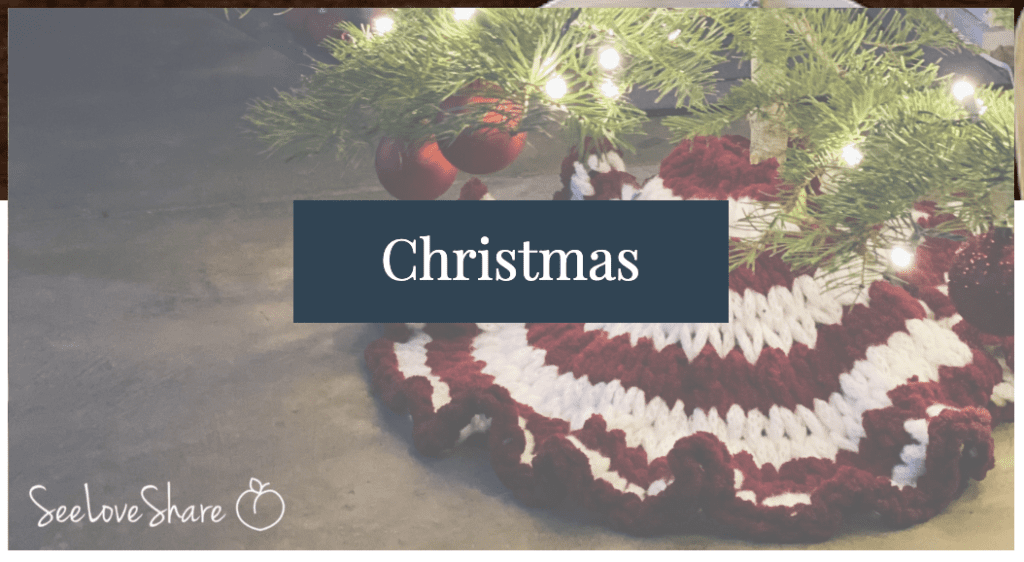
All Holiday All Home Decor Crochet
November 13th, 2023
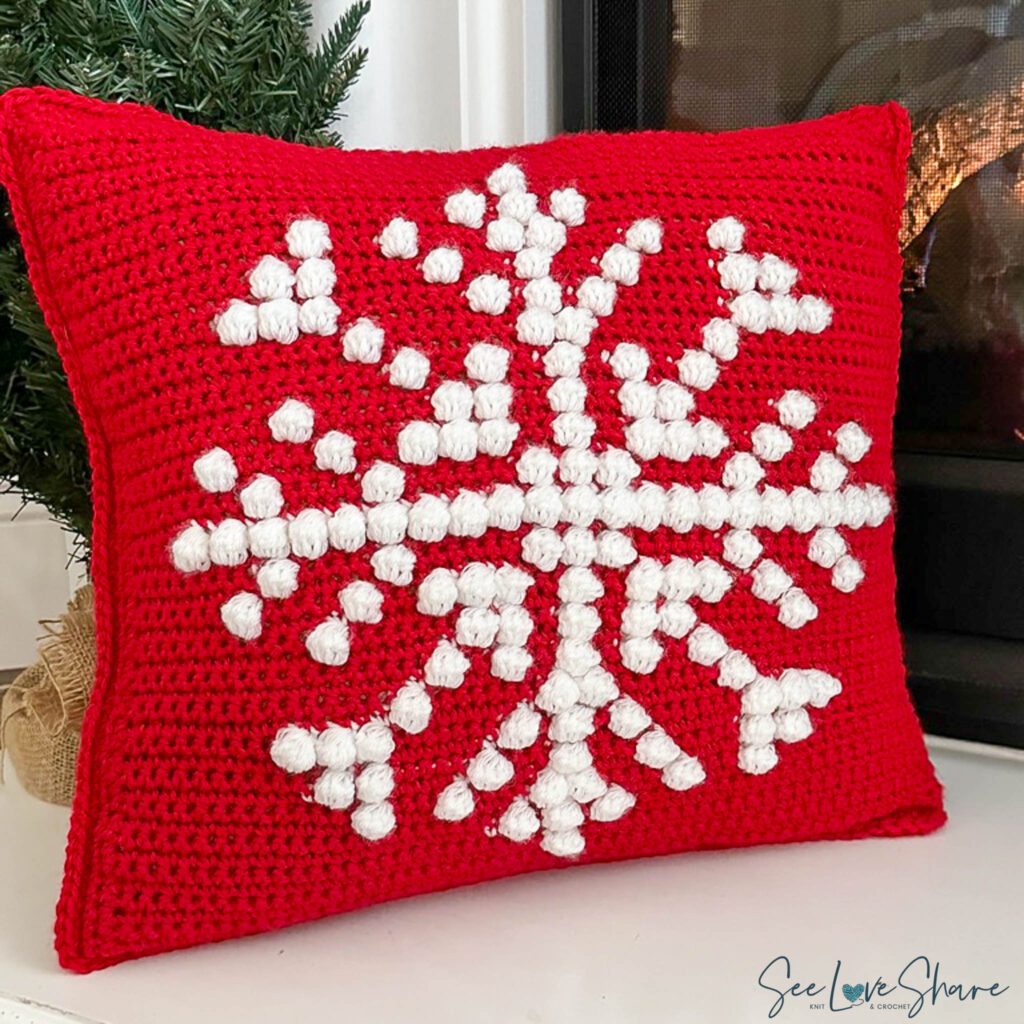
Snowflake Bobble Stitch Holiday Pillow Cover – Free Crochet Pattern
Crochet your way to a festive and cozy holiday season with our Holiday Snowflake Bobble Pillow Pattern.
Embrace the magic of the holiday season with our enchanting Holiday Snowflake Bobble Pillow Pattern. This delightful crochet pattern combines the cozy charm of a decorative pillow with the intricate beauty of snowflakes, creating a festive accent that will instantly transform your home into a winter wonderland. Whether you’re an experienced crocheter or just starting your crafting journey, this pattern is designed to bring the joy of handmade decor to your holiday celebrations.
Pattern Notes:
- This pattern uses the Intarsia Crochet technique that involves using multiple colors in a single row or round of crochet to create a specific design or pattern.
- The pattern is written out by row, but you can also follow the graph for the color work.
- Each square represents an individual stitch, either a single crochet or bobble stitch.
- Beginning Ch-1s do not count as a stitch throughout the entire pattern.
- Bobbles are worked only on EVEN rows (wrong side of work) and are always worked in the contrast color. When bobbles are marked in the pattern, you are to follow the color change at the same time. See tips on changing colors below.
- For simplicity, you can bind off the CC after every even row and reattach at the next even row (this saves you from carrying the yarn in the back across 2 rows).
- Once the back and front panels are complete, we will edge the work with sc to ensure a clean seam when joining the seams together. You can increase the size of the work by increasing the edging. If you are working this up as a pillow cover you many need an additional round or 2 of edging to fit over your existing pillow (you may not need to do this if using a pillow form).
Tips on Changing Colors:
- Finish the Last Stitch with the Old Color:
- Work until there are two loops on the hook with the old color.
- Yarn Over with the New Color:
- Before completing the last stitch with the old color, yarn over with the new color.
- Pull Through Loops:
- Finish the last stitch by pulling through the last two loops with the new color.
- Secure the Old Color:
- Once you’ve changed colors, secure the yarn of the old color by either crocheting over the tail or by weaving it in later.
Skill Level:
Intermediate: For crocheters with some experience. More intricate stitches, shaping & finishing.
Measurements:
The pattern is written for a 16x16in pillow and can easily be increased by adding additional rounds to the edging. Each round of edging will add approx. ½ inch to the size of the panel.
Materials:
- #3 Medium yarn
- Main color (MC): 2 ball of 198 g/7 oz, 338 meters/370 yards
- Contrast color (CC): 1 ball of – 198 g/7 oz, 338 meters/370 yards
- As photographed – Red Heart With Love in Holy Berry (MC) and Eggshell (CC)
- Size 6.5 mm (U.S. K/10 ½)
- Tapestry needle
Gauge:
- Crochet Gauge: 4″ x 4″ (10 cm x 10 cm) 14 sc and 14 rows with a 6.5 mm (U.S. K/10 ½) crochet hook
Abbreviations:
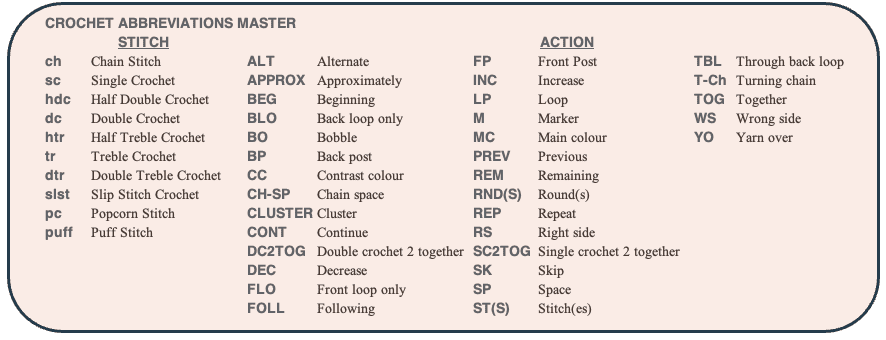
Bobble St: Yarn over, insert hook into stitch, yarn over and pull through (three loops on hook), yarn over and pull through 2 of the loops. Repeat the previous step four more times so that you have five not-quite-complete dc stitches worked into the same stitch. There will be six loops on the hook. Yarn over and pull through all six loops. This closes your bobble crochet stitch.
If you’d like an Ad-Free Version or if you’d just like to support my effort – please consider purchasing a downloadable & printable version from my Etsy Shop! A little goes a long way. Thank you!
Pattern:
- REFER TO BOBBLE GRAPH AS ATTACHMENT –
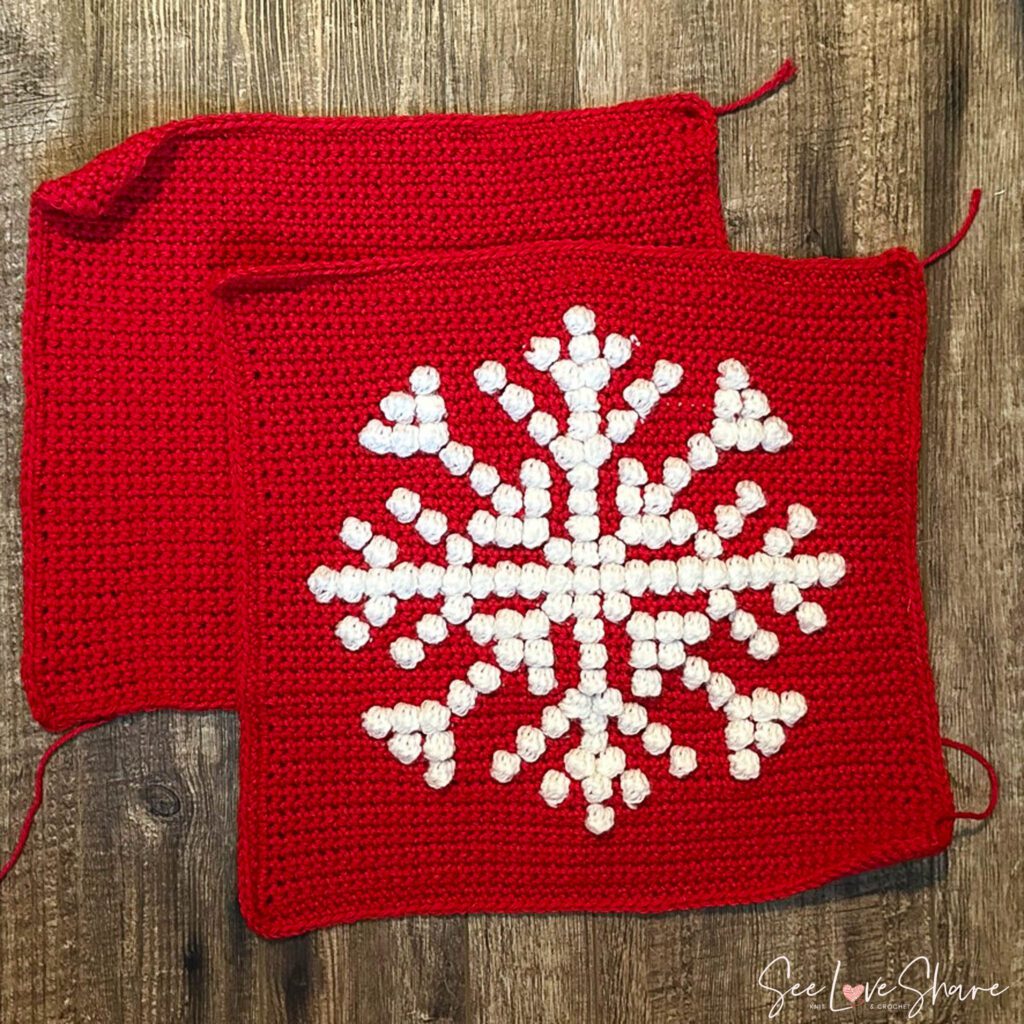
Front Panel:
To start, with MC, ch 52
Row 1: sc in 2nd ch from hook to end, ch 1, turn (51 sts)
Row 2-5: sc in each st across, ch 1, turn
Row 6: Begin color work on WS: sc in the first 25 sts, change color to CC, work bobble in the next st, change color to MC, sc to end, ch 1, turn. Color changes are called out in this row but will be integrated into the rows going forward (see pattern notes above).
Row 7: and every odd row: sc in each st across, ch 1, turn
Row 8: sc in first 22, bobble, sc in next 2 sts, bobble, sc in next 2 sts, work bobble, sc to end, ch 1, turn
Row 10: sc in first 13, bobble, sc in next 4 sts, bobble, sc in next 5, bobble, sc, bobble, sc in next 5 sts, bobble, sc in 4, bobble, sc to end, ch 1 turn
Row 12: sc in first 11, bobble, sc, bobble, sc in 6, bobble, sc in 4, bobble, sc in 4, bobble, sc in 6, bobble, sc, bobble, sc to end, ch 1, turn
Row 14: sc in first 9, [bobble, sc, bobble, sc, bobble, sc in 8, bobble] within [] all in CC, sc in 2, bobble, sc in 2, bobble, sc in 8, bobble, sc, bobble, sc, bobble, sc to end, ch 1, turn
Row 16: sc in first 15, bobble, sc in 8, bobble, sc, bobble, sc in 8, bobble, sc to end, ch 1 turn
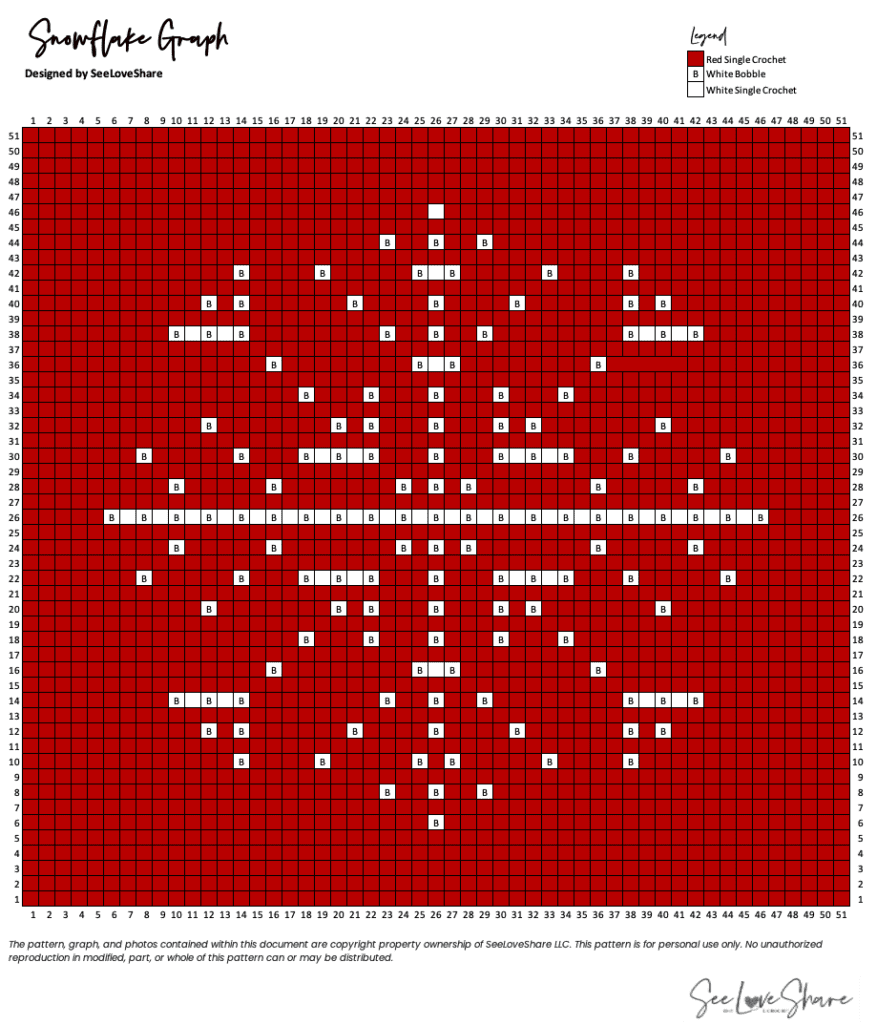
Row 18: sc in first 17, bobble, sc in 3, bobble, sc in 3, bobble, sc in 3, bobble, sc in 3, bobble, sc to end, ch 1, turn
Row 20: sc in first 11, bobble, sc in 7, bobble, sc, bobble, sc in 3, bobble, sc in 3, bobble, sc, bobble, sc in 7, bobble, sc to end, ch 1, turn
Row 22: sc in first 7, bobble, sc in 5, bobble, sc in 3, [bobble, sc, bobble, sc, bobble] within [] all in CC, sc in 3, bobble, sc in 3, [bobble, sc, bobble, sc, bobble] within [] all in CC, sc in 3, sc in 5, sc to end, ch 1, turn
Row 24: sc in first 9, bobble, sc in 5, bobble, sc in 7, bobble, sc, bobble, sc, sc in 7, bobble, sc in 5, bobble, sc to end, ch 1, turn
Row 26: sc in first 5, [work *bobble, sc* repeated to last 6 sts, work one last bobble] within [] all in CC, sc to end, ch 1, turn
Row 28: as row 24
Row 30: as row 22
Row 32: as row 20
Row 34: as row 18
Row 36: as row 16
Row 38: as row 14
Row 40: as row 12
Row 42: as row 10
Row 44: as row 8
Row 46: as row 6
Row 47-51: sc in each st across, ch 1, turn. Bind off on final row.
Back Panel:
To start, with MC, ch 52
Row 1: sc in 2nd ch from hook to end, ch 1, turn (51 sts)
Row 2-51: sc in each st across, ch 1, turn. Bind off on final row.
Closing and Finishing
Place pieces together with both the right sides facing out. SC the pieces together, working 1 SC into each ST across the top, side, and bottom, and working 2 SC into each corner. Insert the pillow form and close the last side by SC up the final side. SL ST into the 1st SC worked, tie off yarn, and weave in end.
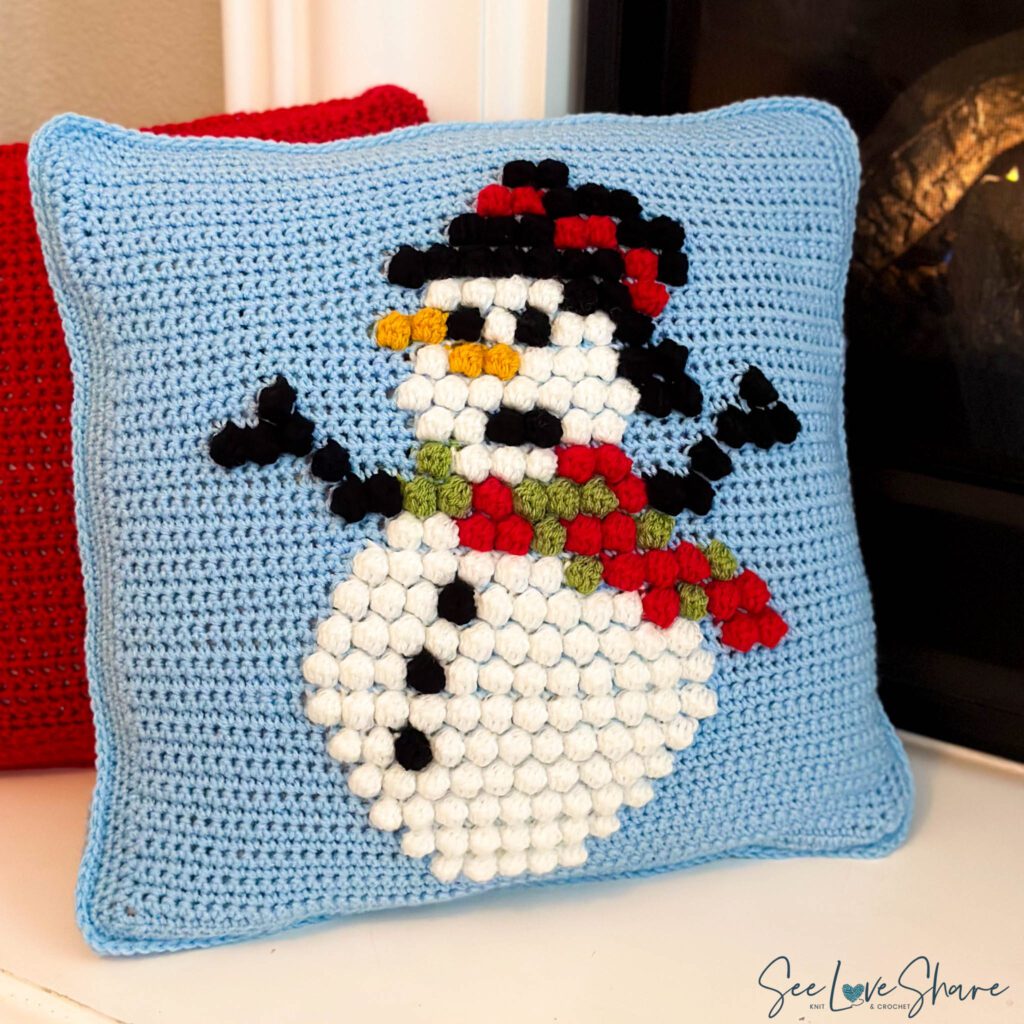
Pssssss… add Frosty to the collection!
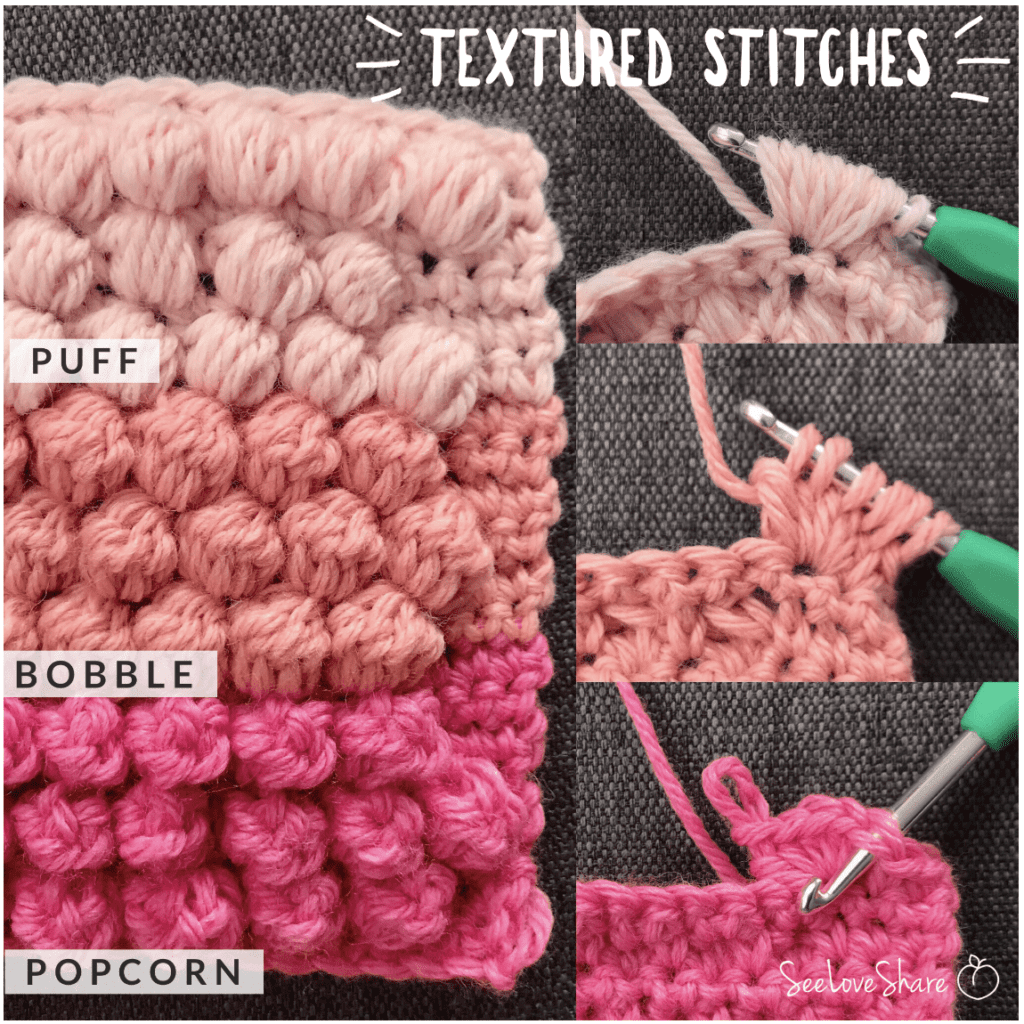
Know the difference between Puff, Bobble and Popcorn Stitches? Check them out here..
Want even more holiday? Check out our Christmas collection here: