
Free Blankets Free Knit All Blanket Patterns
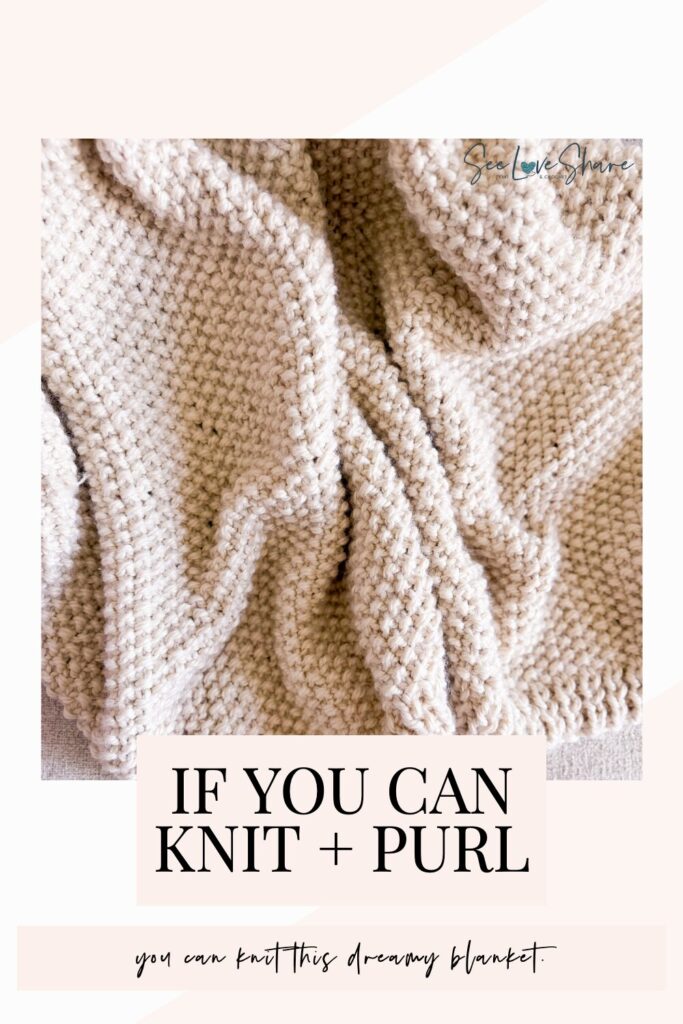
If you’ve ever wanted a soft, pillowy knit blanket that looks like a marshmallow cloud — but knit it using only the two stitches you already know — this seed stitch knit blanket is the pattern. The Whipped Cream Seed Stitch Blanket creates a beautifully textured, reversible fabric using nothing but knit and purl, and it works up beautifully fast in super bulky yarn. It’s the kind of throw that looks impressive on the sofa but actually finishes in a long weekend.
🧶 Part of the Re-Spun Series. This throw is one of three easy knit-and-purl blankets made with Lion Brand Re-Spun Thick & Quick. Browse all three in the Easy Knit and Purl Blanket Patterns series.
Why I designed this Whipped Cream Seed Stitch Blanket
I love textured knits. The kind that look impressive on the sofa but don’t require advanced skills to create. After releasing the Seersucker Stitch Knit Throw as Pattern 1 in the Re-Spun Series, so many of you asked: “What’s next? Something even simpler?”
This blanket is the answer. Seed stitch is one of the most beloved beginner knitting stitches — it’s just alternating knits and purls, but unlike ribbing, you knit the purls and purl the knits on every following row. The result is a soft, dimensional, pebbled fabric that’s beautifully reversible and looks the same from both sides. There’s no shaping, no seaming, no carrying yarn. Just a relaxing rhythm that becomes meditative the moment you find it.
For those who appreciate handcrafted items, this seed stitch knit blanket is a beautiful way to express your creativity. By following this simple pattern, you can create a unique throw that showcases your knitting skills with a stunning finished look.
The Whipped Cream Seed Stitch Blanket is perfect for cozy nights on the couch, adding a soft handmade touch to your home decor while keeping you warm. Whether draped over a chair or snuggled under while watching your favorite movie, this throw is sure to become your everyday favorite.
Made with sustainable yarn
This pattern was designed for Lion Brand Re-Spun Thick & Quick — a soft super bulky yarn made from 100% recycled polyester. Each skein gives new life to about 6 plastic bottles. It has the same gorgeous chunky look as any super bulky yarn, with a smaller environmental footprint.
The colorway shown is Whipped Cream — a soft, creamy off-white with subtle natural variation that works beautifully with any home decor palette. The seed stitch texture really shines on solid colors, so I’d recommend sticking to a single solid skein color rather than a variegated yarn for this blanket.
Watch the video tutorial
The video tutorial walks through the signature slipped first stitch technique — slipping with yarn in front or back depending on what the next stitch is. It’s a small detail that creates a beautifully clean edge, and it’s much easier to see than to read. Watch the full step-by-step tutorial on the SeeLoveShare YouTube channel.
Pattern details
- Skill level: Beginner friendly — knit and purl only
- Construction: Worked flat in one piece on circular needles, no joining
- Stitch pattern: Seed stitch (2-row alternating repeat, even cast-on)
- Edge: Slipped first stitch (wyif or wyib depending on next working stitch) + 8-row K1, P1 ribbing borders on each end
- Sizes included: Five — from Lap/Stroller to Twin throw
- Format: Full free pattern below, plus printable PDF available on Etsy
Shop the materials


Materials
- Yarn: Lion Brand Re-Spun Thick & Quick in Whipped Cream (or any solid Super Bulky #6 yarn) — see sizing table below for skein counts
- Needles: US 15 / 10mm circular knitting needles, 29–36″ cord
- Notions: tapestry needle, scissors, stitch markers (optional), measuring tape
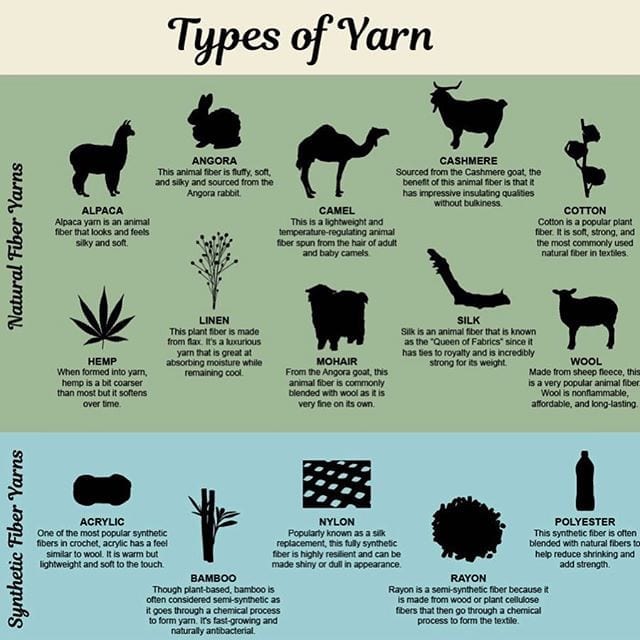
Not sure what yarn weight to use? Check out the complete yarn weights guide for a full breakdown of every weight category.
Five sizes included
The versatility of this seed stitch blanket allows you to customize colors and yarn types, making it a perfect project for all skill levels. You can choose a bold color for a statement piece or a soft hue for a subtle touch. Whatever you decide, this throw will brighten your space.
When creating your Whipped Cream Seed Stitch Blanket, remember to enjoy the process. Each stitch is an opportunity to relax and unwind, resulting in a lovely finished piece to cherish for years to come. Once completed, your blanket can also make a thoughtful gift for friends or family, showcasing your love and effort in every stitch.
One of the things I wanted to make easy with this pattern was the “what size do I need?” guesswork. The chart below includes five fully calculated sizes with cast-on counts and yardage estimates so you can pick the right size for your space without doing the math yourself.
| Size | Finished | Cast-on | Yardage | Skeins |
|---|---|---|---|---|
| Lap / Stroller | 36″ × 45″ | 80 sts | 650–750 yds | 5–6 |
| Lapghan | 40″ × 50″ | 90 sts | 800–950 yds | 7–8 |
| Throw (as written) | 50″ × 60″ | 112 sts | 1200–1400 yds | 10–11 |
| Large Throw | 55″ × 65″ | 124 sts | 1450–1650 yds | 11–13 |
| Twin | 60″ × 70″ | 134 sts | 1700–1950 yds | 13–15 |
All sizes use the same gauge (9 sts × 13 rows = 4″ on US 15 needles, lightly blocked) and the same stitch pattern. The cast-on for every size is an even number, which is what this seed stitch construction needs to alternate cleanly between Row 1 and Row 2.
Want early access to the next 2 patterns?
Whipped Cream is the second in The Re-Spun Series — four beginner-friendly knit throws made with recycled yarn. The final two drop free in our community group first.
Join Stitch & Share →Gauge
9 sts × 13 rows = 4″ (10 cm × 10 cm) in seed stitch with US 15 / 10mm needles, lightly blocked.
Abbreviations
Written in standard American knitting terms.
- K — knit
- P — purl
- sl st — slip stitch
- st(s) — stitch(es)
- wyif — with yarn in front
- wyib — with yarn in back
- BO — bind off
- CO — cast on
Pattern notes before you start
- Circular needles, worked flat: This pattern uses circular knitting needles, but is worked flat (you will not join in the round). The circular needles simply hold the wide blanket comfortably as you knit.
- The signature slipped first stitch: Every row begins with a slipped first stitch — but how you slip it depends on what stitch comes next. If the next stitch in the row is a knit, slip the first stitch knitwise with yarn held in back (wyib). If the next stitch is a purl, slip the first stitch purlwise with yarn held in front (wyif). This creates a beautifully clean chain edge along both sides of the throw — and the video tutorial walks through it visually.
- Seed stitch logic with an even cast-on: Because the cast-on is even, Row 1 and Row 2 of seed stitch alternate — Row 1 starts with a knit, Row 2 starts with a purl. The result is that knits sit above purls and purls sit above knits, which is what creates the pebbled seed stitch texture.
- Length is adjustable: Work the body until you’re 2.5″ from your desired finished length, then start the final ribbing.
The Whipped Cream Seed Stitch Blanket pattern
Cast on the number of stitches for your chosen size using a long-tail cast-on. The Throw size (as shown) uses 112 sts. See the sizing table above for other sizes.
Top border — K1, P1 ribbing (Rows 1–8)
Row 1: Sl 1 knitwise wyib, *K1, P1*, repeat from * to * to the last stitch, K1.
Row 2: Sl 1 purlwise wyif, *P1, K1*, repeat from * to * to the last stitch, P1.
Rows 3–8: Repeat Rows 1 and 2 three more times (ending after Row 8).
Because the cast-on is an even number, ribbing alternates: knits stack on knits, purls stack on purls across both rows. The slipped first stitch follows the rule — slip knitwise wyib if the next stitch is a knit (Row 1), slip purlwise wyif if the next stitch is a purl (Row 2).
Body — Seed stitch
Row 1: Sl 1 knitwise wyib, *K1, P1*, repeat from * to * to the last stitch, K1.
Row 2: Sl 1 purlwise wyif, *P1, K1*, repeat from * to * to the last stitch, P1.
The seed stitch rows look almost identical to the ribbing rows on paper — but the magic is that you’re now knitting the purls and purling the knits from the previous row, which creates the textured pebbled fabric instead of vertical ribs. Trust the rhythm: read your stitches as you go, and let the pattern reveal itself.
Continue repeating Rows 1 and 2 until your blanket measures approximately 2.5″ less than your desired finished length. For the Throw size (60″ total length), work the seed stitch body until your piece measures 57.5″ from the cast-on edge. End on a Row 2.
Bottom border — K1, P1 ribbing (Rows 1–8)
Row 1: Sl 1 knitwise wyib, *K1, P1*, repeat from * to * to the last stitch, K1.
Row 2: Sl 1 purlwise wyif, *P1, K1*, repeat from * to * to the last stitch, P1.
Rows 3–8: Repeat Rows 1 and 2 three more times (ending after Row 8).
Bind off
Bind off loosely in pattern (knit the knits, purl the purls as you bind off). Cut yarn, pull through the last loop, and weave in all ends with a tapestry needle.
Get the full PDF pattern
The full PDF pattern includes all five sizes laid out cleanly, gauge swatch instructions, abbreviations, special stitch notes, and finishing & blocking instructions for the recycled polyester yarn. It’s clean, ad-free, and yours to keep. Available as an instant download from my Etsy shop.
Use code SEELOVE15 for 15% off — my thank-you to the SeeLoveShare community for supporting this small business 💛
Why beginners love seed stitch
Don’t hesitate to experiment with different yarn colors to make your seed stitch blanket truly unique to your style.
If you’ve been knitting garter stitch blankets or simple stockinette and you’re ready for something more visually interesting — but you’re not yet ready for cables or lace — seed stitch is the perfect next step. Here’s why it works so well for beginners moving up:
- No new techniques. If you can knit and purl, you can make this throw. The “magic” comes from the alternation, not the stitches themselves.
- Mistake forgiving. The pebbled texture hides minor tension variations beautifully — perfect if you’re still working on consistent stitches.
- Beautifully reversible. Seed stitch looks the same from both sides, so there’s no “wrong side” to hide.
- Easy to read your work. Each stitch tells you what to do — if you see a bump, knit it. If you see a V, purl it. Once you can read the stitches, you don’t need to count or follow rows.
- Memorizes quickly. The 2-row repeat clicks into rhythm fast — most knitters have it memorized after just a few inches.
- Looks stunning. The soft, dimensional, marshmallow-like texture of this blanket punches above its weight — it looks far more advanced than a simple knit/purl pattern has any right to.
A few tips for your best result
- Master the slipped first stitch. Every row begins with a slipped first stitch — wyib for knits, wyif for purls. The video tutorial shows exactly how to do this. It’s the detail that separates a hobbyist edge from a polished, professional finish.
- Don’t skip the gauge swatch. Gauge isn’t critical for a blanket, but checking it gives you a finished size close to what’s listed. If your gauge runs significantly off, the throw will run wider or narrower and use more or less yarn than the chart shows.
- Stick with solid yarn. The seed stitch texture is the star of this pattern — variegated or self-striping yarns will compete with the texture and dull the visual effect.
- Block lightly. Re-Spun is recycled polyester so it doesn’t block aggressively, but a gentle steam or wet block will relax the stitches and even out the texture beautifully. Hover the iron 1–2 inches above the fabric — never touch it directly.
- Bind off loosely. A tight bind-off will pucker the bottom edge of your blanket. If you tend to bind off tight, go up one needle size for the bind-off row.
- Buy one extra skein. If you’re between sizes or close to the upper end of a yardage range, grab one extra skein. Dye lots vary and you don’t want to run short on row 170 of 195.
The final product, your Whipped Cream Seed Stitch Blanket, will not only be a functional throw but also a cherished memento of your crafting journey.
Frequently asked questions
Is this seed stitch blanket pattern really beginner friendly?
Yes — if you can knit and purl, you can make this throw. There’s no shaping, no increases or decreases, and no advanced techniques. Seed stitch is just alternating knits and purls.
What is seed stitch?
Seed stitch is a classic beginner knitting stitch that alternates K1, P1 across the row — but unlike ribbing, you knit the purls and purl the knits on every following row. The result is a textured, pebbled fabric that’s beautifully reversible and looks the same from both sides — perfect for a blanket or throw.
Why do I slip the first stitch differently on each row?
The slipped first stitch creates a clean, chain-like edge along both sides of the blanket. To keep that edge looking polished and your working yarn properly positioned, you slip the first stitch knitwise with the yarn in back (wyib) when the next stitch is a knit, and purlwise with the yarn in front (wyif) when the next stitch is a purl. The video tutorial walks through this visually — it’s much easier to see than to read.
How long does this seed stitch throw take to knit?
Most knitters finish the main Throw size (50″ × 60″) in about 15–20 hours of knitting time. That works out to a long weekend if you’re knitting steadily, or about a week of evening sessions in front of the TV.
Can I use a different yarn for this blanket?
Absolutely. Any solid Super Bulky #6 yarn will work — Bernat Blanket Extra, Lion Brand Wool-Ease Thick & Quick, or any comparable jumbo yarn. Just check your gauge and adjust needle size if needed. The texture shows best on solid colors, so I’d avoid variegated yarns for this throw.
Do I need to knit in the round?
No — this pattern is worked flat on a circular needle. You’ll never join. The long cord just gives you room to hold all the stitches comfortably as the blanket grows.
Can I make this blanket bigger or smaller than the sizes listed?
Yes — as long as your cast-on is an even number, the seed stitch pattern will work. The five sizes in the chart cover most needs, from a small lap blanket up to a twin throw, but you can adjust to any size you’d like.
How do I get the printable pattern?
The full free pattern is right above! For a clean, printable PDF with all five sizes laid out beautifully, head over to my Etsy shop — it’s an instant download available immediately after purchase.
More cozy knit throw patterns
If you love a knit-and-purl-only project, you’ll love these other beginner-friendly throws and blankets from the SeeLoveShare collection:
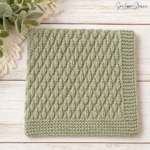
 Seersucker Stitch Knit Throw — Pattern 1 in the Re-Spun Series, made in Olive Branch colorway
- Easy Peasy Chunky Knit Throw — the original beginner-friendly knit and purl throw that started it all
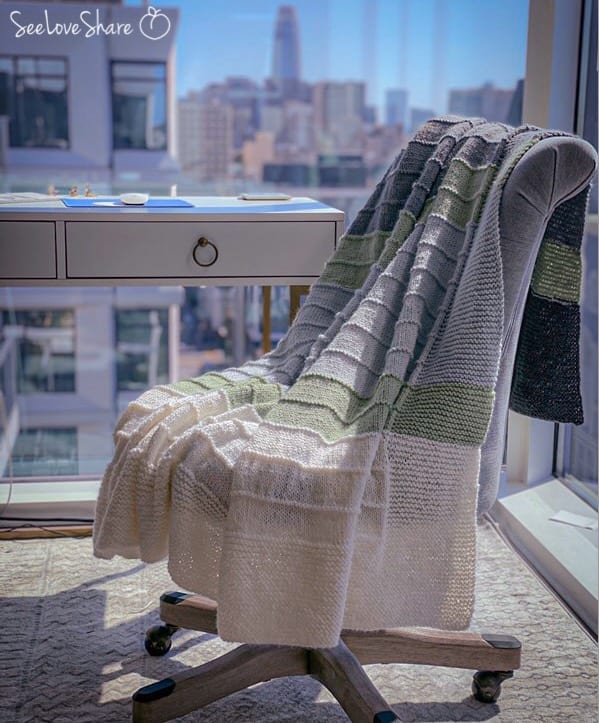
 Simple Color Block Knit Throw — knit and purl with one strategic color change for a Pottery Barn-style finish
 Yarn Weights Guide — pick the perfect yarn weight for any project

Ready to make your own?
Use code SEELOVE15 for 15% off the printable PDF version on Etsy.
I can’t wait to see your finished blankets! Tag @seeloveshare on Instagram with #SeeLoveShare when you share your make — it absolutely makes my day to see the patterns come to life in your homes.
Happy knitting! 🧶