
Free Knit Free Blankets All Blanket Patterns
December 3rd, 2020
Geometric Eyelet Throw — Free Knit Blanket Pattern
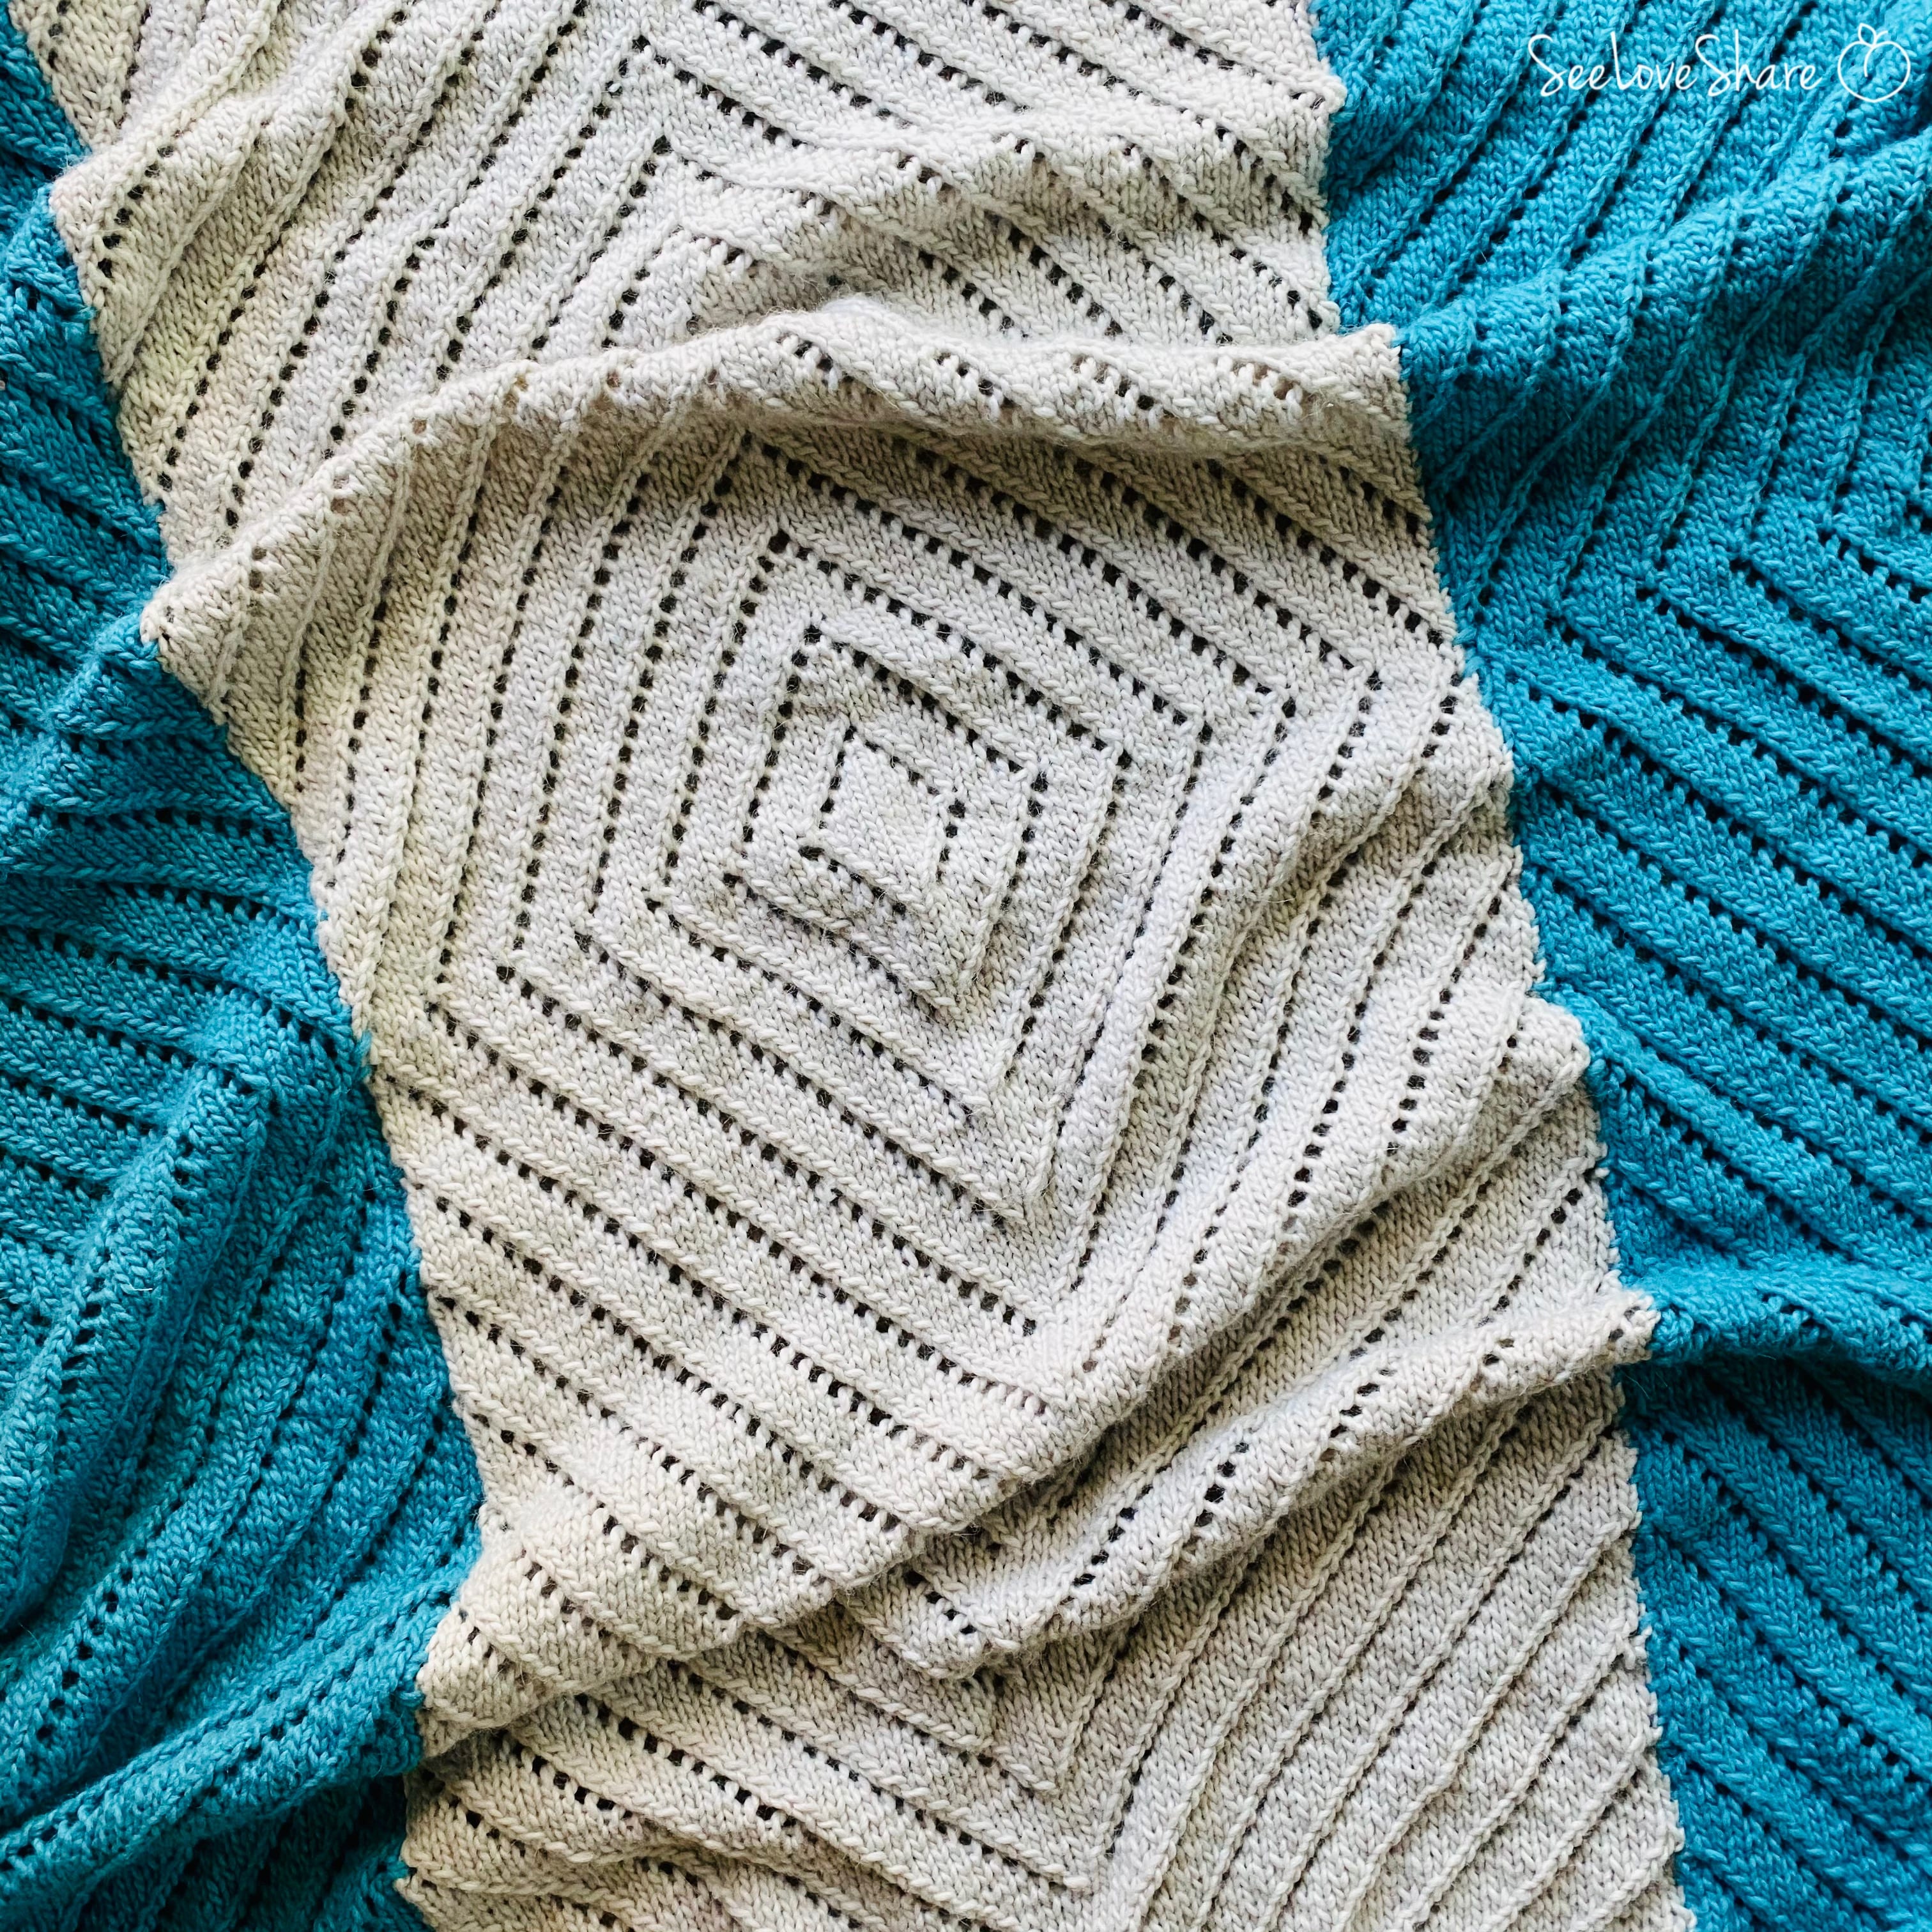
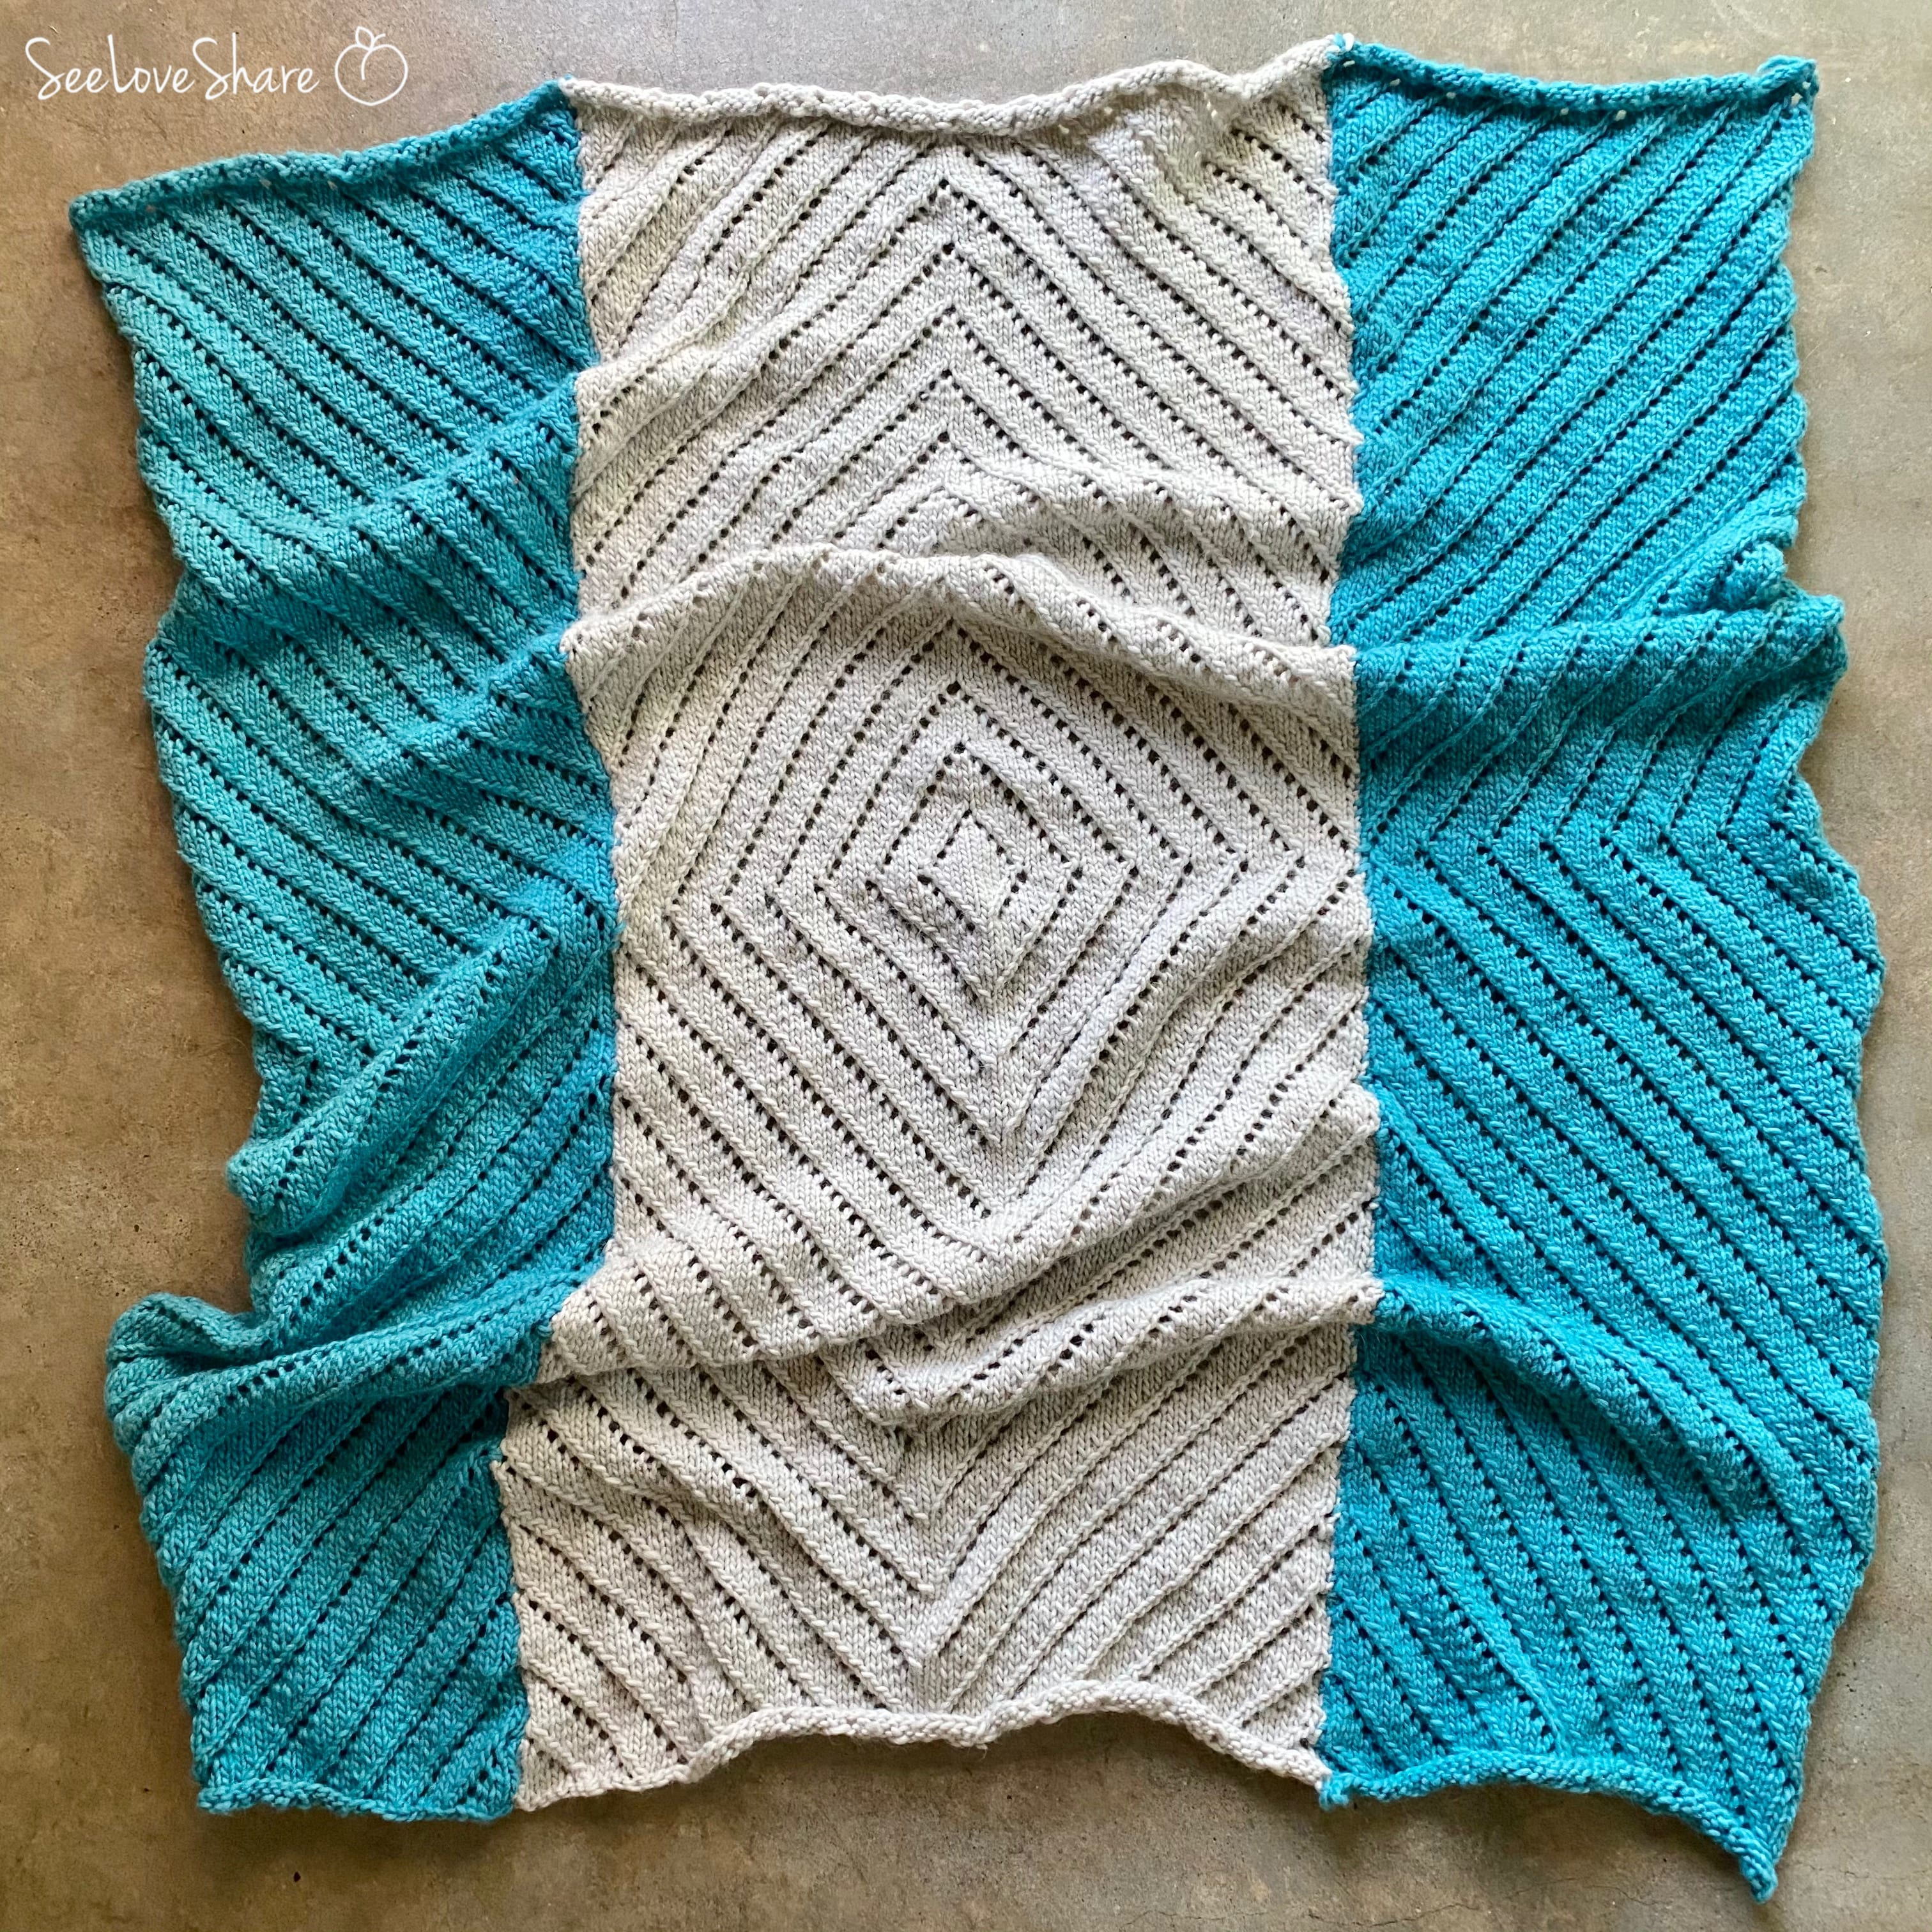
This geometric eyelet throw is the perfect modern knit blanket project — bold geometric eyelet patterns and clean straight lines create a subtle design with absolutely amazing texture. The geometric eyelet throw uses a soft Aran weight wool yarn for warmth without bulk, and the eyelet stitch (yo + k2tog repeats) creates that gorgeous lace-meets-modern look that’s surprisingly easy to master once you get the rhythm of left and right side decreases.
This geometric eyelet throw pattern works up to a standard throw size of 52×60 inches and is constructed in three panels (one main + two side panels) that join along the eyelet pattern lines. The eyelet stitch has become very popular recently — perfect Netflix-and-knit project. As long as you’ve got the hang of left and right side decreases, you’ll cruise right through. We’ve also included a video tutorial link on those decreases in case you need a refresher!
Why You’ll Love This Geometric Eyelet Throw
✔ Striking modern eyelet stitch design with geometric pattern lines
✔ The geometric eyelet throw uses simple yo + k2tog repeats
✔ Standard throw size — 52×60 inches finished
✔ Works in soft Aran weight wool or alpaca blend yarn
✔ Three-panel construction joins along pattern lines
✔ Beginner-intermediate friendly with video tutorial for decreases
✔ Customize colors for any room’s aesthetic
✔ Cozy holiday gift idea — Netflix-and-knit perfect project
Pattern Details
| Skill Level | Beginner-Intermediate |
| Key Technique | Eyelet stitch (yo + k2tog + left/right tilt decreases) |
| Finished Size | 52 x 60 inches (standard throw) |
| Yarn Weight | Aran #4 alpaca blend or wool |
| Needles | US 10 (6.0mm) circular needles, 28in cord |
| Gauge | 15 sts x 20 rows = 4″ (10 cm) |
Materials You’ll Need
- 🧶 6 balls of each color Patons Classic Wool (I used Aquamarine and Birch — substitute for the original Patons Alpaca Blend)
- 🧷 US 10 (6.0mm) circular knitting needles with a 28-inch cord
- 🧵 Tapestry needle for weaving in ends and joining panels
- ✂️ Scissors
Shop the materials


This geometric eyelet throw works in any Aran weight (#4) wool or wool blend yarn. Patons Classic Wool is a great choice — warm, durable, and comes in beautiful natural colors that show off the eyelet pattern texture. You can also try Patons Inspired for a similar alpaca-like feel. For yarn weight reference, the Craft Yarn Council has a great overview of Aran weight standards.
Pattern Notes
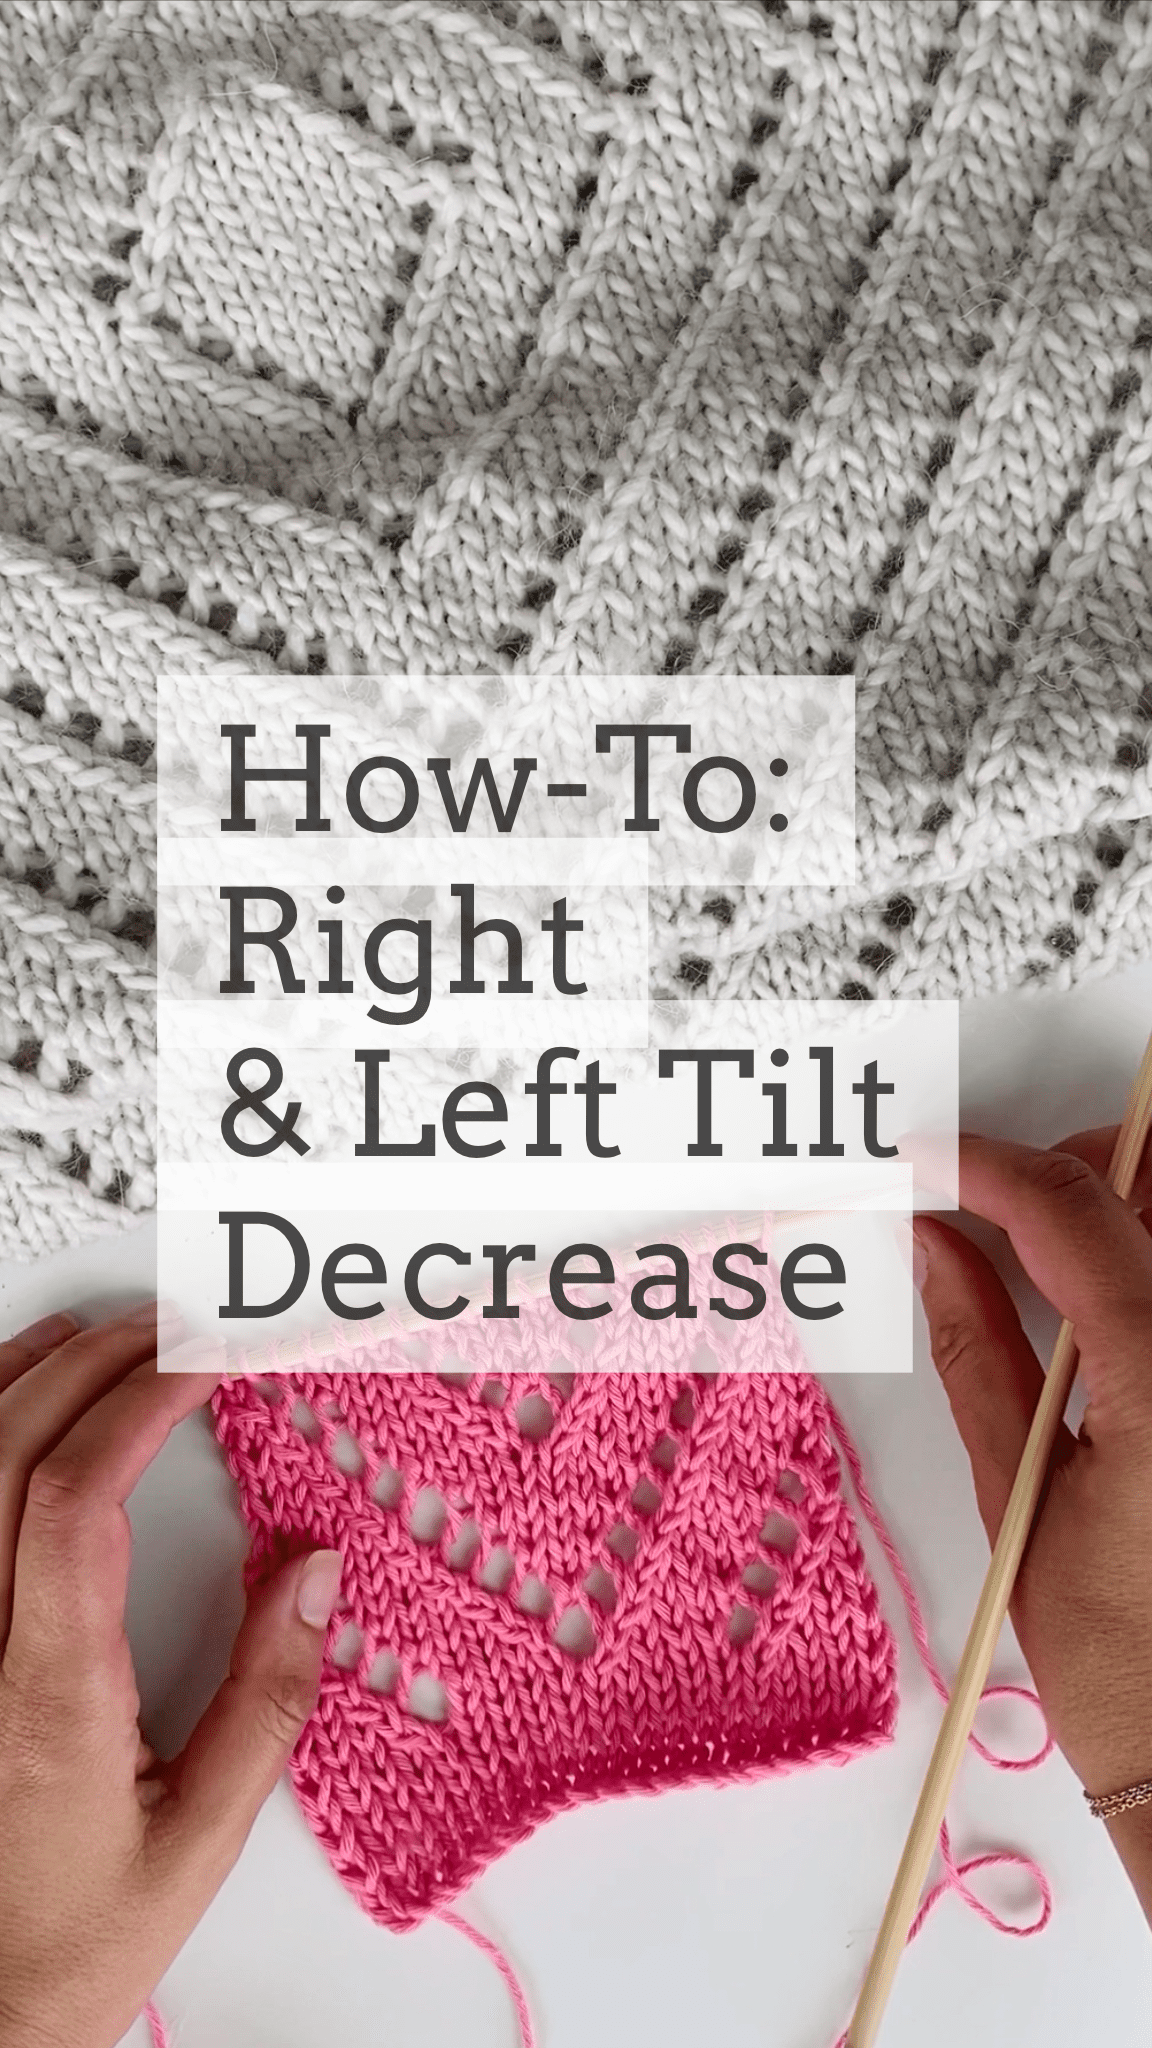
This geometric eyelet throw is worked flat in three panels — one main panel and two side panels — that join along the eyelet pattern lines. Eyelets make this throw pop! Layered on a warm wool or alpaca blend yarn, this makes for one cozy and beautiful throw. Once you get a sense of the 10-row pattern repeat you will cruise right through. The pattern uses many right and left tilt decreases — there’s a how-to tutorial linked below if you need a refresher!
📺 Watch the Left & Right Tilt Decrease Video Tutorial →
Abbreviations
- k — knit
- p — purl
- st(s) — stitch(es)
- k2tog — knit 2 together (right-leaning decrease)
- yo — yarn over
- decr — decrease (left side decr = left-leaning decrease, see video tutorial)
The Geometric Eyelet Throw Pattern
This geometric eyelet throw pattern uses many right and left tilt decreases. If you need a refresher, check out the video tutorial here.
Main Panel
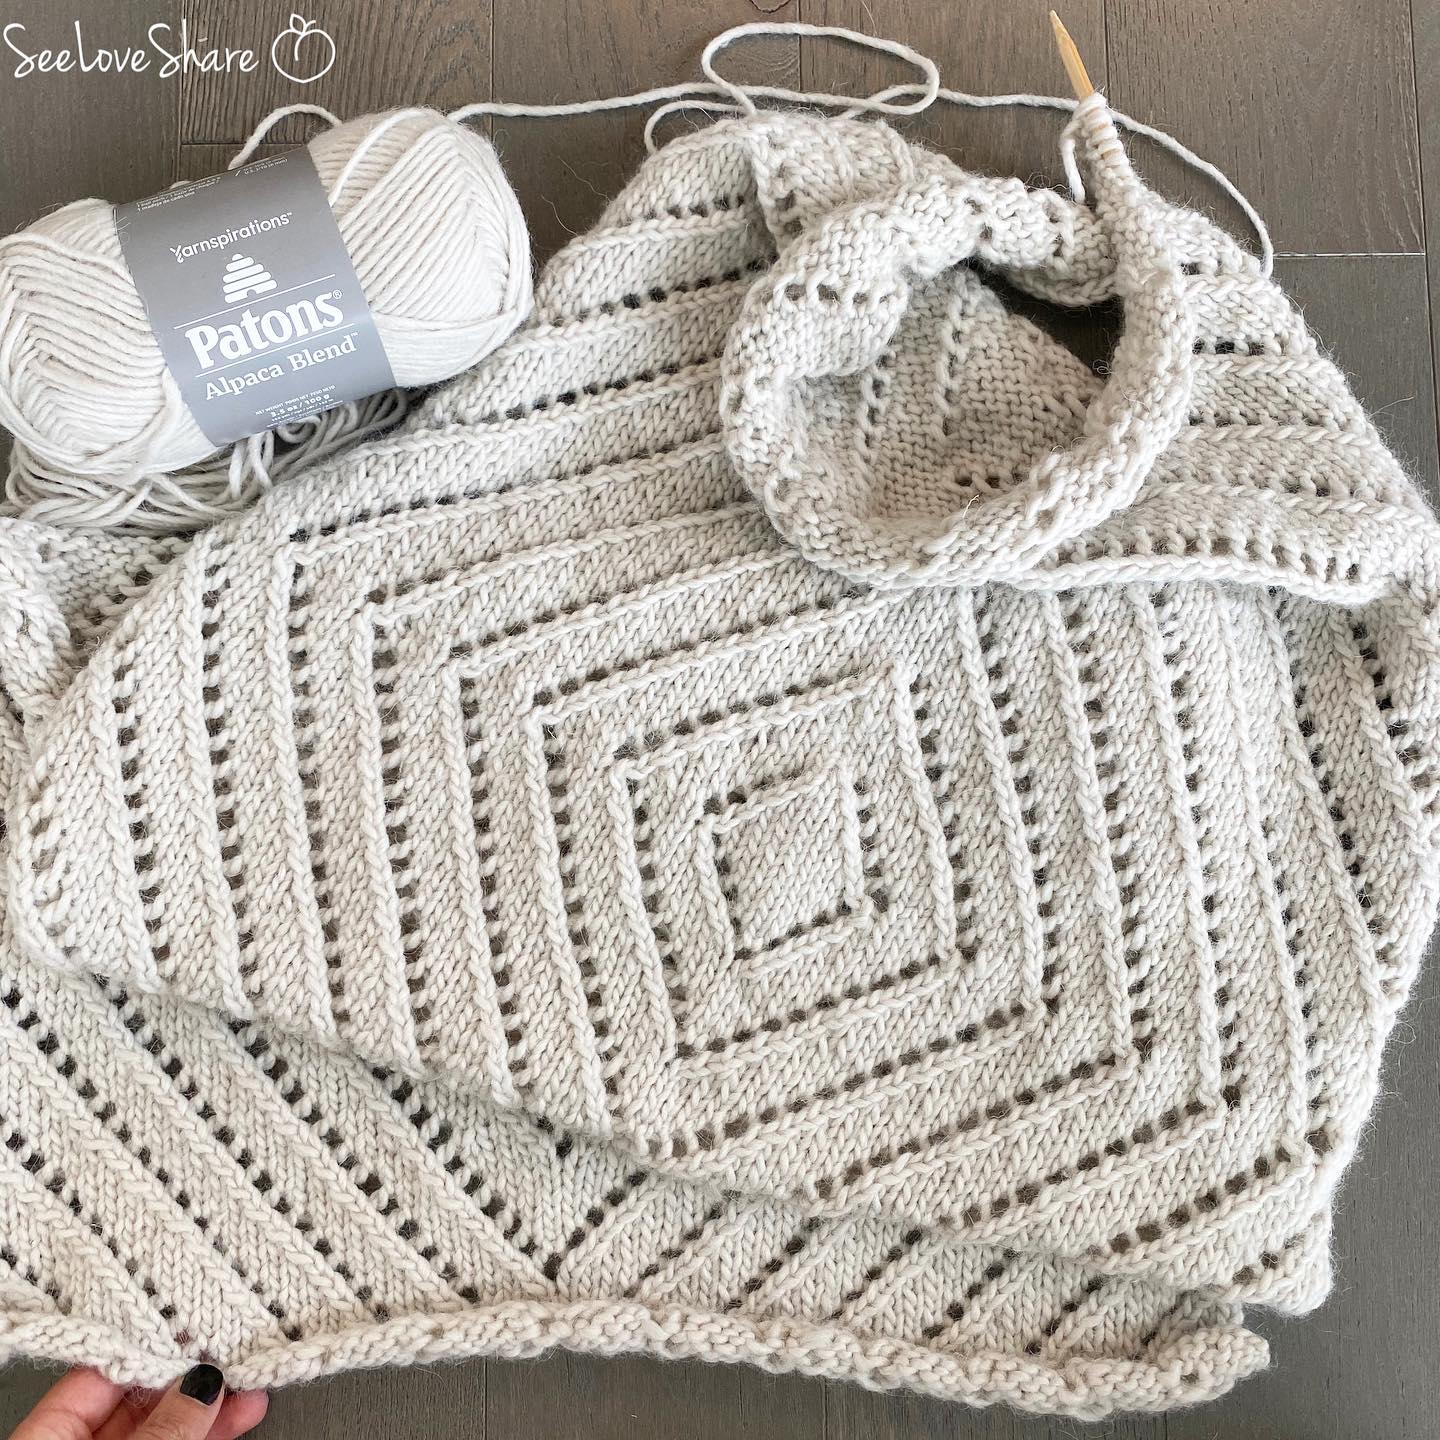
Cast on 71 sts
Row 1: K4, *k2tog, yo, k3* repeat 5 more times, k2tog, yo, *left side decr, k3, yo* repeat 5 more times, left side decrease, k4
Row 2 and every other row thereafter: Purl
Row 3: K3, *k2tog, yo, k3* repeat 5 more times, k2tog, yo, *k1, yo, left side decr, yo, left side decr, k3, yo* repeat 5 more times, left side decrease, k3
Row 5: K2, *k2tog, yo, k3* repeat 5 more times, k2tog, yo, *k3, yo, left side decr, k3, yo* repeat 5 more times, left side decrease, k2
Row 7: K1, *k2tog, yo, k3* repeat 5 more times, k2tog, yo, *k5, yo, left side decr, k3, yo* repeat 5 more times, left side decrease, k1
Row 9: K5, *k2tog, yo, k3* repeat 4 more times, k2tog, yo, *k7, yo, left side decr, k3, yo* repeat 4 more times, left side decrease, k5
Repeat this 10-row sequence 14 more times.
Then continue with the mirror sequence:
Row 1: K5, yo, left side decr, *k3, yo, left side decrease* repeat 5 more times, k7, *k2tog, yo, k3* repeat 5 more times, k2
Row 2 and every other row thereafter: Purl
Row 3: K1, yo, left side decr, *k3, yo, left side decrease* repeat 5 more times, k5, *k2tog, yo, k3* repeat 5 more times, k2tog, yo, k1
Row 5: K2, yo, left side decr, *k3, yo, left side decrease* repeat 5 more times, k3, *k2tog, yo, k3* repeat 5 more times, k2tog, yo, k2
Row 7: K3, yo, left side decr, *k3, yo, left side decrease* repeat 5 more times, k1, *k2tog, yo, k3* repeat 5 more times, k2tog, yo, k3
Row 9: K4, yo, left side decr, *k3, yo, left side decrease* repeat 5 more times, k4, *k2tog, yo, k3* repeat 4 more times, k2tog, yo, k4
Repeat this 10-row sequence 14 more times. Bind off.
Side Panel 1
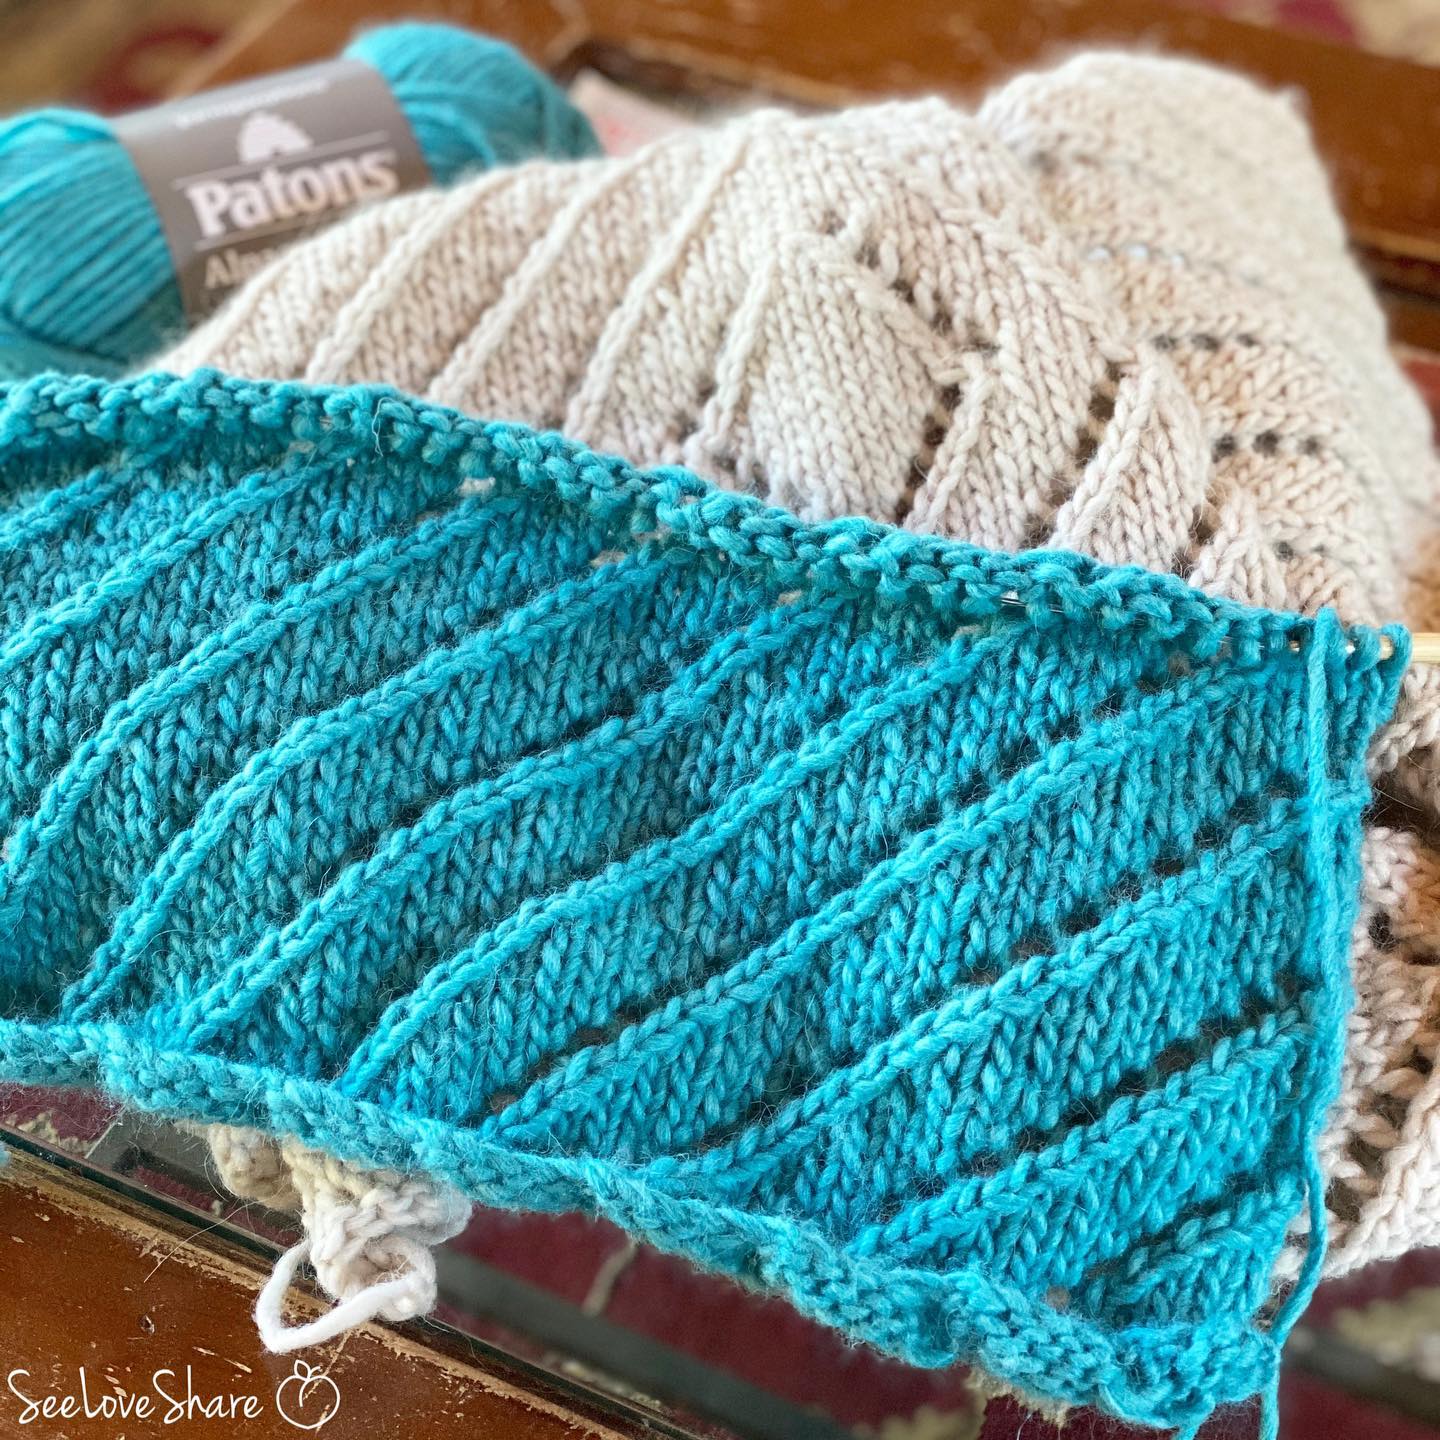
Cast on 45 sts
Row 1: K4, k2tog, yo, *k3, k2tog, yo* repeat to last 4 sts, k4
Row 2 and every other row thereafter: Purl
Row 3: K3, k2tog, yo, *k3, k2tog, yo* repeat to last 5 sts, k5
Row 5: K2, k2tog, yo, *k3, k2tog, yo* repeat to last 6 sts, k3, k2tog, yo, k1
Row 7: K1, k2tog, yo, *k3, k2tog, yo* repeat to last 7 sts, k3, k2tog, yo, k2
Row 9: K2tog, yo, *k3, k2tog, yo* repeat to last 7 sts, k3, k2tog, yo, k3
Repeat this 10-row sequence 14 more times.
Then continue with the mirror sequence:
Row 1: K5, yo, left side decrease, *k3, yo, left side decrease* repeat to last 3 sts, k3
Row 2 and every other row thereafter: Purl
Row 3: K1, yo, left side decrease, *k3, yo, left side decrease* repeat to last 2 sts, k2
Row 5: K2, yo, left side decrease, *k3, yo, left side decrease* repeat to last 1 st, k1
Row 7: K3, yo, left side decrease, *k3, yo, left side decrease* repeat to end
Row 9: K4, yo, left side decrease, *k3, yo, left side decrease* repeat to last 4 sts, k4
Repeat this 10-row sequence 14 more times. Bind off.
Side Panel 2
Cast on 45 sts
This panel is worked as the mirror image of Side Panel 1 — start with the left-tilt sequence and finish with the right-tilt sequence:
Row 1: K5, yo, left side decrease, *k3, yo, left side decrease* repeat to last 3 sts, k3
Row 2 and every other row thereafter: Purl
Row 3: K1, yo, left side decrease, *k3, yo, left side decrease* repeat to last 2 sts, k2
Row 5: K2, yo, left side decrease, *k3, yo, left side decrease* repeat to last 1 st, k1
Row 7: K3, yo, left side decrease, *k3, yo, left side decrease* repeat to end
Row 9: K4, yo, left side decrease, *k3, yo, left side decrease* repeat to last 4 sts, k4
Repeat this 10-row sequence 14 more times.
Then continue with the right-tilt sequence:
Row 1: K4, k2tog, yo, *k3, k2tog, yo* repeat to last 4 sts, k4
Row 2 and every other row thereafter: Purl
Row 3: K3, k2tog, yo, *k3, k2tog, yo* repeat to last 5 sts, k5
Row 5: K2, k2tog, yo, *k3, k2tog, yo* repeat to last 6 sts, k3, k2tog, yo, k1
Row 7: K1, k2tog, yo, *k3, k2tog, yo* repeat to last 7 sts, k3, k2tog, yo, k2
Row 9: K2tog, yo, *k3, k2tog, yo* repeat to last 7 sts, k3, k2tog, yo, k3
Repeat this 10-row sequence 14 more times. Bind off.
Assembly
Attach each side panel to the main panel along the side that continues the pattern direction. Make sure to align the eyelets so that the panels stay straight and the geometric pattern flows seamlessly across the seam. Bind off and weave in all ends. Block gently for the final finish — blocking really helps the eyelet pattern open up beautifully!
Tips for the Perfect Geometric Eyelet Throw
- Watch the decrease video first: the geometric eyelet throw uses both right and left tilt decreases. Practice the technique on a small swatch before starting.
- Use stitch markers: mark the start of each pattern repeat in the main panel — there are a LOT of repeats and it’s easy to lose your place.
- Count stitches every 10 rows: the geometric eyelet throw maintains the same stitch count throughout. If you’ve gained or lost stitches, you’ve missed a decrease.
- Block the panels before joining: blocking opens up the eyelets and gives you accurate measurements for matching panel lengths.
- Match eyelets at seams: when joining panels, line up the eyelet rows so the geometric pattern flows continuously across the seam.
- Use circular needles for the weight: even though you’re knitting flat, 6mm circular needles handle the weight of the throw better than straight needles.
- Color combinations: the geometric eyelet throw looks beautiful in monochromatic neutrals (cream + birch) or contrasting tones (aquamarine + cream).
Frequently Asked Questions
How long does the geometric eyelet throw take? About 40-60 hours total. It’s a substantial project, but Netflix and a few weekends gets you there.
Is this beginner-friendly? Beginner-intermediate. The geometric eyelet throw uses knit, purl, yarn over, k2tog, and left tilt decreases. Watch the decrease video tutorial first.
What yarn substitutes work for Patons Alpaca Blend? Any Aran weight (#4) wool or alpaca blend — Patons Classic Wool is a great substitute and what we recommend now. Cascade 220, Lion Brand Vanna’s Choice, or similar Aran wools also work.
Can I make it as one piece instead of three panels? Yes, but it’s more complex — the original three-panel construction simplifies the eyelet alignment. For a single panel, cast on around 160 sts and adjust the pattern repeats.
What size does it come out? About 52 x 60 inches — standard throw size, perfect for couches or as a bed accent.
Can I sell finished throws? Yes — small batch sales are allowed for personal income with this geometric eyelet throw pattern. Please credit SeeLoveShare as the designer.
More Knit Blanket Patterns You’ll Love
 How to Knit Right & Left Tilt Decreases — Video Tutorial
 Honeycomb Knit Throw — Chunky Cable Pattern
- Browse All Knit Blanket Patterns
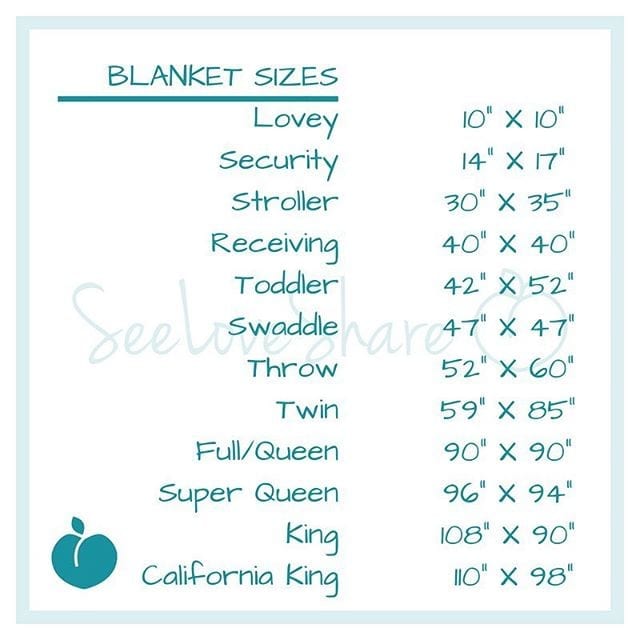
 Standard Blanket Sizes Guide
Save This Geometric Eyelet Throw Pattern
Want to come back to this geometric eyelet throw pattern later? Save it to Pinterest so you can find it for your next cozy weekend project — and share it with your knitting friends!