

Free Baby & Kids Free Crochet All Baby & Kids
May 14th, 2026
Crochet Playroom Wall Decor — Free PLAY Sign C2C Pattern
If you’re looking for crochet playroom wall decor that’s bold, beginner-friendly, and ready to make a real statement, this free PLAY sign pattern is a must-make. The Let’s PLAY corner-to-corner (C2C) wall hanging is a roomy, eye-catching statement piece perfect for playrooms, nurseries, classrooms, or any kids’ space that could use a little color. Designed to be both stylish and functional, this DIY playroom wall decor features primary-color block letters, a clean cream background, and a stunning scalloped orange border that ties the whole piece together.

Whether you’re styling a playroom, nursery, daycare classroom, or kid’s reading nook, this crochet PLAY sign will quickly become the focal point of the space. It finishes at approximately 24 inches by 60 inches including the scalloped border — true statement-sized wall decor that reads from across the room.
And the best part? You can grab the printable chart and digital tracker in my Etsy shop so you can work this pattern anywhere — without scrolling through 102 rows of color changes on your phone.
👉 Get the Printable Chart + Digital Tracker:
Why You’ll Love This Crochet Playroom Wall Decor
This DIY playroom wall decor was designed with both style and function in mind.
✔ Bold, room-defining handmade playroom wall art
✔ Perfect statement piece for playrooms and nurseries
✔ Beginner-friendly C2C crochet project
✔ Stunning scalloped border finish
✔ Customizable colors to match any kids’ room palette
✔ Beautiful handmade gift for new parents or grandparents
It’s also a wonderful introduction to corner-to-corner colorwork — a technique that opens up endless possibilities for handmade playroom wall hangings, nursery decor, and graphghan blankets once you’ve got the basics down.

Crochet PLAY Sign Pattern Details
Skill Level: Beginner to Intermediate
Finished Size: Approximately 24 in × 60 in including scalloped border
Technique: Corner-to-corner (C2C) crochet with scalloped edging
Yarn Weight: #4 worsted weight
Language: English (US Terms)
The free pattern below includes:
• Complete materials list with affiliate links
• Gauge and abbreviations
• Full row-by-row written instructions for all 102 rows
• Color change tips and bobbin guidance
• Two-round scalloped border instructions
• Blocking and hanging tips for finished playroom decor
Prefer to work from a visual chart? The Etsy version adds a printable color chart, an interactive digital tracker with row highlighter, and a clean ad-free PDF you can print or save to your device.
👉 Get the Etsy version with chart + tracker:
Use code SEELOVE15 at checkout for 15% off.
Perfect Playroom Wall Decor for So Many Spaces
One of the things I love most about this PLAY sign is how versatile it is as kids’ room wall art.
Use your finished crochet playroom wall decor in:
🧸 Playrooms and toy rooms
👶 Nurseries and baby rooms
📚 Reading nooks and book corners
🎨 Daycare and preschool classrooms
🏠 Kids’ bedrooms and bonus rooms
🎁 As a handmade baby shower or first birthday gift
It’s a practical handmade piece that grows with the kiddo and works for a wide age range — the kind of playroom decor you’ll keep up for years.

Customize Your Playroom Wall Hanging
Another fun part of making your own playroom wall decor is customizing it to fit the space you have in mind.
You can easily:
• Swap the letter colors to match a specific nursery or playroom palette
• Use pastels or muted tones for a soft, modern playroom look
• Change the border color (or skip the scallops for a simpler edge)
• Add a fabric backing for extra structure
• Stitch a dowel sleeve on the back for easy wall hanging
• Make a coordinating banner with another word like “LOVE” or “GROW”
Every version becomes a unique handmade piece of kids’ room wall art.
Materials
Yarn
I used Red Heart Super Saver yarn (#4 worsted weight) in the following colors:
- 4 skeins — Soft White (0316)
- 1 skein — Hot Red (0390)
- 1 skein — Bright Yellow (0324)
- 1 skein — Spring Green (0672)
- 1 skein — Pool (0506)
- 1 skein — Carrot (0256) — for the scalloped border
Shop the materials


Hook & Tools
- 5.5 mm crochet hook (US I/9)
- Scissors
- Tapestry needle
- Blocking mats and pins
Gauge
4 in × 4 in (10 cm × 10 cm) = 12 sc and 15 rows with a 5.5 mm (US I/9) crochet hook.
Abbreviations
ch — chain · hdc — half double crochet · sl st — slip stitch · st — stitch · sp — space · tr — treble crochet · dtr — double treble crochet · RS — right side · WS — wrong side
Pattern Notes Before You Start
📐 The chart is rectangular, not square. You’ll have two sides with the same number of blocks and two with different counts.
🧶 Wind your bobbins before you start. Five colors means a lot of yarn ends — bobbins make every color change cleaner and faster.
🟦 Each square on the chart = 1 C2C block. The written pattern matches the chart exactly.
↔️ Carry unused yarn on the wrong side until it’s needed again — don’t cut or fasten off until a color is fully completed.
Quick Color Change Tip
To change colors cleanly: work the stitch in the old color until two loops remain on your hook, yarn over with the new color and pull through the two loops, then secure the old color by crocheting over it.
Free Crochet PLAY Sign Pattern
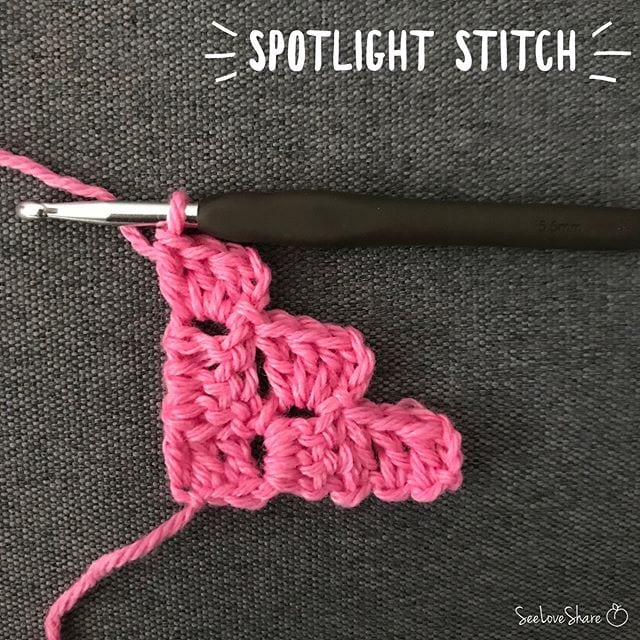
New to corner-to-corner crochet? Start with my Spotlight Stitch: Corner to Corner (C2C) tutorial to learn the technique step by step.
Starting the C2C Panel
Ch 5. Hdc in 3rd ch from hook (counts as 1st hdc), hdc in each st to end, turn. (1 square made)
Increasing Rows (Pattern Repeat)
Ch 5. 1 hdc in 3rd ch from hook, 1 hdc in each of next 2 ch. *Sl st in next ch-2 sp, ch 2, 3 hdc in same sp as last sl st. Repeat from * to end of row. Turn. Each row will have one more block than the previous row.
Decreasing Rows
Once you reach the widest point, switch to decreasing. Sl st in each of first 3 hdc. *Sl st in next ch-2 sp, ch 2, 3 hdc in same sp as last sl st. Repeat from * to last ch-2 sp. Sl st in last ch-2 sp. Turn, leaving last square unworked.
Row-by-Row Color Chart
Each row is read in the direction of the arrow (← right-to-left or → left-to-right).
💡 Want to skip the scrolling? Grab the printable chart + digital tracker on Etsy → use code SEELOVE15 for 15% off
Increasing Rows (1–29)
← Row 1 [RS]: Soft White × 1 (1 square)
→ Row 2 [WS]: Soft White × 2 (2 squares)
← Row 3 [RS]: Soft White × 3 (3 squares)
→ Row 4 [WS]: Soft White × 4 (4 squares)
← Row 5 [RS]: Soft White × 5 (5 squares)
→ Row 6 [WS]: Soft White × 6 (6 squares)
← Row 7 [RS]: Soft White × 7 (7 squares)
→ Row 8 [WS]: Soft White × 8 (8 squares)
← Row 9 [RS]: Soft White × 9 (9 squares)
→ Row 10 [WS]: Soft White × 10 (10 squares)
← Row 11 [RS]: Soft White × 11 (11 squares)
→ Row 12 [WS]: Soft White × 8, Hot Red × 1, Soft White × 3 (12 squares)
← Row 13 [RS]: Soft White × 3, Hot Red × 2, Soft White × 8 (13 squares)
→ Row 14 [WS]: Soft White × 8, Hot Red × 3, Soft White × 3 (14 squares)
← Row 15 [RS]: Soft White × 4, Hot Red × 3, Soft White × 8 (15 squares)
→ Row 16 [WS]: Soft White × 8, Hot Red × 3, Soft White × 5 (16 squares)
← Row 17 [RS]: Soft White × 6, Hot Red × 3, Soft White × 8 (17 squares)
→ Row 18 [WS]: Soft White × 8, Hot Red × 3, Soft White × 7 (18 squares)
← Row 19 [RS]: Soft White × 8, Hot Red × 3, Soft White × 8 (19 squares)
→ Row 20 [WS]: Soft White × 8, Hot Red × 3, Soft White × 9 (20 squares)
← Row 21 [RS]: Soft White × 10, Hot Red × 3, Soft White × 8 (21 squares)
→ Row 22 [WS]: Soft White × 8, Hot Red × 3, Soft White × 11 (22 squares)
← Row 23 [RS]: Soft White × 12, Hot Red × 3, Soft White × 8 (23 squares)
→ Row 24 [WS]: Soft White × 8, Hot Red × 5, Soft White × 11 (24 squares)
← Row 25 [RS]: Soft White × 11, Hot Red × 6, Soft White × 8 (25 squares)
→ Row 26 [WS]: Soft White × 8, Hot Red × 7, Soft White × 11 (26 squares)
← Row 27 [RS]: Soft White × 11, Hot Red × 8, Soft White × 8 (27 squares)
→ Row 28 [WS]: Soft White × 8, Hot Red × 3, Soft White × 2, Hot Red × 4, Soft White × 11 (28 squares)
← Row 29 [RS]: Soft White × 11, Hot Red × 3, Soft White × 4, Hot Red × 3, Soft White × 8 (29 squares)
Widest Section — Begin Decreasing on WS (Rows 30–74)
From Row 30 onward, you’ll hold 29 squares per row while the colorwork shifts. Follow the chart carefully where each letter begins and ends.
→ Row 30 [WS]: Soft White × 7, Hot Red × 3, Soft White × 5, Hot Red × 2, Soft White × 6, Bright Yellow × 2, Soft White × 4 (29 squares)
← Row 31 [RS]: Soft White × 4, Bright Yellow × 3, Soft White × 5, Hot Red × 3, Soft White × 5, Hot Red × 3, Soft White × 6 (29 squares)
→ Row 32 [WS]: Soft White × 5, Hot Red × 3, Soft White × 6, Hot Red × 2, Soft White × 5, Bright Yellow × 4, Soft White × 4 (29 squares)
← Row 33 [RS]: Soft White × 4, Bright Yellow × 5, Soft White × 5, Hot Red × 1, Soft White × 7, Hot Red × 3, Soft White × 4 (29 squares)
→ Row 34 [WS]: Soft White × 4, Hot Red × 3, Soft White × 6, Hot Red × 2, Soft White × 4, Bright Yellow × 6, Soft White × 4 (29 squares)
← Row 35 [RS]: Soft White × 4, Bright Yellow × 3, Soft White × 1, Bright Yellow × 3, Soft White × 4, Hot Red × 1, Soft White × 6, Hot Red × 3, Soft White × 4 (29 squares)
→ Row 36 [WS]: Soft White × 5, Hot Red × 2, Soft White × 5, Hot Red × 2, Soft White × 3, Bright Yellow × 3, Soft White × 2, Bright Yellow × 3, Soft White × 4 (29 squares)
← Row 37 [RS]: Soft White × 4, Bright Yellow × 3, Soft White × 3, Bright Yellow × 3, Soft White × 3, Hot Red × 2, Soft White × 4, Hot Red × 3, Soft White × 4 (29 squares)
→ Row 38 [WS]: Soft White × 4, Hot Red × 3, Soft White × 2, Hot Red × 3, Soft White × 3, Bright Yellow × 3, Soft White × 4, Bright Yellow × 3, Soft White × 4 (29 squares)
← Row 39 [RS]: Soft White × 4, Bright Yellow × 3, Soft White × 5, Bright Yellow × 3, Soft White × 3, Hot Red × 7, Soft White × 4 (29 squares)
→ Row 40 [WS]: Soft White × 4, Hot Red × 6, Soft White × 3, Bright Yellow × 3, Soft White × 6, Bright Yellow × 3, Soft White × 4 (29 squares)
← Row 41 [RS]: Soft White × 5, Bright Yellow × 2, Soft White × 7, Bright Yellow × 3, Soft White × 3, Hot Red × 5, Soft White × 4 (29 squares)
→ Row 42 [WS]: Soft White × 4, Hot Red × 4, Soft White × 3, Bright Yellow × 3, Soft White × 7, Bright Yellow × 2, Soft White × 6 (29 squares)
← Row 43 [RS]: Soft White × 7, Bright Yellow × 1, Soft White × 8, Bright Yellow × 3, Soft White × 10 (29 squares)
→ Row 44 [WS]: Soft White × 9, Bright Yellow × 3, Soft White × 12, Spring Green × 2, Soft White × 3 (29 squares)
← Row 45 [RS]: Soft White × 3, Spring Green × 3, Soft White × 12, Bright Yellow × 3, Soft White × 8 (29 squares)
→ Row 46 [WS]: Soft White × 7, Bright Yellow × 3, Soft White × 12, Spring Green × 3, Soft White × 4 (29 squares)
← Row 47 [RS]: Soft White × 4, Spring Green × 3, Soft White × 13, Bright Yellow × 3, Soft White × 6 (29 squares)
→ Row 48 [WS]: Soft White × 5, Bright Yellow × 3, Soft White × 13, Spring Green × 3, Soft White × 5 (29 squares)
← Row 49 [RS]: Soft White × 6, Spring Green × 3, Soft White × 13, Bright Yellow × 3, Soft White × 4 (29 squares)
→ Row 50 [WS]: Soft White × 3, Bright Yellow × 3, Soft White × 13, Spring Green × 3, Soft White × 7 (29 squares)
← Row 51 [RS]: Soft White × 7, Spring Green × 3, Soft White × 14, Bright Yellow × 2, Soft White × 3 (29 squares)
→ Row 52 [WS]: Soft White × 3, Bright Yellow × 1, Soft White × 14, Spring Green × 4, Soft White × 7 (29 squares)
← Row 53 [RS]: Soft White × 7, Spring Green × 5, Soft White × 17 (29 squares)
→ Row 54 [WS]: Soft White × 16, Spring Green × 6, Soft White × 7 (29 squares)
← Row 55 [RS]: Soft White × 3, Spring Green × 2, Soft White × 2, Spring Green × 3, Soft White × 1, Spring Green × 2, Soft White × 16 (29 squares)
→ Row 56 [WS]: Soft White × 15, Spring Green × 2, Soft White × 2, Spring Green × 3, Soft White × 1, Spring Green × 3, Soft White × 3 (29 squares)
← Row 57 [RS]: Soft White × 4, Spring Green × 6, Soft White × 2, Spring Green × 3, Soft White × 14 (29 squares)
→ Row 58 [WS]: Soft White × 13, Spring Green × 3, Soft White × 3, Spring Green × 6, Soft White × 4 (29 squares)
← Row 59 [RS]: Soft White × 5, Spring Green × 6, Soft White × 3, Spring Green × 2, Soft White × 13 (29 squares)
→ Row 60 [WS]: Soft White × 12, Spring Green × 2, Soft White × 3, Spring Green × 6, Soft White × 6 (29 squares)
← Row 61 [RS]: Soft White × 8, Spring Green × 5, Soft White × 2, Spring Green × 3, Soft White × 11 (29 squares)
→ Row 62 [WS]: Soft White × 10, Spring Green × 3, Soft White × 1, Spring Green × 5, Soft White × 5, Pool × 1, Soft White × 4 (29 squares)
← Row 63 [RS]: Soft White × 4, Pool × 2, Soft White × 6, Spring Green × 4, Soft White × 1, Spring Green × 2, Soft White × 10 (29 squares)
→ Row 64 [WS]: Soft White × 9, Spring Green × 7, Soft White × 6, Pool × 3, Soft White × 4 (29 squares)
← Row 65 [RS]: Soft White × 5, Pool × 3, Soft White × 6, Spring Green × 7, Soft White × 8 (29 squares)
→ Row 66 [WS]: Soft White × 7, Spring Green × 6, Soft White × 7, Pool × 3, Soft White × 6 (29 squares)
← Row 67 [RS]: Soft White × 7, Pool × 3, Soft White × 8, Spring Green × 4, Soft White × 7 (29 squares)
→ Row 68 [WS]: Soft White × 6, Spring Green × 4, Soft White × 8, Pool × 3, Soft White × 8 (29 squares)
← Row 69 [RS]: Soft White × 9, Pool × 3, Soft White × 8, Spring Green × 4, Soft White × 5 (29 squares)
→ Row 70 [WS]: Soft White × 5, Spring Green × 2, Soft White × 9, Pool × 3, Soft White × 10 (29 squares)
← Row 71 [RS]: Soft White × 11, Pool × 3, Soft White × 9, Spring Green × 2, Soft White × 4 (29 squares)
→ Row 72 [WS]: Soft White × 4, Spring Green × 1, Soft White × 9, Pool × 3, Soft White × 12 (29 squares)
← Row 73 [RS]: Soft White × 13, Pool × 3, Soft White × 13 (29 squares)
→ Row 74 [WS]: Soft White × 6, Pool × 9, Soft White × 14 (29 squares)
Decreasing Rows — Begin on RS (Rows 75–102)
Starting Row 75, switch to the decreasing pattern. Each row will have one fewer square than the previous row.
← Row 75 [RS]: Soft White × 14, Pool × 8, Soft White × 6 (28 squares)
→ Row 76 [WS]: Soft White × 5, Pool × 8, Soft White × 14 (27 squares)
← Row 77 [RS]: Soft White × 13, Pool × 8, Soft White × 5 (26 squares)
→ Row 78 [WS]: Soft White × 4, Pool × 2, Soft White × 4, Pool × 2, Soft White × 13 (25 squares)
← Row 79 [RS]: Soft White × 13, Pool × 2, Soft White × 9 (24 squares)
→ Row 80 [WS]: Soft White × 9, Pool × 2, Soft White × 12 (23 squares)
← Row 81 [RS]: Soft White × 12, Pool × 2, Soft White × 8 (22 squares)
→ Row 82 [WS]: Soft White × 7, Pool × 3, Soft White × 11 (21 squares)
← Row 83 [RS]: Soft White × 11, Pool × 2, Soft White × 7 (20 squares)
→ Row 84 [WS]: Soft White × 6, Pool × 2, Soft White × 11 (19 squares)
← Row 85 [RS]: Soft White × 10, Pool × 2, Soft White × 6 (18 squares)
→ Row 86 [WS]: Soft White × 5, Pool × 2, Soft White × 10 (17 squares)
← Row 87 [RS]: Soft White × 9, Pool × 3, Soft White × 4 (16 squares)
→ Row 88 [WS]: Soft White × 4, Pool × 2, Soft White × 9 (15 squares)
← Row 89 [RS]: Soft White × 8, Pool × 3, Soft White × 3 (14 squares)
→ Row 90 [WS]: Soft White × 13 (13 squares)
← Row 91 [RS]: Soft White × 12 (12 squares)
→ Row 92 [WS]: Soft White × 11 (11 squares)
← Row 93 [RS]: Soft White × 10 (10 squares)
→ Row 94 [WS]: Soft White × 9 (9 squares)
← Row 95 [RS]: Soft White × 8 (8 squares)
→ Row 96 [WS]: Soft White × 7 (7 squares)
← Row 97 [RS]: Soft White × 6 (6 squares)
→ Row 98 [WS]: Soft White × 5 (5 squares)
← Row 99 [RS]: Soft White × 4 (4 squares)
→ Row 100 [WS]: Soft White × 3 (3 squares)
← Row 101 [RS]: Soft White × 2 (2 squares)
→ Row 102 [WS]: Soft White × 1 (1 square)
Total block counts: Soft White × 1,673 · Bright Yellow × 94 · Spring Green × 146 · Hot Red × 138 · Pool × 95
Fasten off and weave in all ends with a tapestry needle.
Scalloped Border
Round 1 — Single Crochet Base
With RS facing, attach Carrot (0256) to the bottom-right corner. Ch 1, hdc in same st. Work 3 hdc into each C2C square edge all the way around. Place 3 hdc in each corner stitch. Join with a sl st to starting hdc.
Round 2 — Scallops
Sl st over next 2 sts. Ch 1, then *sk 3 sts, 10 dtr in next st, sk 3 sts, sl st in next st*. Repeat across all sides. At each corner stitch, work 12 dtr instead of 10 dtr. Adjust spacing as needed on the longer sides for an even finish. Join with sl st to beginning. Fasten off and weave in ends.
Finishing & Hanging Your Playroom Wall Decor
Blocking is what takes this PLAY sign from “homemade” to “handmade” — and with a graphghan it makes a huge difference. Soak the finished piece in lukewarm water for 20–30 minutes, gently squeeze out the excess (don’t wring), roll in a towel to press out moisture, then pin to shape on blocking mats. Make sure the rectangle is true and the scallops sit evenly. Let it dry fully before unpinning.
To hang your finished playroom wall decor, stitch a sleeve along the top back for a dowel, sew on D-rings or curtain clips, or use Command strips for a no-damage install — whatever fits the wall and the weight of your finished piece.
Grab the Printable Chart + Digital Tracker
While I share lots of free crochet patterns here on the blog, this playroom wall decor pattern is also available as a beautiful printable PDF in my Etsy shop — with a few extras that make the colorwork much easier to follow.
The Etsy version includes:
📊 Printable color chart — see the whole PLAY sign at a glance
📱 Interactive digital tracker with row highlighter
📄 Clean ad-free PDF — formatted for printing, ready for your project bag
The PDF is formatted for easy reading while crocheting and can be saved to your device or printed.
👉 Download the Pattern Here:
Use code SEELOVE15 at checkout for 15% off.
More Crochet Patterns You’ll Love
If you enjoyed this crochet playroom wall decor pattern, here are more handmade kids’ projects to add to your queue:
 Spotlight Stitch: Corner to Corner (C2C) Tutorial — new to C2C? Start here
 Hudson’s Dump Truck Play Mat — another fun C2C project for kids’ rooms
- Baby Bunny C2C Throw — sweet C2C blanket for the nursery
- Crochet Lion Lovey — cuddly handmade baby gift
- Browse all baby and kids patterns


Share Your Creation
I absolutely love seeing your finished projects!
If you make this crochet PLAY sign for your playroom or nursery:
📸 Share it on Instagram and tag @SeeLoveShare
💬 Join our crochet community on Facebook
🧶 Show off your handmade playroom wall decor with #SeeLoveShare
Your makes inspire other crocheters in the community!
Save This Pattern For Later
Planning to make this playroom wall decor later?
📌 Save it to Pinterest
💬 Share it with a crochet friend
❤️ Bookmark it for your next project