
Crochet All Holiday Patterns Free Patterns
April 26th, 2021
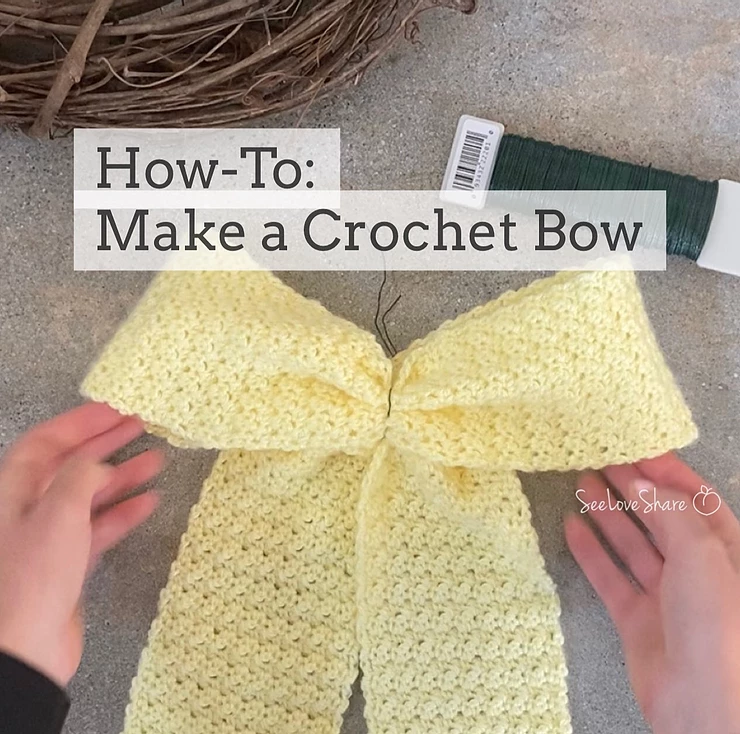
How-To: Make a Crochet Bow
Wondering how to make a crochet bow? This step-by-step tutorial shows you exactly how to turn a length of crochet ribbon into a beautiful, structured bow that’s perfect for wreaths, gifts, hair accessories, and home decor. The whole process takes about 5 minutes once you have your ribbon ready — and it’s so much easier than it looks. Whether you’re new to crochet or just looking for a quick decorative finishing touch, this is one of those skills that pays off again and again.
You’ll need a crocheted ribbon strip and a piece of floral wire — that’s it. Read on for the full step-by-step photo tutorial, plus a video walkthrough if you prefer to watch.

Why Make a Crochet Bow?
- Perfect for wreaths — adds the focal-point bow to any seasonal wreath you make
- Gift toppers — a handmade alternative to fabric ribbon, much more memorable
- Hair accessories — attach to a clip or headband for a sweet finishing touch
- Home decor — tie to baskets, pillows, mantel garlands, or chair backs
- Reusable for years — unlike fabric ribbon, crochet bows hold their shape beautifully and can be packed away and reused season after season
Materials
- Crocheted ribbon strip — use our free Simple Bow Ribbon Pattern to crochet your own. Length depends on how big you want the bow.
- Floral wire — for cinching the bow center
- Scissors — for trimming wire ends
For more on choosing the right yarn for your ribbon strip, the Craft Yarn Council yarn weight system is a helpful reference. A worsted weight #4 yarn creates ribbons in a versatile size for most decorative projects.
How to Make a Crochet Bow: Step-by-Step
Step 1: Make a Loop
Take your crocheted ribbon strip and form a loop, keeping the “right side” facing up the whole time (it’s easy to accidentally twist it as you work, so pay attention to which side faces out). The width of your loop determines how wide the finished bow’s loops will be, and how long the tails will hang.
Pro tip: Make the loop a bit larger than you think you want — the bow will pull slightly tighter when you cinch the center.

Step 2: Gather in the Middle
Pinch the ribbon together in the center of your loop. This is the magic moment — pinching pulls the two loops to either side and creates the classic bow shape. Keep pinching firmly while you move to the next step.

Step 3: Secure with Floral Wire
Wrap a 6-inch piece of floral wire around the pinched center and twist it tightly behind the bow to hold the shape. The wire does the work of “tying” the bow without needing to actually tie a knot — which would add bulk and look messy.
Trim the wire ends to about 1 inch and tuck them behind the bow. If you’re attaching the bow to something (a wreath, a wrapped gift, a basket), leave the wire ends longer so you can use them to fasten the bow in place.

Step 4: Flip Over and Shape
Flip the bow over so the wire is hidden at the back. Now shape the loops — pull them gently outward and adjust until the bow looks symmetrical. Check the sizing against wherever you plan to attach the bow, and adjust the loops or tail lengths as needed.

Step 5: Attach and Enjoy
Use the floral wire ends to secure your finished bow wherever you want it — wreaths, gift boxes, baskets, garlands, hair clips, anywhere. The example below uses this bow as the focal point on an Easter wreath, but the technique works for any season.

Watch the Video Tutorial
If you’d rather watch than read, here’s the full video tutorial walking through every step:
Tips for the Best Crochet Bow
- Block your ribbon strip first — a quick gentle blocking makes the finished bow look polished. See our how to block work tutorial for the technique.
- Choose your yarn carefully — wool and cotton hold their shape best; acrylic is fine but tends to look softer/floppier
- For wreaths, make oversized — what looks too big in your hand looks just right on a 16+ inch wreath
- Trim tail ends at an angle — angled cuts look more intentional than straight cuts and prevent fraying
- Match the ribbon weight to the project — a delicate worsted ribbon bow on a baby headband; a thick chunky ribbon bow on a Christmas wreath
Where to Use Your Crochet Bow
- Seasonal wreaths — Easter, Christmas, Valentine’s, fall — any wreath looks better with a handmade bow as the focal point
- Handmade gift wrapping — tie or fasten to wrapped gifts as a memorable handmade touch
- Hair accessories — sew or glue to a hair clip, headband, or barrette
- Pet collars — small versions look adorable on dog or cat collars for holidays
- Pillow accents — attach to a pillow as a removable seasonal decoration
- Baskets and storage bins — tie to handles for an instant farmhouse touch
More Crochet Tutorials & Patterns You’ll Love
- Simple Bow Ribbon Crochet Pattern — the ribbon strip pattern that turns into this bow
- How to Carry Yarn for Buffalo Plaid Patterns — clean colorwork without all the ends to weave
- How to Block Knit & Crochet Work — finishing technique that makes any project look professional
- Browse all tutorials — every how-to in one place
Frequently Asked Questions
How long does it take to make a crochet bow?
Once you have your crocheted ribbon strip ready, the bow takes about 5 minutes to assemble — looping, gathering, wiring, and shaping. Crocheting the ribbon itself takes longer (typically 30-60 minutes depending on length and yarn weight).
How long should my ribbon strip be?
For a standard bow with 4-inch loops and 5-inch tails, you need about 18-20 inches of ribbon. For a larger wreath-sized bow, plan for 24-30 inches. Make the ribbon a few inches longer than you think you need — easier to trim than to add length later.
Can I make a crochet bow without floral wire?
Yes — you can use thread, yarn, twine, or even a small zip tie to cinch the center. Floral wire is preferred because it’s strong, holds tension well, and the ends can double as attachment points. Yarn or thread works but is less sturdy for heavier applications like wreaths.
Why does my crochet bow look uneven?
Two common causes. First: the ribbon strip got twisted during looping — make sure the same side of the ribbon faces up the entire time. Second: the loops aren’t equal — measure your ribbon length and mark the center before you start. A small mark in the center of the ribbon makes it easier to keep the loops symmetrical.
Can I make a multi-loop or layered crochet bow?
Yes — make 2 or 3 separate single bows and stack them on top of each other, securing them all with the same wire. Multi-loop bows look gorgeous on large wreaths or as gift toppers. Use slightly different sizes for each layer for the most dimensional look.
Want more free patterns, tutorials, and project ideas delivered to your inbox? Join the SeeLoveShare newsletter here.