November 20th, 2021
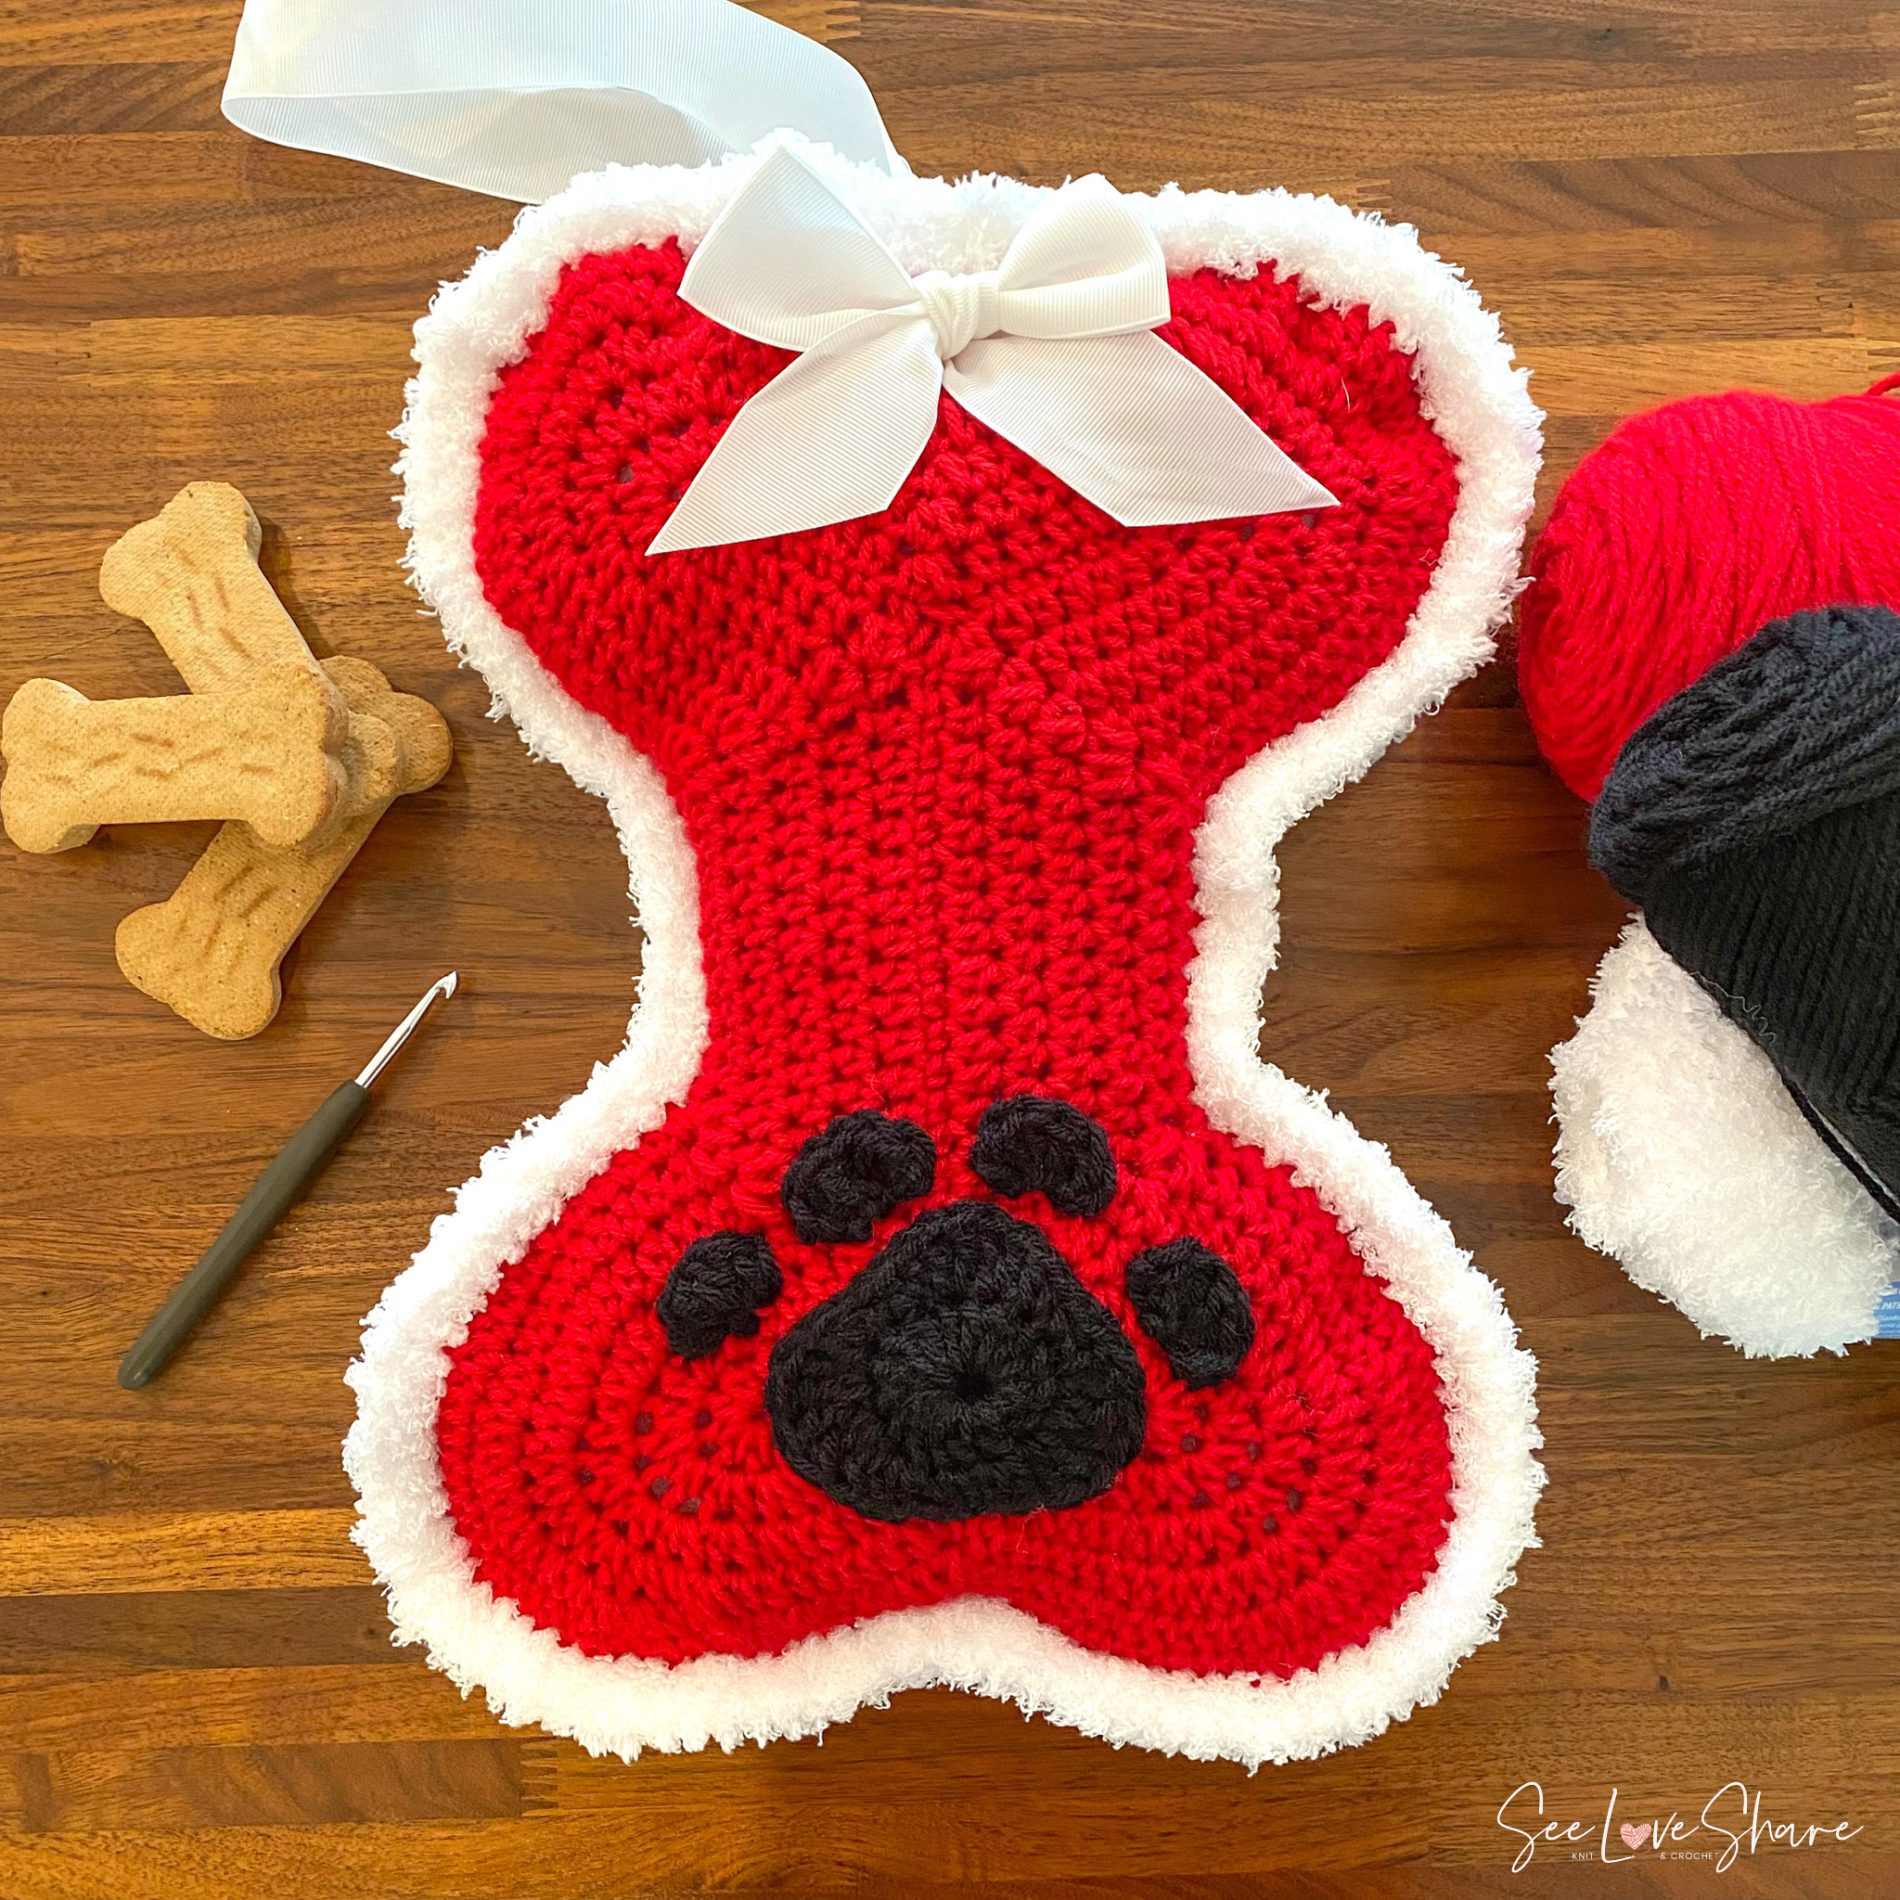
Tyson’s Doggy Bone Stocking – Free Crochet Pattern
He’s going to get presents anyway… might as well get them into his own stocking!
This is a fun pattern to work up. The fuzzy edging that Pipsqueak provides is a must have to add that pop of Christmas!

Pattern Notes:
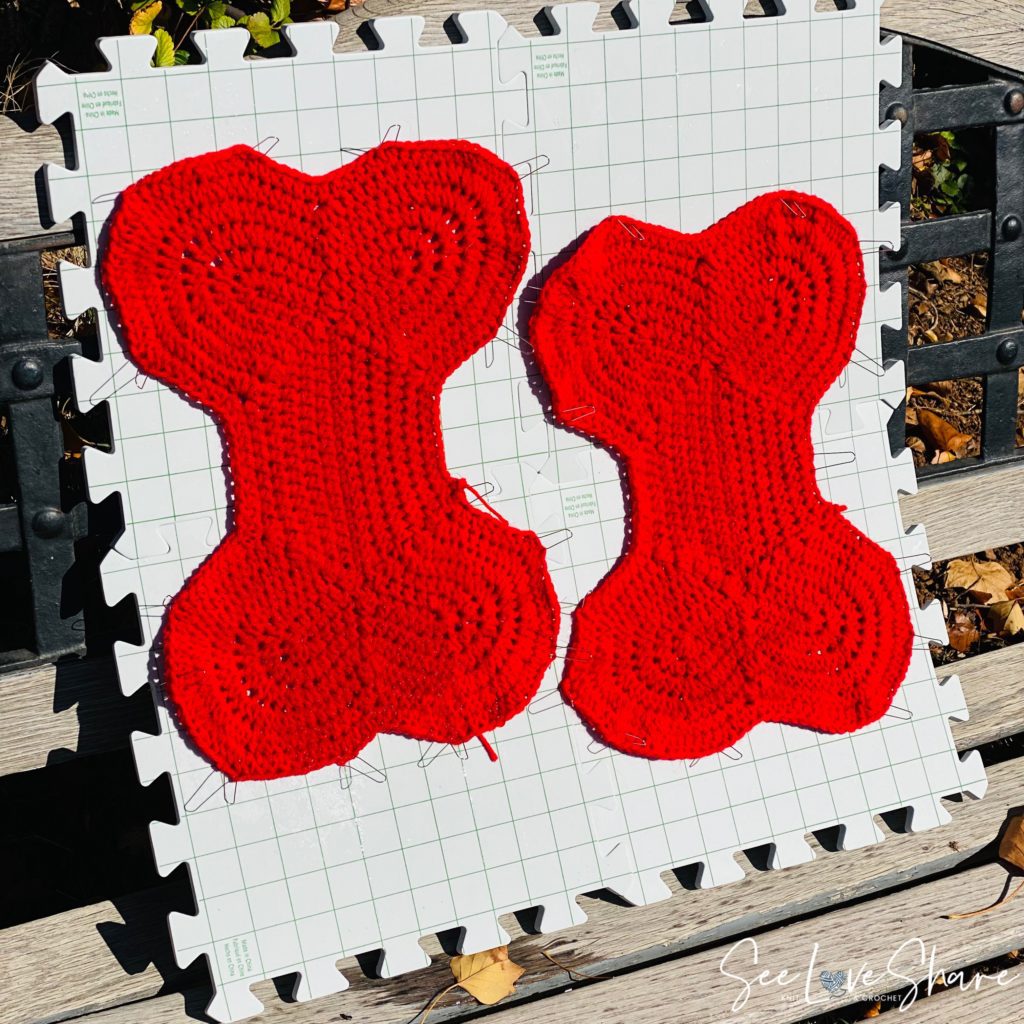
This pattern works 2 bones, one as the front of the stocking and the other as the back. They are then attached together by DC through both panels with the fluffy white yarn.
Measurements:
12in wide by 16in long.
Materials:
- Crochet Hook: 5.5mm
- Tapestry needle
- 1 Ball Red Heart Super Saver Red Hot and black
- 1 Ball Bernat Pipsqueak in White
Gauge:
Crochet: 12sc and 15 rows = 4in
Abbreviations:
Ch: Chain
SC: Single Crochet
DC: Double Crochet
SLST : Slip Stitch
HDC : Half Double Crochet
HDC2TOG : Half Double Crochet Two sts together
HDC4TOG : Half Double Crochet Four sts together
Pattern:
Bone: Make 2
With Red, Ch 25:
Rnd 1: (sc in back of 3rd ch from hook, sc in next 4 ch, ch 7, sc in back of 3rd ch from hook, sc in next 4 ch), working back on the foundation ch, sc in next 18 ch, ch 7, rep within (), join with a slst to 1st ch.

Rnd 2: Ch2, hdc in same as join and next 15 sts, *hdc2tog, HDC in next 3 sts, 2 hdc in next st, 4 HDC in end ch loop, 2 hdc in next st, hdc in next 3 sts, hds2tog, hdc in next 3 sts, 2 hdc in next st, 4 HDC in end ch loop, 2 hdc in next st, hdc in next 3 sts, hdc2tog, hdc in next 16 sts, hdc2tog, , hdc in next 3 sts, 2 hdc in next st, 4 HDC in end ch loop, 2 hdc in next st, hdc in next 3 sts, hdc2tog, join with a slst to the top of first hdc.
Rnd 3: Ch 2, hdc in same as join and next 14 sts, *hdc2tog, HDC in next 3 sts, 2 hdc in next st 6 sts, hdc in next 4 sts, hds2tog, hdc in next 4 sts, 2 hdc in next 6 sts, hdc in next 3 sts, hdc2tog, hdc in next 15 sts, hdc2tog, , hdc in next 4 sts, 2 hdc in next 6 hdc, hdc in next 3 sts, hdc2tog, hdc in next 3 sts, 2 hdc in next 6 hdc, hdc in next 4 sts, hdc2tog, join with a slst to the top of first hdc.
Rnd 4: Ch 2, hdc in same as join and next 13 sts, *hdc2tog, HDC in next 5 sts, 2 hdc in next st 8 sts, hdc in next 5 sts, hds2tog, hdc in next 5 sts, 2 hdc in next 8 sts, hdc in next 5 sts, hdc2tog, hdc in next 14 sts, hdc2tog, , hdc in next 5 sts, 2 hdc in next 8 hdc, hdc in next 5 sts, hdc2tog, hdc in next 5 sts, 2 hdc in next 8 hdc, hdc in next 5 sts, hdc2tog, join with a slst to the top of first hdc.
Rnd 5: Ch 2, sk 2 st, hdc in next 11 sts, *hdc4tog, HDC in next 7 sts, 2 hdc in next st 9 sts, hdc in next 7 sts, hds4tog, hdc in next 7 sts, 2 hdc in next 9 sts, hdc in next 7 sts, hdc4tog, hdc in next 11 sts, hdc4tog, hdc in next 7 sts, 2 hdc in next 9 hdc, hdc in next 7 sts, hdc4tog, hdc in next 7 sts, 2 hdc in next 9 hdc, hdc in next 7 sts, hdc4tog, join with a slst to the top of first hdc.
Rnd 6: Ch 2, sk 2 st, hdc in next 10 sts, *hdc4tog, HDC in next 10 sts, 2 hdc in next st 9 sts, hdc in next 10 sts, hds4tog, hdc in next 10 sts, 2 hdc in next 9 sts, hdc in next 10 sts, hdc4tog, hdc in next 8 sts, hdc4tog, hdc in next 10 sts, 2 hdc in next 9 hdc, hdc in next 10 sts, hdc4tog, hdc in next 10 sts, 2 hdc in next 9 hdc, hdc in next 10 sts, hdc4tog, join with a slst to the top of first hdc.
Rnd 7: Ch 2, hdc in each st around, bind off.
The shape of the bones may not necessarily lay flat. Now is the time to block both bones if this is happening to you.
Shape the stocking pocket / create edging:
Lay the bones on top of each other with wrong sides on the inside.
With right side facing, starting halfway along the top edge of the LEFT side of the bone, attach White Pipsqueak yarn through BOTH layers of the bone.
From this point on DC in each st through both layers of the bone. When you have returned to the mirror spot on the right side, continue to DC through the TOP layer ONLY! This is what creates the pocket. Join with a slst to the first DC.
Finish the edging of the back bone: attach White Pipsqueak to the unfinished back panel to edge the remaining stitches.
Bind off.
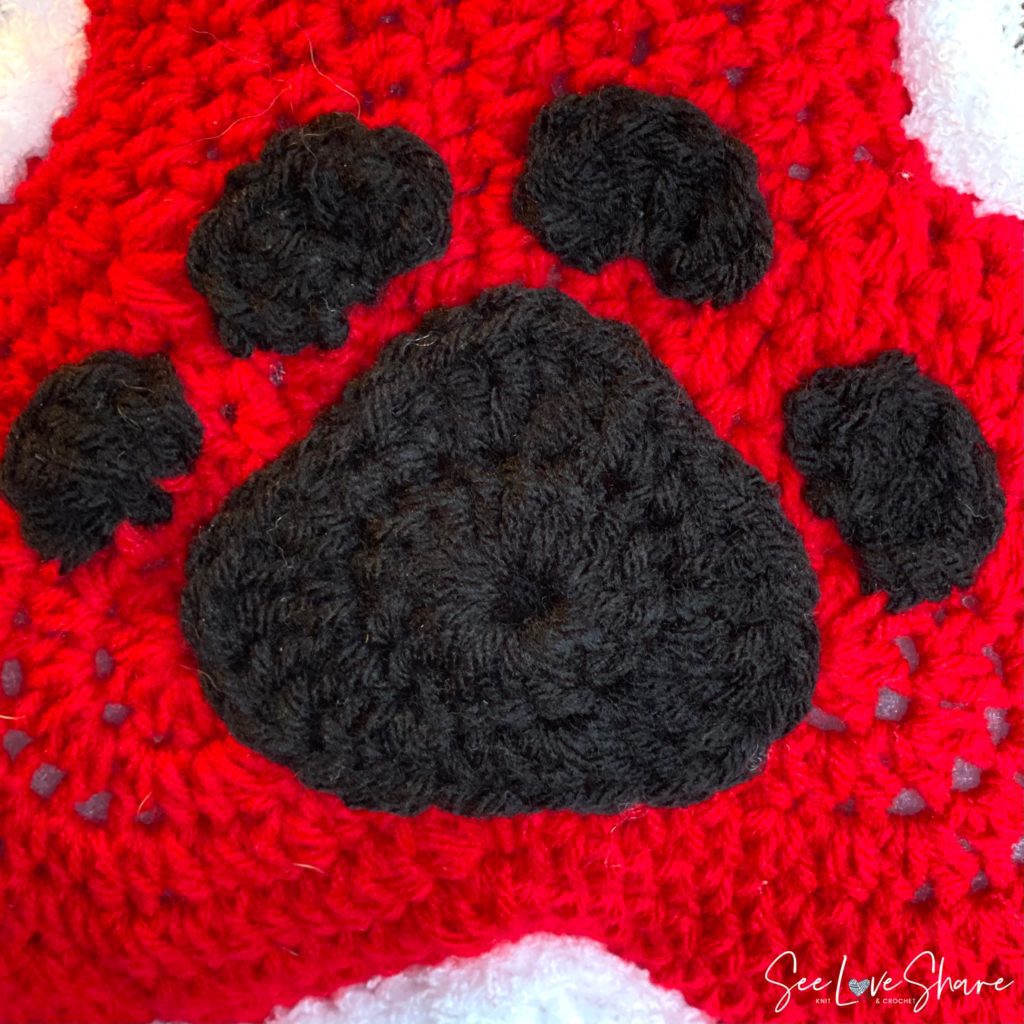
Paw Motif:
This part is optional but… why not!? If you want to add the Embellishment… head right here for the info!
Assembly:
Sew paw motif on to stocking in as shown in photo.
Looking for more Holiday Patterns? Check these out…