
September 26th, 2020
Seed Stitch Crochet Tutorial — Free Photo Guide for Beginners
The seed stitch crochet technique is one of the most rewarding textured stitches you can add to your toolkit — a simple two-stitch repeat that creates a beautifully bumpy, dimensional fabric perfect for pillows, baby blankets, apparel, scarves, and home decor. If you can single crochet and double crochet, you can crochet seed stitch. The rhythm becomes meditative within a few rows, and the finished texture looks far more advanced than it actually is.
This free seed stitch crochet tutorial walks you through the stitch step by step, with the row-by-row written pattern, tips for keeping your edges clean, project ideas, and the exact yarn I used in the photo. Bookmark this one — you’ll come back to it every time you start a new textured project.
Why You’ll Love the Seed Stitch Crochet Technique
This stitch is a workhorse — once you learn it, you’ll reach for it constantly:
✔ Uses only two basic stitches (single crochet + double crochet)
✔ Easy two-stitch repeat that becomes meditative quickly
✔ Creates gorgeous dimensional bumpy texture
✔ Works for pillows, baby blankets, scarves, apparel, and home decor
✔ Looks beautifully sophisticated even in a single colour
✔ Equally stunning in two-tone stripes or ombre transitions
✔ No special tools, no shaping, no counting beyond multiples of 2
✔ Lays flat naturally — no curling or blocking required
Materials You’ll Need
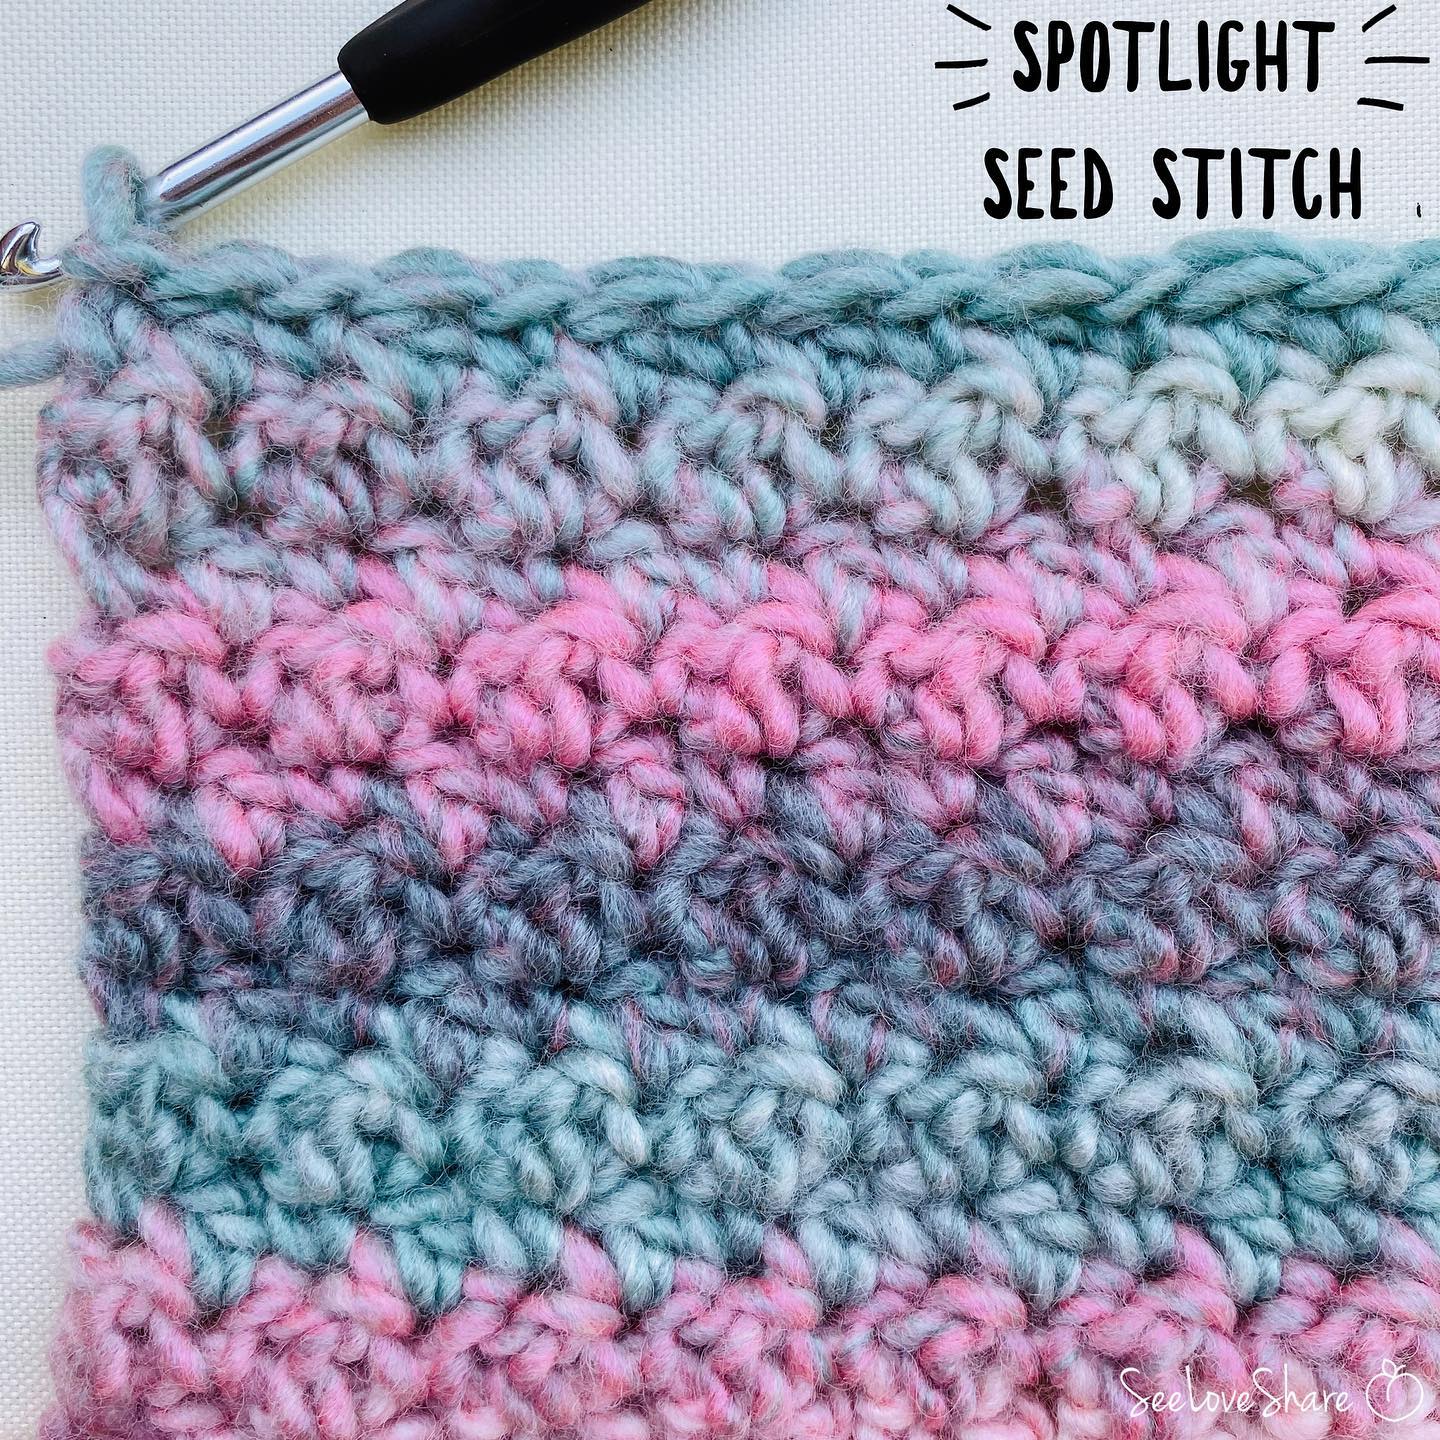
The seed stitch works with any weight yarn — the texture stands out beautifully whether you’re using fingering, worsted, or chunky. Here’s what I used in the photo:
- Bernat Symphony — the gorgeous tonal pink shown in the photo
- Crochet hook (any size appropriate for your chosen yarn — this set covers every size you’ll need)
- Tapestry needle for weaving in ends
- Scissors
Match your hook size to your yarn weight — your yarn label will recommend a hook size. The seed stitch is forgiving with hook size; go up a size for a softer, drapier fabric or down a size for a denser, more structured one.
How to Crochet Seed Stitch
The seed stitch alternates single crochets and double crochets across each row. The key is that on every row, your single crochet goes into the previous row’s double crochet, and your double crochet goes into the previous row’s single crochet. That offset is what creates the dimensional bumpy texture.
Abbreviations (US Terms)
- ch — chain
- sc — single crochet
- dc — double crochet
- st — stitch
The Pattern
Foundation: Chain any even number to your desired width.
Row 1: Sc in 2nd ch from hook, dc in next ch. Repeat (sc, dc) across to the end of the row. Ch 1, turn.
Row 2: Sc in the first st (which is the previous row’s dc), dc in the next st (which is the previous row’s sc). Repeat (sc, dc) across to the end. Ch 1, turn.
Repeat Row 2 to your desired length. Fasten off and weave in your ends with a tapestry needle.
That’s the whole stitch! Every row from this point forward is identical — you’re just alternating sc into dc and dc into sc, all the way across, all the way up.
Tips for Clean Seed Stitch Edges
- Count regularly: Every row should have the same total stitch count as the row before. If you miss a stitch or add an extra, your edges will start to wobble.
- Always end on a dc: Since you start each row with a sc into a dc, your last stitch of the previous row should be a dc. If your row ends on a sc, you’ve miscounted somewhere — frog back and recount.
- Keep your turning chain consistent: Ch 1 between rows. The ch-1 does not count as a stitch.
- Watch your tension: Seed stitch alternates between short (sc) and tall (dc) stitches, which can pull tension unevenly if you grip too tight. Relax your hands and let your stitches breathe.
- Use stitch markers: If you’re new to the stitch, drop a marker into the first and last stitch of each row until you’ve internalized the rhythm.
Project Ideas for Seed Stitch Crochet
This stitch is endlessly versatile. Some of my favourite uses:
- Throw pillows — the dimensional texture is perfect for couch accent pillows
- Baby blankets — soft, squishy, and looks beautifully handmade
- Scarves and cowls — the texture adds visual interest in solid colours
- Dishcloths and washcloths — the bumpy surface adds gentle scrubbing power
- Apparel panels — sweater fronts, vest backs, anywhere you want texture without complexity
- Table runners and placemats — neutral colours with seed stitch look like designer textiles
- Coasters and trivets — a quick project to practice the rhythm
- Handmade bag or tote panels — the texture adds structure and visual depth
Frequently Asked Questions
Is seed stitch crochet hard? No — if you can single crochet and double crochet, you can crochet seed stitch. The two-stitch repeat becomes meditative within a few rows.
Can I use any yarn for seed stitch? Yes! The seed stitch texture shows beautifully in any weight — from fingering to super bulky. Just match your hook size to your yarn weight.
Does seed stitch curl? No — the alternating short and tall stitches naturally balance out, so seed stitch lays flat without blocking. Perfect for blankets and pillows.
How do I make seed stitch wider or narrower? Chain any even number to set your width. The pattern is a 2-stitch repeat, so any even multiple works.
Can I do seed stitch in two colours? Yes! Two-tone seed stitch is gorgeous — alternate colours every row or every few rows for stripes, or graduate colours for an ombre effect.
Is seed stitch the same in knitting and crochet? The name is shared but the technique is different. Knit seed stitch uses k1, p1 alternation; crochet seed stitch uses sc, dc alternation. Both create textured fabric.
More Crochet Stitch Tutorials You’ll Love
- Textured Crochet Stitches Round-Up — Puff, Bobble & Popcorn
- How to Crochet the Bobble Stitch — Step by Step for Beginners
- Crochet Waffle Stitch Tutorial
- How to Make Bulky Yarn — Easy DIY Tutorial
Save This Seed Stitch Crochet Tutorial
Want to come back to this seed stitch crochet tutorial later? Save it to Pinterest so you can find it when you start your next textured project — and share it with your crocheting friends!