
September 25th, 2018
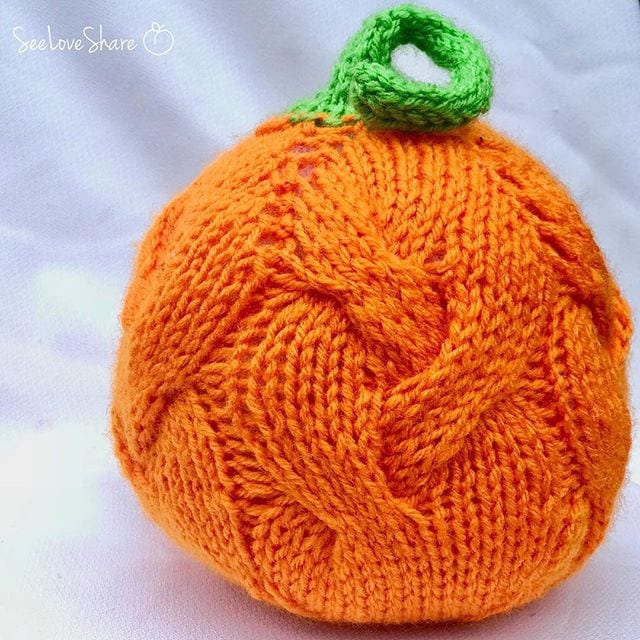
Knit Cable Pumpkin — Free Fall Pattern with Classic Twisted Cables
This knit cable pumpkin is the perfect fall mantel statement piece — a classic twisted cable detail wraps around a stuffed pumpkin worked in the round from the stem down. Whether you’re a cable veteran or trying cables for the first time, this is a small enough project to get the hang of without committing to a full sweater. The finished knit cable pumpkin makes adorable autumn decor for your fall table settings, Thanksgiving centerpiece, or just to sit on a shelf all season.
The knit cable pumpkin is knit in the round starting from the stem and working downward. The stem uses a basic I-cord technique (walked through step-by-step below) and you can add length to make it longer for dramatic effect — twist it around your fingers as it grows for that perfect curly tendril look.
Why You’ll Love This Knit Cable Pumpkin
This pumpkin is the ultimate fall handmade gift:
✔ Classic twisted cable detail wraps around the body
✔ Beginner-friendly introduction to cables — small project, big learning
✔ Knit in the round with double-pointed needles
✔ Generous 8″ tall x 7″ wide finished size
✔ Step-by-step I-cord instructions for the stem
✔ The knit cable pumpkin works in any worsted weight yarn
✔ Perfect fall mantel, Thanksgiving table, or autumn gift
✔ Reusable seasonal decor — bring it out year after year
Pattern Details
The knit cable pumpkin starts at the stem with an I-cord, increases out into a ball-shaped body, features a cabled section around the middle, and decreases back to a base. Stuffed firmly with poly-fil and finished with a tapestry needle, it makes a beautiful dimensional pumpkin.
Skill Level
Beginner-intermediate. Requires knit, purl, increases (kfb, m1R, m1L), decreases (ssk, k2tog), I-cord technique, and cable stitches (c5F, c5B).
Pattern Notes
This pumpkin is knit in the round starting from the stem and working down toward the base. The stem uses I-cord technique — full step-by-step instructions are included below in case you’ve never done it before.
Finished Size
Approximately 8 inches tall x 7 inches wide with a 19-inch circumference.
Gauge
17 stitches x 23 rows = 4 inches (10cm).
Materials You’ll Need
- 1 ball of worsted weight yarn in orange/pumpkin color — I love Red Heart Super Saver in Pumpkin (affordable, durable)
- Small amount of scrap green yarn for the stem (Red Heart Super Saver Spring Green works perfectly)
- US size 9 (5.5mm) double-pointed needles, 9-inch length
- Cable needle
- Tapestry needle for finishing
- Poly-Fil stuffing
- Scissors
Shop the materials


Any worsted weight yarn works for the knit cable pumpkin — Red Heart Super Saver gives durable, vibrant fall colors. The green stem only uses a few yards, so any scrap green yarn from your stash will do.
Abbreviations
- k — knit
- p — purl
- kfb — knit in front and back of stitch (increase)
- ssk — slip, slip, knit (decrease)
- k2tog — knit 2 together (decrease)
- m1R — lift the bar between stitches from back to front with left needle, then knit into the front of the stitch
- m1L — lift the bar between stitches from front to back with left needle, then knit through back of stitch
- c5F — put next 5 stitches on cable needle and hold to front. Knit next 5 stitches, then knit 5 stitches from cable needle
- c5B — put next 5 stitches on cable needle and hold to back. Knit next 5 stitches, then knit 5 stitches from cable needle
- st(s) — stitch(es)
Step-by-Step I-Cord Instructions
If you’ve never knit an I-cord before, don’t worry — it’s a breeze once you’ve got the rhythm:
- Cast on your stitches.
- Hold the needle with stitches in your right hand.
- Slip each stitch onto the left needle.
- Bring the yarn behind the work over to the right-hand side.
- Insert the right needle into the next stitch from left to right and knit normally.
- Pull firmly on this stitch to tighten up.
- Repeat to remaining stitches.
- Transfer stitches as before and repeat the knit process.
- When the cord is the length needed, cast off.
The Knit Cable Pumpkin Pattern
Stem (Green Yarn)
Cast on 5 stitches with green yarn.
Knit an I-cord (using the instructions above) for 4 inches.
Increase Round 1: (kfb, k1) twice, kfb. (8 sts)
Knit 3 rows in I-cord.
Increase Round 2: (kfb, k1) four times. (12 sts)
Knit 3 rows. (12 sts)
Increase Round 3: kfb, k1, (kfb in next 2 stitches, k1) three times, kfb.
Knit 2 rows. (20 sts)
Stuff the enlarged end of the stem lightly with poly-fil. Join pumpkin-colored yarn.
Pumpkin Body (Orange Yarn)
Purl one row.
(k3, p1) five times for two rows.
Increase: (m1R, k3, m1L, p1) five times. (30 stitches)
(k5, p1) five times.
Increase: (m1R, k5, m1L, p1) five times. (40 stitches)
(k7, p1) five times.
Increase: (m1R, k7, m1L, p1) five times. (50 stitches)
(k9, p1) five times.
Increase: (m1R, k9, m1L, p1) five times. (60 stitches)
(k11, p1) five times.
Increase: (m1R, k11, m1L, p1) five times. (70 stitches)
(k13, p1) five times.
Increase: (m1R, k13, m1L, p1) five times. (80 stitches)
(k15, p1) five times.
Cabled Sides of the Pumpkin
(c5F, k5, p1) five times.
(k15, p1) five times — repeat this row four more times.
(k5, c5B, p1) five times.
(k15, p1) five times — repeat this row nine more times.
(c5F, k5, p1) five times.
(k15, p1) five times — repeat this row five more times.
Decrease for Base of Pumpkin
(ssk, k11, k2tog, p1) five times. (70 stitches)
(ssk, k9, k2tog, p1) five times. (60 stitches)
(ssk, k7, k2tog, p1) five times. (50 stitches)
(ssk, k5, k2tog, p1) five times. (40 stitches)
(ssk, k3, k2tog, p1) five times. (30 stitches)
(ssk, k1, k2tog, p1) five times. (20 stitches)
Stuff the pumpkin firmly with poly-fil.
(ssk, k2tog, p1) five times. (10 stitches)
Break yarn and thread the end through the last 10 stitches with a tapestry needle. Fasten off and weave in ends.
Enjoy your finished knit cable pumpkin!
Tips for the Perfect Knit Cable Pumpkin
A few extra tricks to make your knit cable pumpkin pattern look its best:
- Stuff firmly: well-stuffed pumpkins hold their shape much better. Don’t be shy with the poly-fil.
- Pull the cables tight: tightly worked cables really stand out from the background. Don’t be loose on the cable transitions.
- Use a stitch marker: place a marker at the start of each round to keep track of where you are in the (k3, p1) pattern.
- Make the stem dramatic: add more I-cord length and curl it around your fingers for a more whimsical tendril look.
- Customize colors: classic orange is timeless, but cream + tan + rust for a modern fall palette, or all-white with green stem for a fresh take.
- Make a set: these look gorgeous in graduated sizes — make 2-3 in different scales for a fall mantel cluster.
Frequently Asked Questions
How long does this knit cable pumpkin take to make? Plan for 6-8 hours total. The cables slow you down a bit, but the rhythm is satisfying.
Is this beginner-friendly? Beginner-intermediate. You should be comfortable with knit, purl, basic increases/decreases. The cables are the only “newer” skill, and they’re great cables to learn on.
Can I use a different yarn weight? Yes — worsted weight gives the photographed result. Bulky yarns make oversized pumpkins; lighter yarns make smaller ones. Adjust needle size and re-check gauge.
Do I need a cable needle? Yes, for the c5F and c5B stitches. Any small needle works — even a knitting needle the same size as your working needles.
Can I skip the I-cord stem? The I-cord makes the pumpkin look professional, but if you want to skip it, you can use a real cinnamon stick or twig wedged into the top opening.
Why do my cables look loose? Either you’re pulling them too loosely when working the c5F/c5B, or your gauge is too loose. Try going down a needle size if it persists.
Can I sell finished pumpkins? Yes — small batch sales are allowed for personal income. Please credit SeeLoveShare as the designer.
More Fall Knit & Crochet Patterns You’ll Love
If you enjoyed this knit cable pumpkin, you’ll love these related fall patterns:
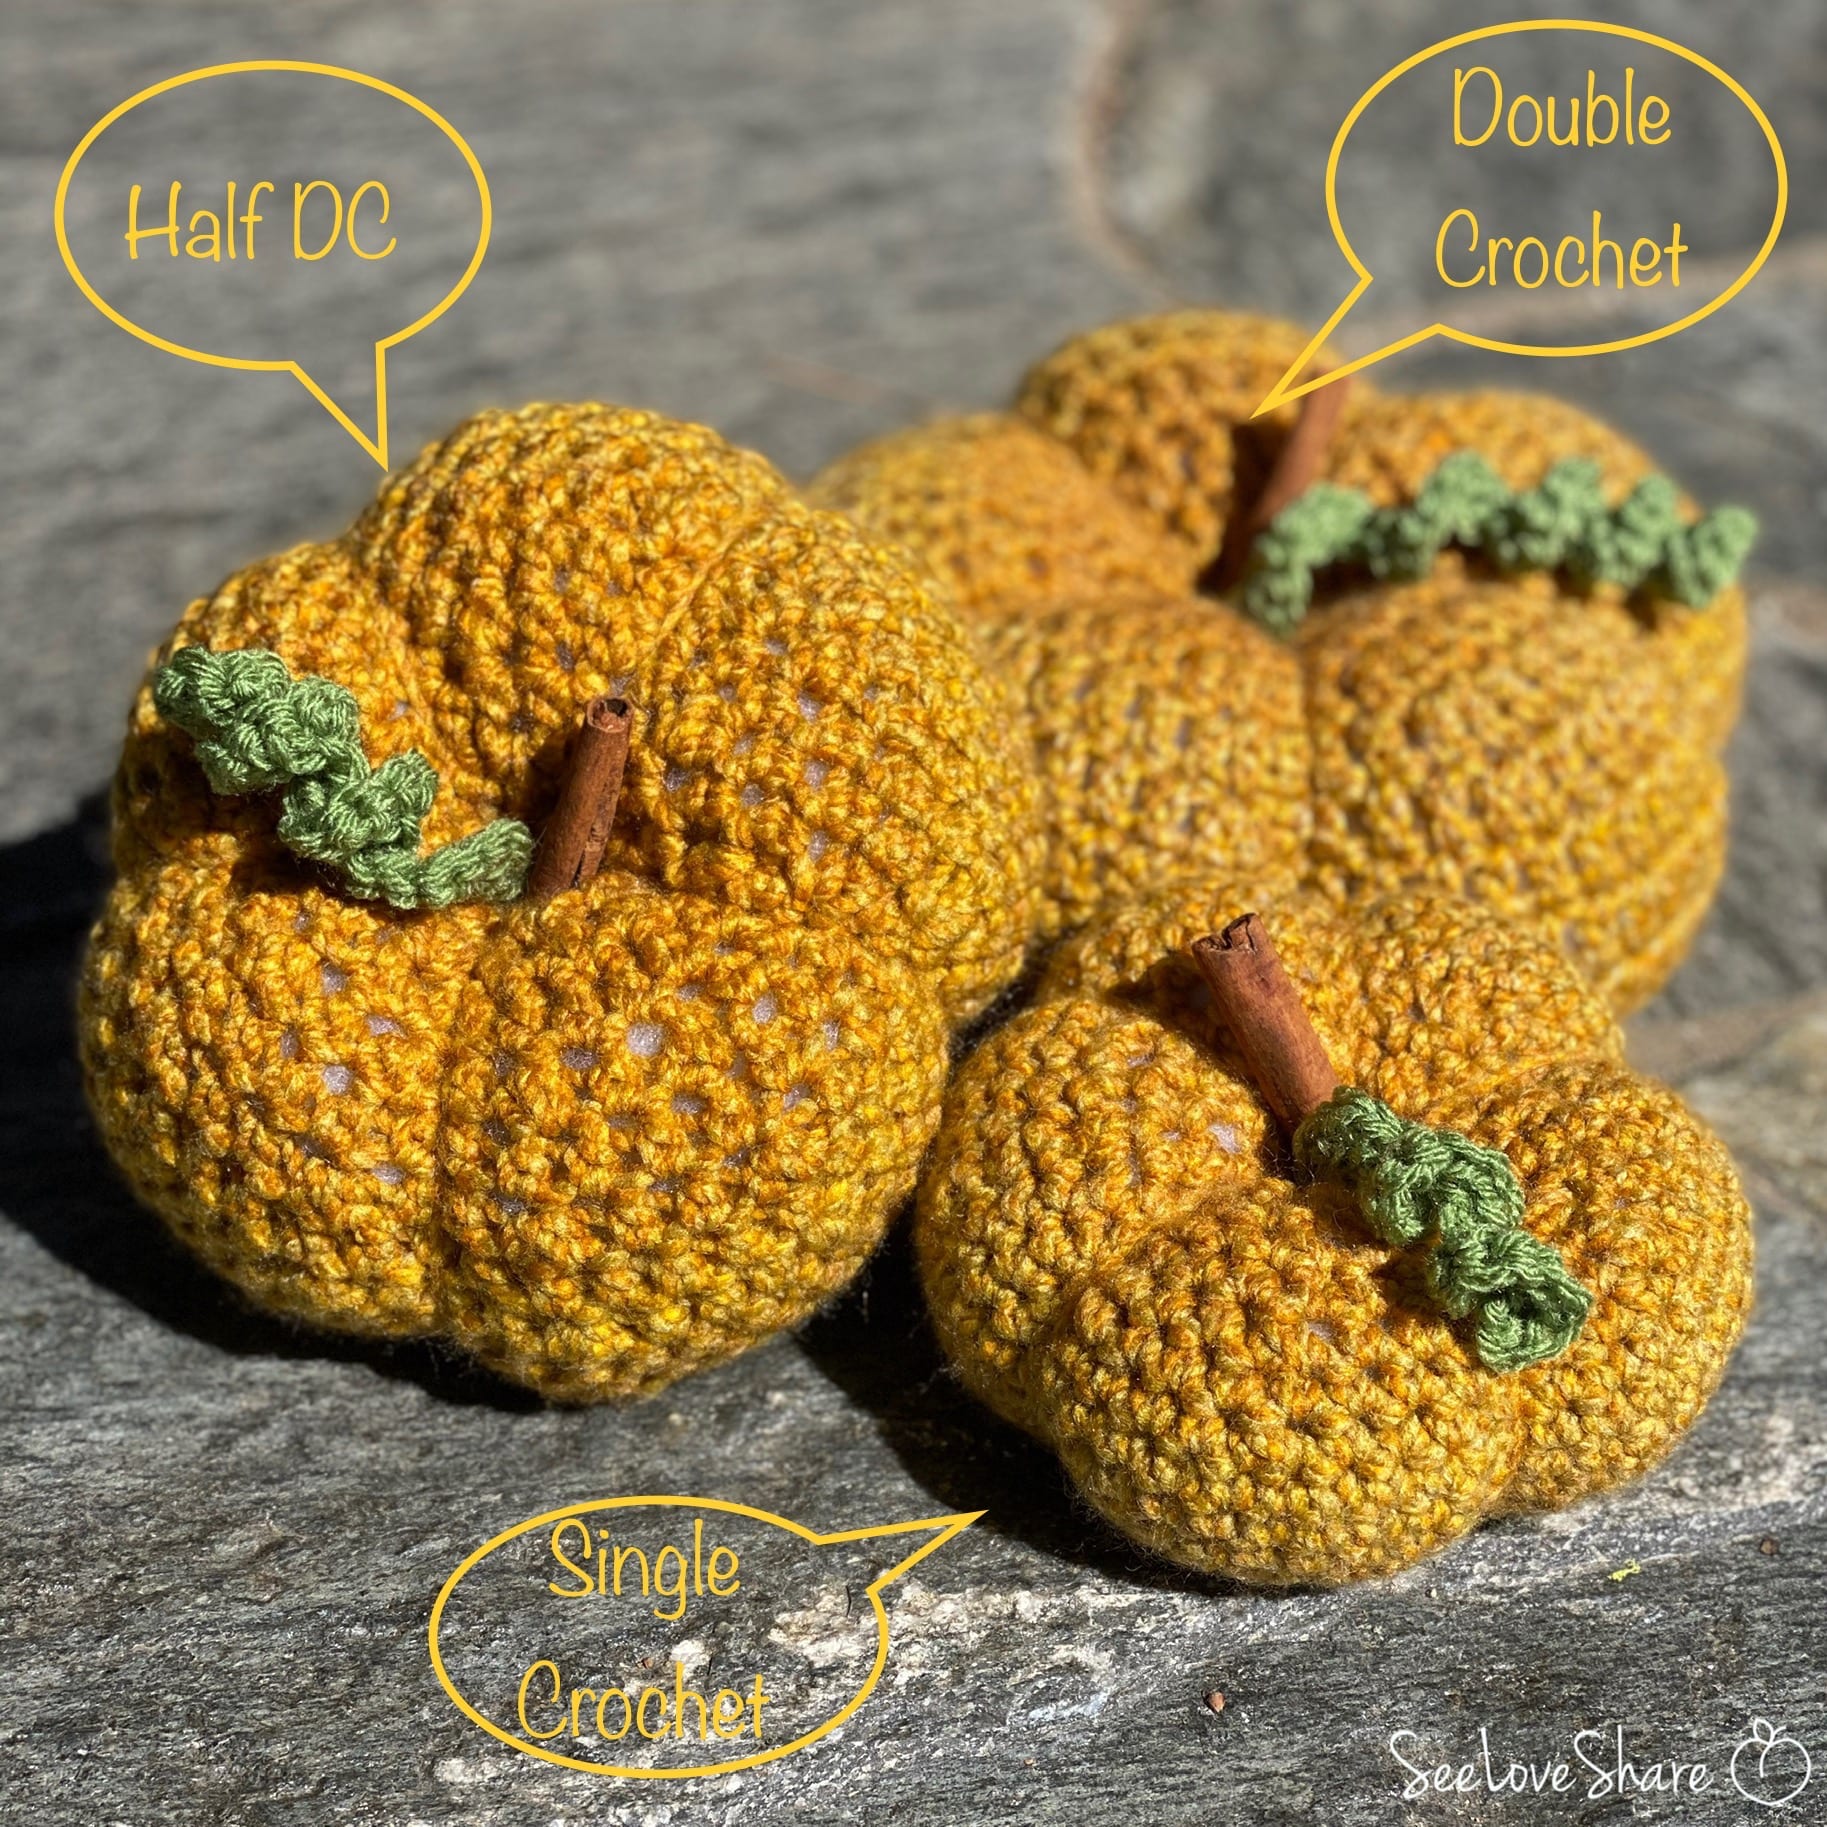
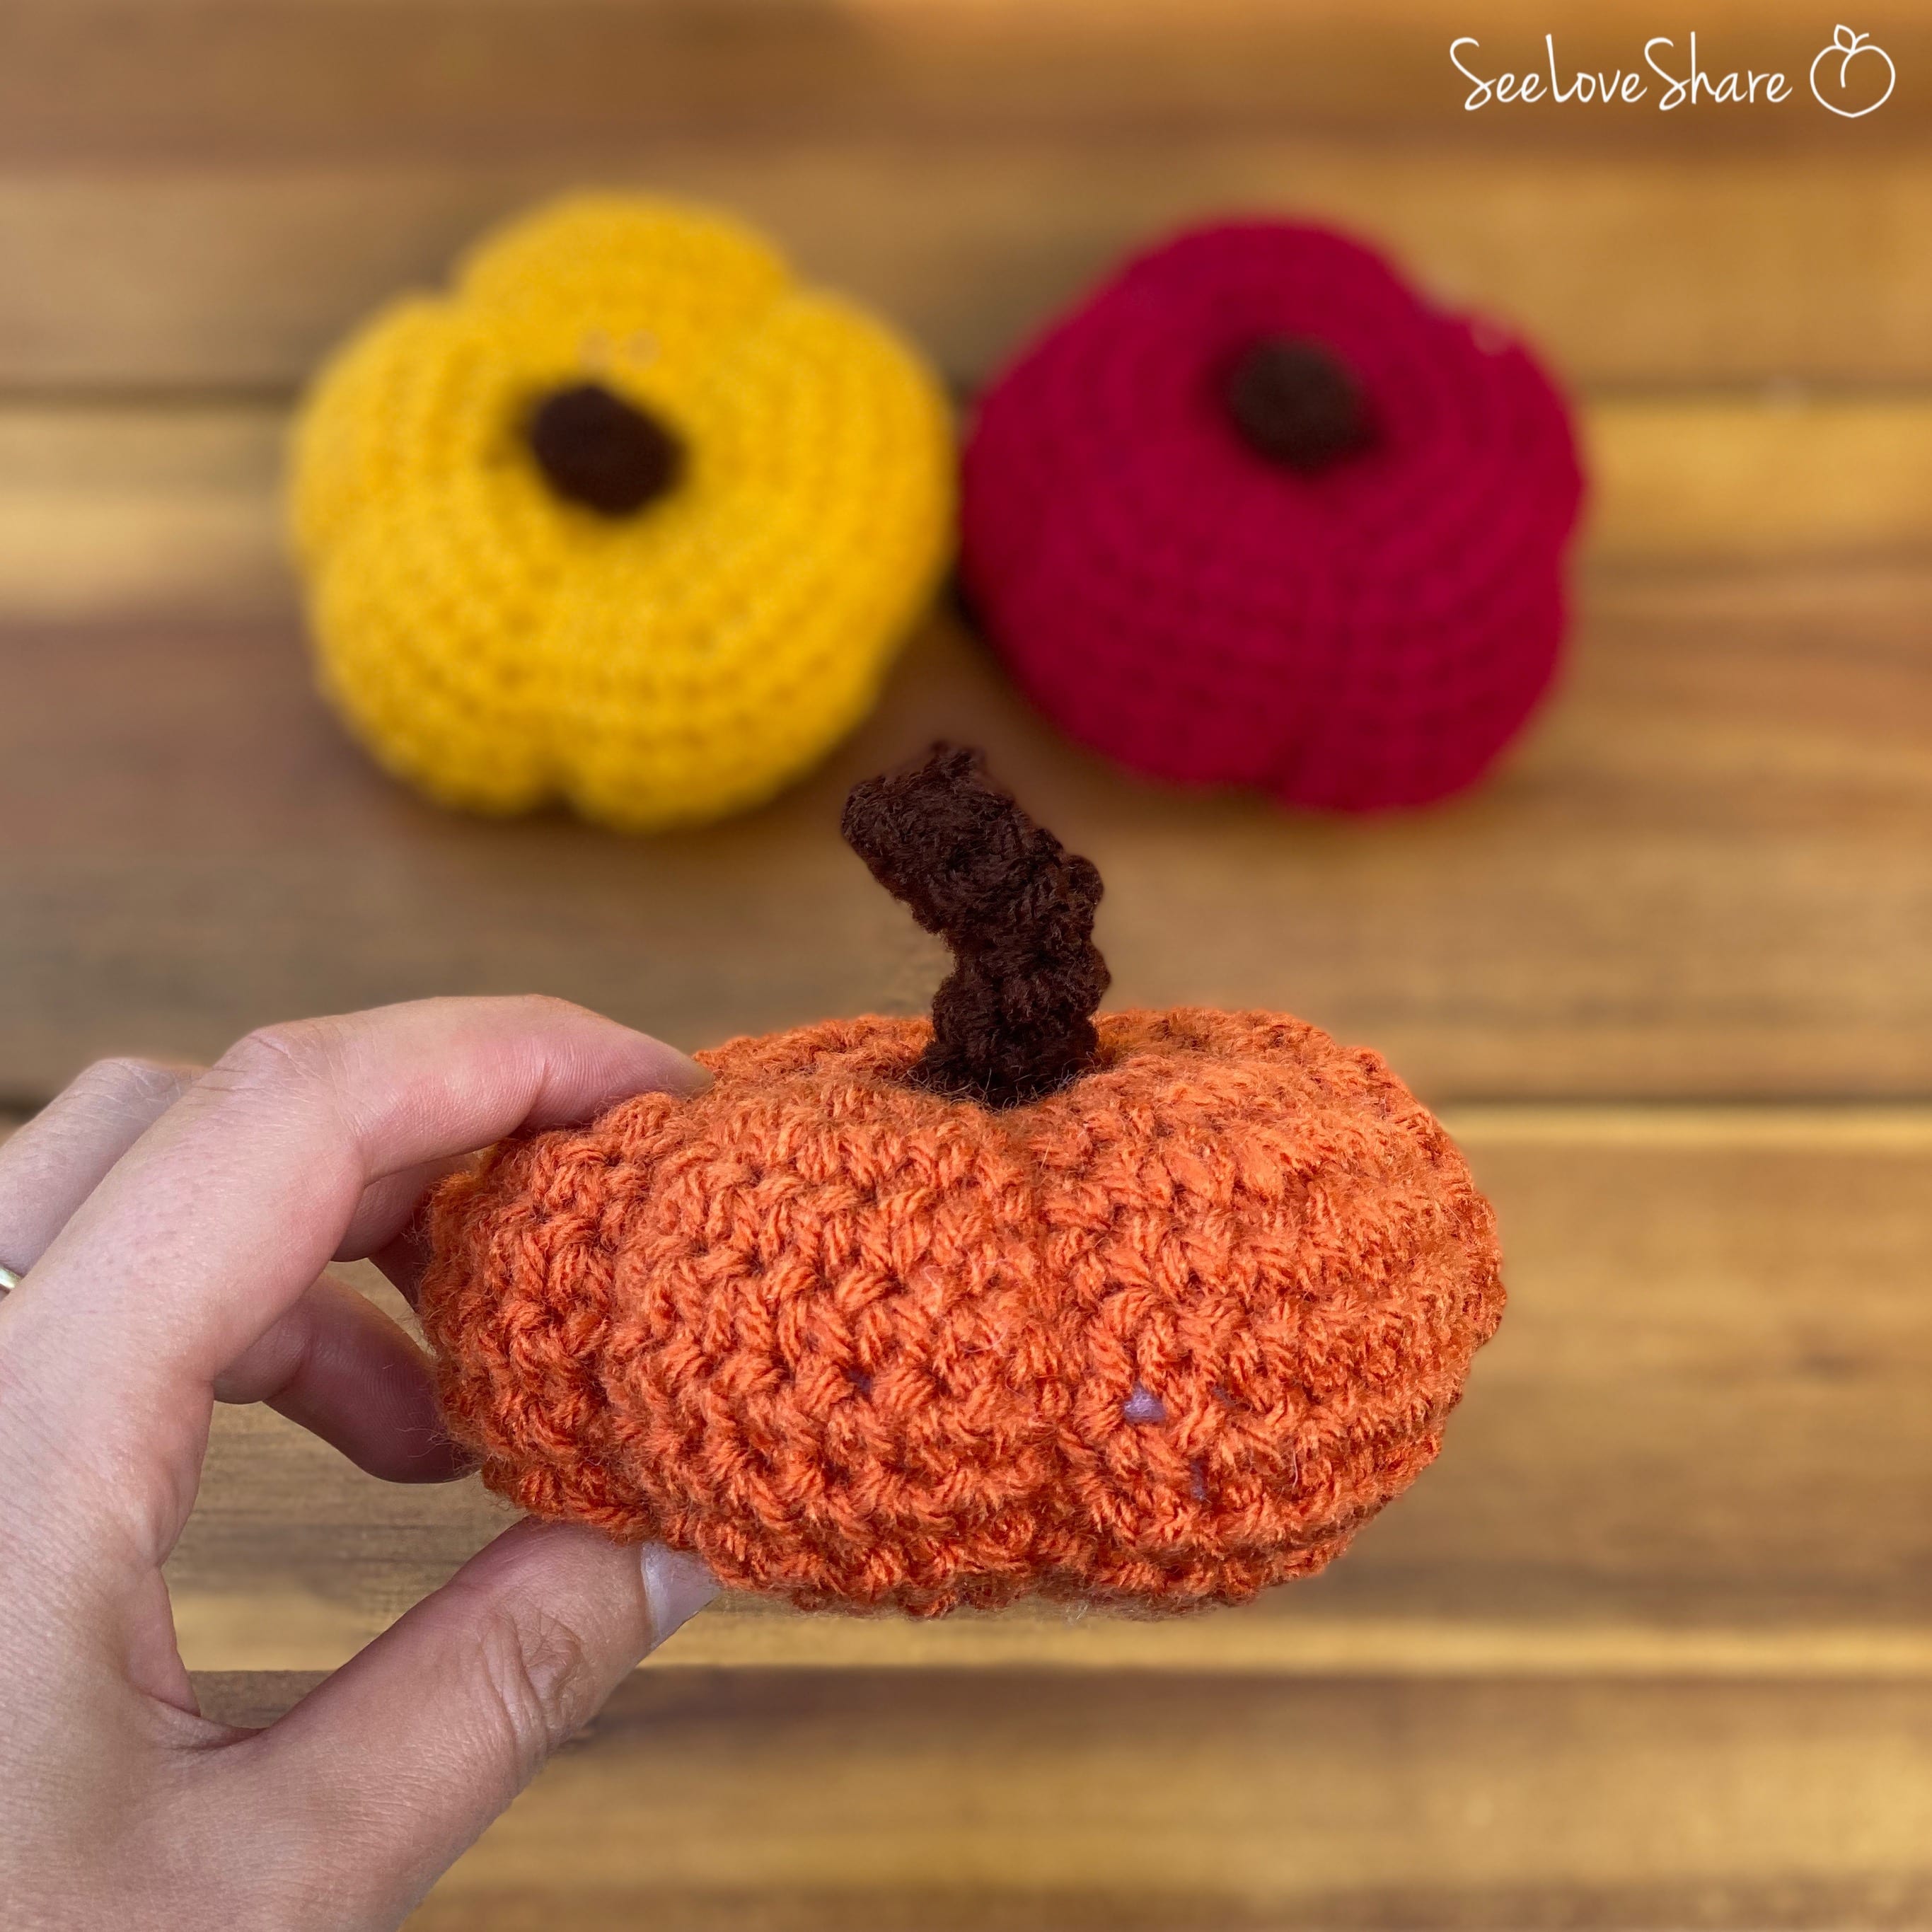
 Crochet Pumpkin Trio — Free Fall Pattern
 Mini Crochet Pumpkin Embellishments
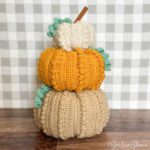
 Farmhouse Stackable Pumpkins
- Autumn Maple Leaf Garland
- Honeycomb Knit Throw — Chunky Cable Pattern

Save This Knit Cable Pumpkin Pattern
Want to come back to this knit cable pumpkin pattern later? Save it to Pinterest so you can find it when fall crafting season hits — and share it with your knitting friends!