

Knit Free Holiday Free Crochet
September 12th, 2021
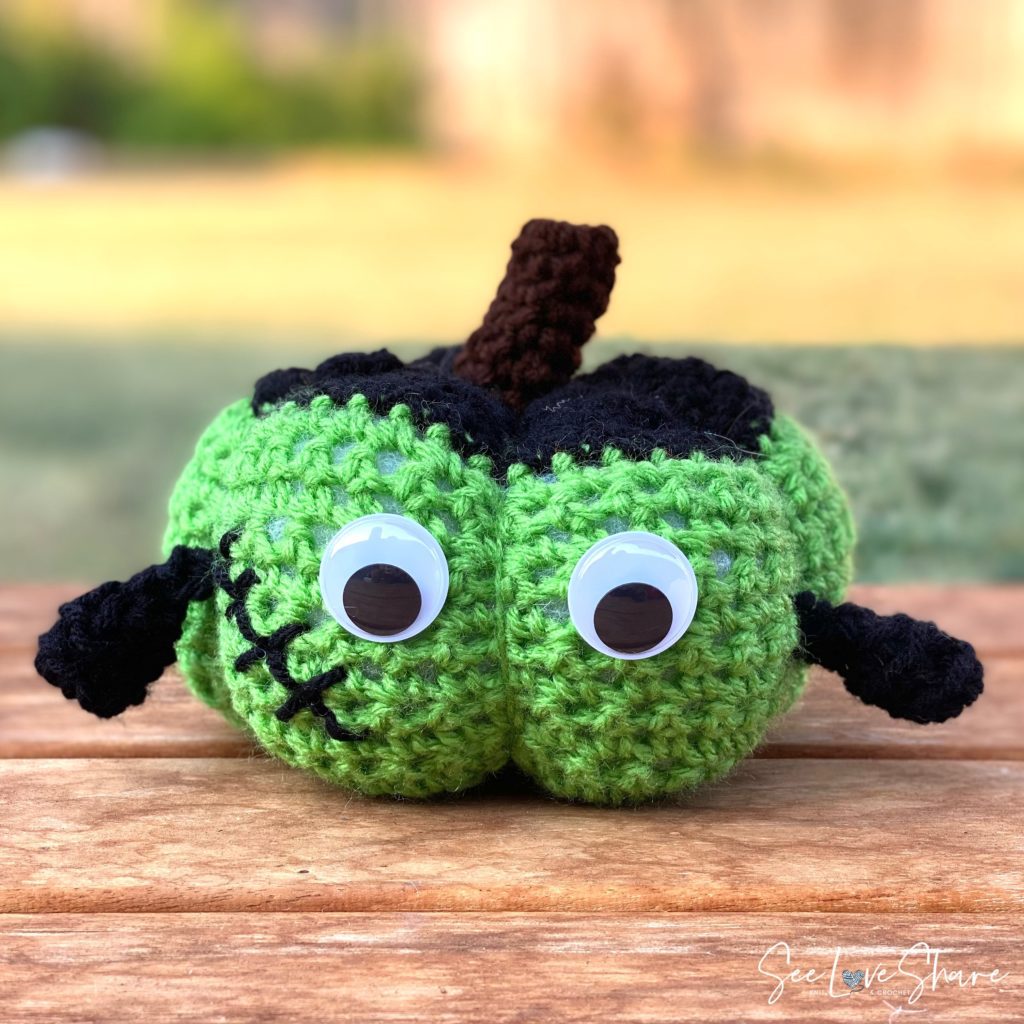
Lil Monsters Frankenstein Pumpkin – Free Knit & Crochet Patterns
This crochet frankenstein pumpkin pattern turns a simple pumpkin into the iconic green-faced monster — complete with the classic flat-top hairline (created by changing colors mid-pumpkin) and two side bolts. It’s part of my Lil Monsters Pumpkin Patch, a free series of 8 costumed pumpkin patterns. 🧌
The signature look of this Frankenstein comes from a clever two-color pumpkin base — the first 16 rows are worked in spring green, and the remaining rows in black. When the pumpkin is seamed and stuffed, this creates the iconic black “hairline” across the top of the green face. Add two simple black bolts to the sides, embroider a face, and you’ve got Halloween’s most recognizable monster.
This blog post includes the crochet version of the pattern. The knit version is available as a bonus in the Lil Monsters Pumpkin Patch Bundle on Etsy.
Why you’ll love this crochet frankenstein pumpkin pattern
- The iconic flat-top hairline — created naturally by changing yarn colors mid-pumpkin
- Beginner-friendly — just one simple color change and two small bolts
- Recognizable monster style — classic green Frankenstein with side bolts
- Customizable face — make it grumpy, surprised, or smiling
- Family-friendly Halloween decor — spooky-cute, never scary
- Part of a coordinated set — make all 8 Lil Monsters costumes for a Halloween display
See the whole Lil Monsters Pumpkin Patch
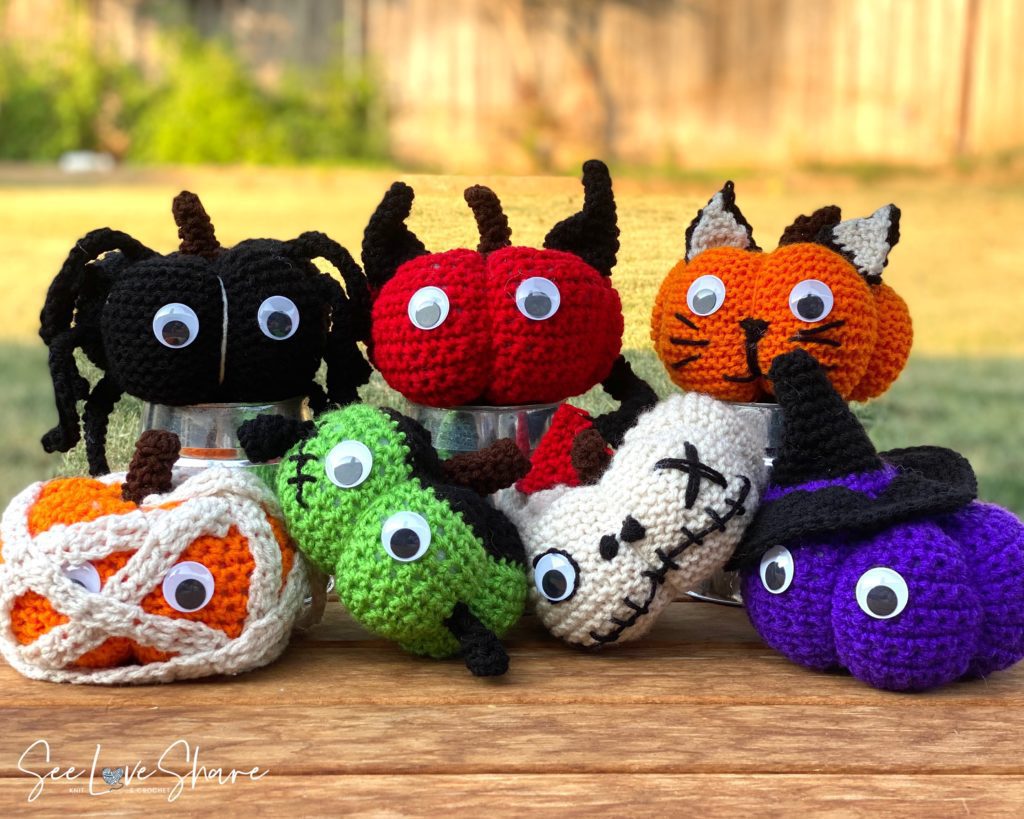
This Frankenstein pumpkin is one of 8 free costumed pumpkin patterns in the Lil Monsters Pumpkin Patch — alongside Mummy, Witch, Devil, Spider, Bumble Bee, Skull, and Kitty Cat. The full collection makes a charming coordinated Halloween display. Visit the main hub for the full overview and easy access to all the patterns:
Pattern details
- Skill Level: Beginner / Confident Beginner
- Finished Size: Approximately 15″ wide × 6″ tall (deflated rectangle); shapes into a plump round pumpkin once seamed and stuffed
- Construction: Two-color pumpkin base (green + black) + custom rounded stump + 2 small black bolts + embroidered face
- Time: An afternoon for the base + about 30 minutes for the bolts and assembly
- Format: Crochet only on blog (knit version available in the Etsy bundle)
Materials
- Red Heart Super Saver yarn in:
- Spring Green — for the green portion of the pumpkin base (the “face”)
- Black — for the top portion of the pumpkin base (the “hair”) and bolts
- Coffee or Brown — for the rounded stump
- Black (additional small amount) — for face embroidery
Shop the materials
- 6.0 mm crochet hook — crochet hook bundle here
- Polyfil stuffing
- Tapestry needle for embroidery, seaming, and assembly
- Scissors


Gauge
12 sc × 14 rows = 4″ (10 cm) with a 6.0 mm crochet hook.
Abbreviations
Ch: Chain · Sc: Single crochet · Sc2tog: Single crochet 2 stitches together · Sl st: Slip stitch · St(s): Stitch(es) · Rnd: Round · BLO: Back loops only
Start with the pumpkin base
Every costume in the Lil Monsters Pumpkin Patch starts with the same simple pumpkin base. The Frankenstein uses a two-color modification of the base, but the construction is otherwise the same.
👉 Get the free Simple Pumpkin Base pattern + tutorial here →
Crochet frankenstein pumpkin pattern — written instructions
Pumpkin base modification (two-color)
Follow the simple pumpkin base pattern with these color changes:
- Begin with Spring Green and work the first 16 rows
- Switch to Black for the remaining rows of the pumpkin base
When the pumpkin is seamed and stuffed, the green portion forms the face and the black portion forms the iconic flat-top hairline across the top.
Custom rounded stump
The Frankenstein uses a custom rounded stump (similar to the Kitty Cat) for a polished, finished look on top of his head.
With Coffee, ch 4. Join with sl st in the first ch to form a loop.
Round 1: 6 sc within the loop. (6 sts)
Round 2: Sc in back loops only of each st around (this creates a small ridge). (6 sts)
Rounds 3–7: Sc in each st around. (6 sts per round)
Fasten off, leaving a long tail. Lightly stuff with polyfil and attach to the top center of the pumpkin.
Bolts (make 2)
The bolts are small black tubes that attach to either side of the pumpkin head.
With Black, ch 4. Join with sl st in the first ch to form a loop.
Round 1: 6 sc within the loop. (6 sts)
Round 2: Sc in back loops only around (creating a small ridge). (6 sts)
Round 3: Sc in each st around. (6 sts)
Round 4: Sc2tog in back loops only around. (3 sts)
Round 5: Sc in each st around. (3 sts)
Fasten off, leaving a long tail. Repeat for the second bolt.
Assembly
- Attach the rounded stump to the top center of the pumpkin (in the black “hair” zone) using the long tail and tapestry needle.
- Position the bolts on either side of the pumpkin’s “neck” — at about the level where the green face meets the black hairline. The bolts should poke out horizontally from the sides.
- Sew each bolt in place with the long tail and tapestry needle, anchoring firmly so they stay positioned.
- Embroider the face. Using black yarn and a tapestry needle, embroider the Frankenstein’s face — typically two simple eyes, a flat horizontal mouth (or a slightly downturned grumpy mouth), and a small scar or stitch detail across the forehead if you want extra character.
- Weave in any remaining ends on the inside of the pumpkin to keep the front clean.
Make the rest of the patch
The Frankenstein is one of 8 free costume patterns in the Lil Monsters Pumpkin Patch — each one uses the same simple pumpkin base, so once you’ve made this one, the rest come together quickly. Pick your favorites or make the whole family:
- Lil Kitty Cat Pumpkin — a black cat pumpkin with pointed ears and a tiny bow
- Lil Witch Pumpkin — a green pumpkin with a tiny pointed witch hat
- Lil Spider Pumpkin — a black pumpkin with eight little spider legs
- Lil Devil Pumpkin — a red devil pumpkin with horns and a pitchfork
- Lil Mummy Pumpkin — a wrapped mummy pumpkin with peek-a-boo googly eyes
- Lil Skull Pumpkin — a bone-colored pumpkin with skull face details
- Lil Bumble Bee Pumpkin — a sweet bumble bee pumpkin in yellow and black stripes
- View the whole Lil Monsters Pumpkin Patch hub
Want all 7 spooky costumes in one printable PDF?
If you’d rather skip jumping between blog posts and work from one clean ad-free PDF, the Lil Monsters Pumpkin Patch Bundle on Etsy includes the Frankenstein plus 6 other costumes (Devil, Spider, Mummy, Skull, Witch, and Cat). The bundle also includes knit versions for 5 of the costumes — including this Frankenstein, so if you’d rather knit your monster pumpkin, that’s where to find the knit version.
Use code SEELOVE15 for 15% off
More crochet pumpkin patterns you’ll love
- Crochet Cable Pumpkin — Beginner’s Guide — a textured cable-stitch pumpkin for grown-up fall decor
- Gingham Plaid Crochet Pumpkin — a charming plaid pumpkin in farmhouse style
- Rustic Ribbed Crochet Pumpkins — a farmhouse-style ribbed pumpkin pattern
- Browse all Crochet Halloween Patterns on the SeeLoveShare blog
Made one? I’d love to see your Frankenstein pumpkin! Tag me on Instagram @seeloveshare or share your makes in our free Facebook community. Happy Halloween! 🧌🎃